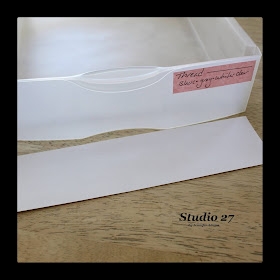
I love storage and organization and I also love making things pretty. Here's a story about how I used both of those interests to upgrade my plastic drawers with a custom rose design:
********
Disclosure - This post may contain affiliate links. If a purchase is made through an affiliate link then (at no additional cost to you) I will receive a commission. You can read more about affiliate links here.
Before
Here are my drawers before I dressed them up. Not too bad, but not pretty either. I added felt to each drawer to help keep things in place, but because I didn't glue them down they were getting all rumply. To help keep track of what's in each drawer I also made a sticky note label for the outside. Now I know I could take this a lot further with pretty vinyl or even by printing something up, but I simply move things around too often. I need to be able to switch out my labels without feeling like I've wasted a lot of time and supplies!
You can click here to find these drawers at Walmart.
(I don't know why these are priced so high on the website, you can find them wayyyy cheaper in the store 😊)
Inside
This particular set of drawers is for my sewing supplies and I used plastic trays from Dollar Tree to help keep things organized.
You can click here to browse Dollar Tree's online collection of plastic containers.
Scrapbooking Paper
I found my scrapbook paper online at Hobby Lobby (and on sale) for .25 a sheet.
I went ahead and ordered 100 sheets since I use this paper so much, and it was only $25 before tax and shipping.
Step 1
After removing everything from my drawers I measured the fronts and used a sheet of printer paper to make a template.
Tip: Don't take your template for granted, go ahead and stick it in your drawer to double check the dimensions before you start cutting your good paper.
Step 2
Once I was sure of my template size, I used it to measure and cut my rose paper in the way that would leave as few scraps as possible. It was super easy to get these precise, straight cuts with this Cricut cutting board. You can even purchase a scoring blade for the same trimmer and use it to get nice, even folds in your paper projects 😍
Step 3
Top: I used a bit of hot glue to anchor my felt in place. I can't tell you how nice it is to have had it stop sliding around!
Bottom: With my felt in place, I stood the drawers on end and attached the strips of rose paper with just a bit of clear tape at the edges. I tried hot glue and white glue as well, but didn't like the way it showed through the drawer fronts. Another bonus with tape is that if you want to change the look of your drawers it's easy to remove.
Better already! I love that the clutter inside is now hidden and that the rose paper is sort of subdued by the plastic. I also appreciate the way that my pink labels now pop against the background.
You can't go wrong with roses 😎
You can't go wrong with roses 😎
And that's how easy it is to upgrade your plastic storage drawers!
Have you completed any similar projects yourself? I wold love to hear from you-
Contact me at Studio27byJenniferAdams@gmail.com or leave a comment below.
**********
I hope you liked this how-to post, thanks for stopping by!
-Jennifer
© Studio 27 by Jennifer Adams 2020
Wonderful Wednesday (Oh My Heartsie Girl)
Wonderful Wednesday (Penny's Passion)


No comments:
Post a Comment