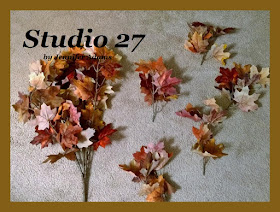
Ready for part two of those fall centerpieces? Let's go:
(You can click here in case you missed the previous post)
Prepped Vase
Now remember where we left off, we had our foam cut to the size of our vases and wrapped in a satin ribbon/ burlap combo. With our vases prepped we are ready to dive into our florals, but before we place any stems.....
Organize
.....I recommend organizing your materials first. Here you can see the florals organized into three sections; foliage, filler and flowers.
Foliage First
I like to begin with my greenery first (even when it's not green anymore 😉) and begin by breaking down my large store-bough bushes into smaller, more manageable stems.
Note: The manner in which you cut apart your stems is going to depend largely on the container you are using and the eventual look you are going for. Since I wanted to end up with round, full centerpieces that were low enough for guests to talk over, I cut my stems into about 6" lengths with the bottom 2" being composed of stem only. So that's 4" lengths of foliage, 2" lengths of stem.
After all of the large bushes had been cut down, I then went through and separated them into five piles, one pile for each vase. I find that when I divide my materials before I begin to fill vases, it is much easier to achieve a consistent look. Not only does each vase have a supply of similar looking material, but one vase doesn't end up more full or compact than another - in other words, I didn't start strong and then run low on material by the time I got to the last vase 😅
Begin Placing Foliage
When 'greening' a container, I like to start with a minimum of five stems. I place one directly in the center followed by one at each corner. After that I fill in between 'corners' until I have the basic shape of the arrangement fleshed out. Your greens are going to help create shape and cover the foam, but don't have to completely hide everything at this point. In fact, adding too many stems of foliage will crowd your vase and make stem placement harder.
Also, note how the photo on top looks quite a bit 'rougher' than the photo on the bottom. Don't stress! The beauty of working with artificial materials is that they can be easily adjusted. Just place your stems and then go back to gently bend or twist as needed until you are happy with their appearance.
Three Large Floral Bushes
Once my containers were greened, I went through and organized the flowers in the same way. Notice how I pushed the leaves all of the way up the stems. When you purchase an artificial floral bush, they usually contain a great deal of foliage all of the way down to the base. I like to push the greenery up because adds volume to the blooms as well as makes the cutting easier.
Divide the Florals
Similar to the greens, I divided the blooms into five separate piles as well. There never seems to be the exact same distribution of blooms between bunches, so you may have to get creative in your sorting. I like to make sure that each arrangement gets at least one large flower as a focal point.
Add Flowers
Begin adding flowers on all sides of the vase similar as to with the foliage. You can see from the top photo that things can start out a bit funky, but with adjustments and patience things will end up just fine,
Tip: Try to avoid taking a stem completely out of the foam and re-inserting. Having unfilled holes in the foam weakens the structure and can lead to cracking.
Filler
Filler flowers can be long and linear (like those pictured here) or bushy and compact like Babies Breath. What makes them 'filler' is the fact that they complement more prominent flowers and fill in any negative spaces. I sorted and cut down the filler stems just as I did with the foliage and floral bushes.
And Done
Look what a difference a little bit of filler makes to the overall composition, it really takes the arrangement to another level!
And that's how easy it is to create your own fall centerpieces.
I hope you enjoyed this how-to post, thanks for stopping by!
-Jennifer
Look what a difference a little bit of filler makes to the overall composition, it really takes the arrangement to another level!
And that's how easy it is to create your own fall centerpieces.
I hope you enjoyed this how-to post, thanks for stopping by!
-Jennifer
© Studio 27 - By Jennifer Adams 2018


