Saturday, November 27, 2021

Artificial Icing Trees

 Christmas

I hope everyone is having a wonderful holiday weekend!
Today I'm sharing how I put together my faux icing trees, take a look:

**********


Disclosure - This post may contain affiliate links.  If a purchase is made through an affiliate link then (at no additional cost to you) I will receive a commission.  You can read more about affiliate links here


Christmas

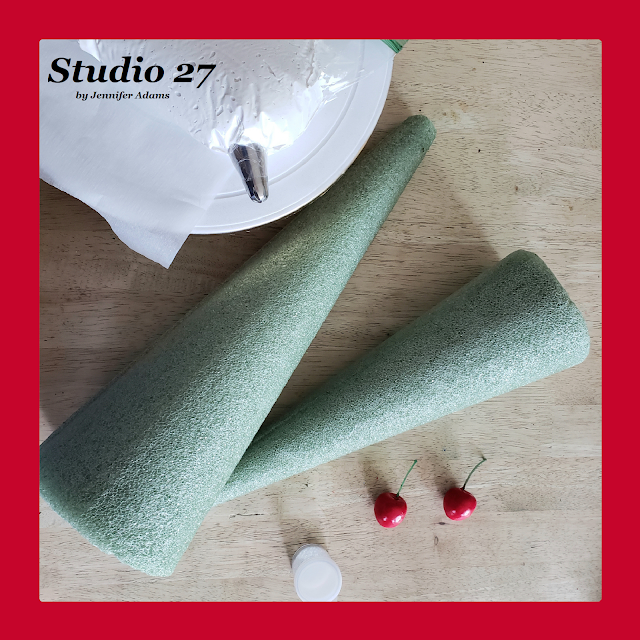
For this project I used light weigh spackle as my icing that I put in a sandwich bag with a Wilton open star tip.  The foam cones were a yard sale find - can you believe they were only a dollar?!?  The cherries, glitter and cake turning stand were things that I already had on hand.


Christmas

Starting at the bottom I began adding swirls of spackle that looked like tiny rosettes.

Having the turning stand made things sooo much easier!
You can find this one at Walmart.

*Even though the turning stand is plastic, I'll still sometimes add a bit of parchment to the surface.  That way I can move the item that I'm working on before it's completely dry without ruining the project.


Christmas

When each layer was complete I started another, just building on top of what was already there.  I found it helpful to place a new layer of rosettes offset from the previous layer, rather than lining them directly above one another.  That way all of the foam space was filled in - kind of like how a brick wall is laid.

No matter how careful you are it won't always be perfect, but don't stress!  You can use a toothpick or small knife to smooth out any rough spots.  Any empty spots can be filled in with a small squeeze from the 'icing' bag.


Christmas

With the entire foam cone covered and the spackle still wet, I popped a faux cherry on top.

You can find these cherries  here on Amazon, though I did find a smaller but similar version in Dollar Tree's holiday section.  You can click here to browse the Dollar Tree webpage. 

Though it doesn't show up well in the photo, I did give each cone a sprinkling of glitter as well.
It's really pretty in the lights from the holiday trees 😊


Christmas

And here are my faux icing trees all complete.  I loved how they turned out and...


Christmas

...couldn't wait to combine them with the artificial gumdrop and sprinkle trees that I had already made.  These are going to look great with the dollhouse turned gingerbread decor that I'm sharing next week!

Want to see more sweet themed holiday decor?
Check out the following links:


I hope you enjoyed this holiday decor post, thanks for stopping by!
-Jennifer


Friday, November 19, 2021

Artificial Sprinkle Trees

 Christmas

If you were here last week you'll remember that I shared a post detailing how I made my Artificial Gumdrop Trees.  As promised, I'm back today with my sprinkle version.

Check it out:


**********


Disclosure - This post may contain affiliate links.  If a purchase is made through an affiliate link then (at no additional cost to you) I will receive a commission.  You can read more about affiliate links here


Christmas

I started off this project with faux sprinkles and foam cones from my stash.  I ended up adding in foam spheres too, but not until later.

The faux sprinkles are tiny plastic pellets that came from a seek and find toy that I picked up at a thrift store.  If you aren't sure what I'm talking about, you can click  here.


Christmas

Using paint leftover from this furniture restyle project, I gave both cones a thick coating in white.  One reason was because I needed to cover up the green cone.  Another was because by adding paint I was able to smooth out the surface of the foam, which made my glue easier to work with.


Christmas

When the paint was dry I then gave the pieces a coating of glue using an old paint brush.

Tip:  If you add a tiny bit of water to the glue, it makes spreading it easier.


Christmas

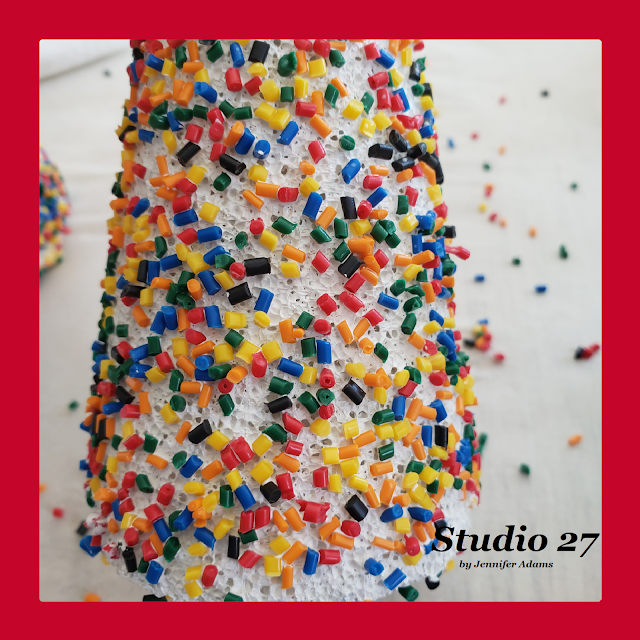
I began pressing on the sprinkles only to find that many of them would fall off while the glue was still wet.  Because of this I did a couple of coats of sprinkles, letting the layers dry in between applications.


Christmas

I also gave the pieces a good final coating of glue as well.  It looks pretty gluey in this picture, but that's because it hadn't yet dried.  Once dry they look much better.


Christmas

And here they are all finished.
You can see that even with a couple of coats of glue and sprinkles, there are still areas of white.  I decided not to get hung up on this and let them be, but it's totally up to you 😉


Christmas

I love how the sprinkle trees (and spheres) look when paired with my gumdrop and icing versions.  I can't wait to see them on display with my faux gingerbread house!

*I'll be back next week with how I made the icing trees*

Want to see more sweet themed holiday decor?
Check out the following links:


I hope you enjoyed this holiday decor post, thanks for stopping by!
-Jennifer


Friday, November 12, 2021

Artificial Gumdrop Trees

Christmas

When recently working on a gingerbread themed holiday village house (post soon 😍) I thought it would be fun to add sweet treat themed 'trees' to the display.  After toying with the idea for awhile I ended up making gumdrop trees and spheres as well.

Read on to see how easy it is to do yourself:

**********


Disclosure - This post may contain affiliate links.  If a purchase is made through an affiliate link then (at no additional cost to you) I will receive a commission.  You can read more about affiliate links here


Christmas

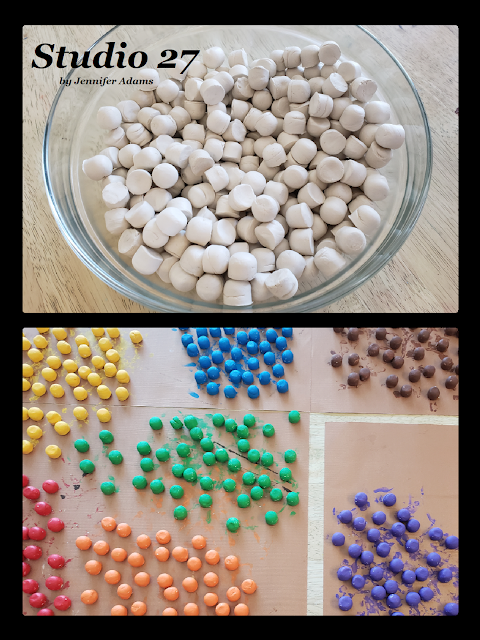
To get started I needed a whole lot of faux gumdrops.  Since I already had the right kind of silicone mold and plenty of air dry clay on hand, I decided to make my own.

(Both the mold and the clay can be found on Amazon)


Christmas

Once I had a nice collection of gumdrops and they were all dry, 
I used various candy colored acrylics to paint them.


Christmas

For the large candy balls I used foam spheres as my base.

*My foam pieces came out of my stash, but you can find all kinds of sizes and shapes at various craft stores.


Christmas

With a bit of hot glue I began in the center and started attaching the gumdrops keeping the colors as varied as I could.  This can get a little tricky because depending upon the size of your sphere and the size of your candies, they don't always line up evenly.  Just do your best and keep going.  I promise that once it's all together it will look great!


Christmas

Here you can see a sphere completely coated with the clay gumdrops.  The colors aren't perfectly spaced, but it's all good!  If you look closely you can see a bit of white Styrofoam peeking out from between the candies.  Not to worry, I'll share a solution for that in a bit 😉


Christmas
Christmas

Using a cone shaped piece of foam I started my trees in a similar way.  This larger one I began at the bottom.....


Christmas

...and the smaller one I began at the top.  
Neither method was easier than the other, so just go as you wish.


Christmas

Looking pretty good, but let's talk about those gaps of foam peeking out.


Christmas

Using white glue and Dollar Tree faux snow, I simply tucked bunched of snow in between each of the candies.  This filled out the spheres/ cones nicely and softened the overall look.


Christmas

I decided that glitter makes everything better and gave each candy form a once over.  Just spray lightly with adhesive spray (also Dollar Tree) and then sprinkle the glitter.  Give another coating of adhesive so everything stays put nicely and you are done!


Christmas

And there you have it - a cute set of candy trees and spheres to add to any holiday decor!


Christmas

I loved how the gumdrop trees turned out so much that I went ahead and made some more with faux sprinkles and icing.  Posts coming soon!

Want to see more sweet themed holiday decor?
Check out the following links:


I hope you enjoyed this holiday decor post, thanks for stopping by!
-Jennifer


Saturday, November 6, 2021

Holiday Village Makeover

 Winter Decor


Remember a couple of weeks ago when I shared how I transformed a set of Dollar Tree village houses into Halloween decor?  Well I couldn't stop there (of course 😊) and made a winter holiday set too.

Read on to see how I did it:


**********


Disclosure - This post may contain affiliate links.  If a purchase is made through an affiliate link then (at no additional cost to you) I will receive a commission.  You can read more about affiliate links here


Winter Decor

In case you missed it last time, here is that set of Dollar Tree houses as they come from the store.  Perfectly cute enough to leave as they are but also easily restyled to fit your decor!

You can click here to browse Dollar Tree's online selection of holiday items, or here to see the houses that I did for Halloween.


Winter Decor

After spraying the houses in a rose gold spray paint, I used white acrylic to reapply the spots of snow.


Winter Decor

Next I applied a coat of spray adhesive and then sprinkled with faux snow 
(both from Dollar Tree's craft section).


Winter Decor

And there you have it- a set of holiday village houses that can fit a multitude of decor styles!
What I especially love about this set is that they can work for Christmas or the winter season as a whole.  Pairing them with a few white bottle brush trees really brought cold winter feelings to the display.  After finding these trees at Walmart I customized them with miniature snow balls and sparkles. (Bottle brush crafting post coming soon 😉)

Another idea would be to surround them with faux pumpkins and leaves, making them suitable for a Thanksgiving display.  The rose gold would instantly warm up with a bit of fall color close by.

I hope you enjoyed this holiday decor post, thanks for stopping by!
-Jennifer