Saturday, March 27, 2021

Peeps - Faux Candy Easter Decor


Easter DIY

How cute are these candy jars full of faux Peeps?
And they are easy to make too, check out how:

********


Disclosure - This post may contain affiliate links.  If a purchase is made through an affiliate link then (at no additional cost to you) I will receive a commission.  You can read more about affiliate links here


Easter DIY

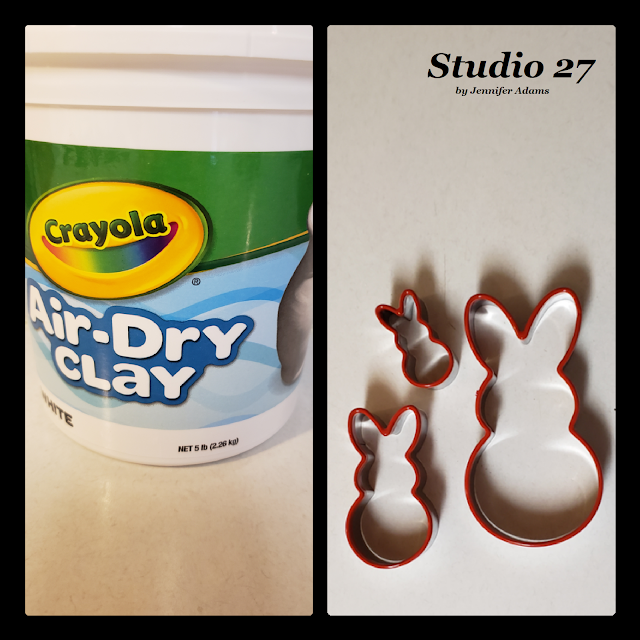
To make my faux Peep candies I used Crayola brand air-dry clay and  a set of bunny cookie cutters, both found on Amazon.  Though the cookie cutter set is currently no longer available, I can tell you that the cutters measure in 2, 3 and 5 inches.  The 2 inch size is the one that I used for the faux Peeps.

(Here Is a similar set of bunny cutters)


Easter DIY

Using a sheet of parchment paper as a base, I rolled out a ball of clay like it was cookie dough and then cut out my shapes.  While I did use all three sizes of my cutters (I made faux cookies too 😃), only the smallest size were used for the candy jars in this post.

After pressing the cutter into the clay, I gently jiggled it back and forth a bit to loosen the bunny shape from the remaining 'dough'.  Usually the clay shape came out stuck inside of the cutter and had to be pulled out, but sometimes it was stuck to the parchment.  No problem, just pull up the parchment and carefully peel it away from your clay shape.  You may need to reshape your bunnies a little, but it's no biggie 😊


Easter DIY

Here are my bunny shapes after cutting them out.  Although actual marshmallow Peeps are thick, I made these faux ones on the thin side.  This is because I wanted them to dry faster and to use less clay, but you could certainly go for thicker if you wanted.  At this thickness it took my bunnies about 2 days to dry thoroughly.


Easter DIY

Once the clay had cured I painted my bunnies front and back before sprinkling them with a bit of glitter.  A permanent marker works perfectly for adding their simplistic eyes and mouths.


Easter DIY

Here are the Dollar Tree jars that I used for this project.  
\This particular style features a glass bottom with a screw-on plastic lid.

(You can click here to browse Dollar Tree's online selection)


Easter DIY

While waiting for my bunnies to dry I got to work on the jars.  
After running them through the dishwasher to remove any dust, I spray painted the lids in gold.  This gave the jars a little bit more definition and elevated the overall look.

Tip:  Don't skip the washing.  Even if the jars look clean from the store, you will be amazed at how sparkly they look afterward!


Easter DIY

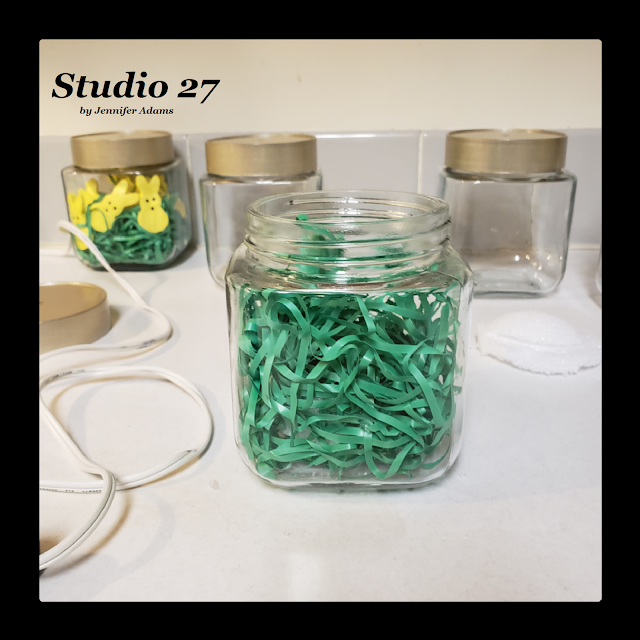
To fill the jars I first created a bed of foam covered in basket filler grass.  This created an nice little cushion for the Peeps, helped to keep them from rolling all around and meant that it took fewer Peeps to fill each jar.  

Tip:  Don't be afraid to hit your foam with a bit of hot glue before adding the grass to keep it more secure 😉


Easter DIY

Here you can see the grass covered foam.  Be generous will your filler grass here, the more that you add the better your composition will stay in place.

Note:  You can see in the background that the weight of the yellow Peeps compressed the grass, even though I used the same amount as the jar in the foreground.

Once you have your grass ready, go ahead and add in your faux Peeps candies.  You can add as few or as many as you would like, mix and match or keep the colors the same.  I decided to use 10 Peeps of the same size and color for each jar.


Easter DIY

And here are all five of my jars completed.
I love how they turned out and can't wait to slip them in with the rest of my Easter decor!

**********

Want more Easter fun?  Check out these links:

**********

I hope you enjoyed this Easter decor post, thanks for stopping by!

-Jennifer


Saturday, March 20, 2021

Dollar Tree Re-Style: Bunny & Eggs

Easter


You can never have too many chocolates, am I right?  I'm still working on adding more chocolaty fun to my Easter decor, this time with a Dollar Tree container re-style.  
Check out how easy it is to copy the look:

********


Disclosure - This post may contain affiliate links.  If a purchase is made through an affiliate link then (at no additional cost to you) I will receive a commission.  You can read more about affiliate links here.


Easter
Plastic Bunny & Eggs

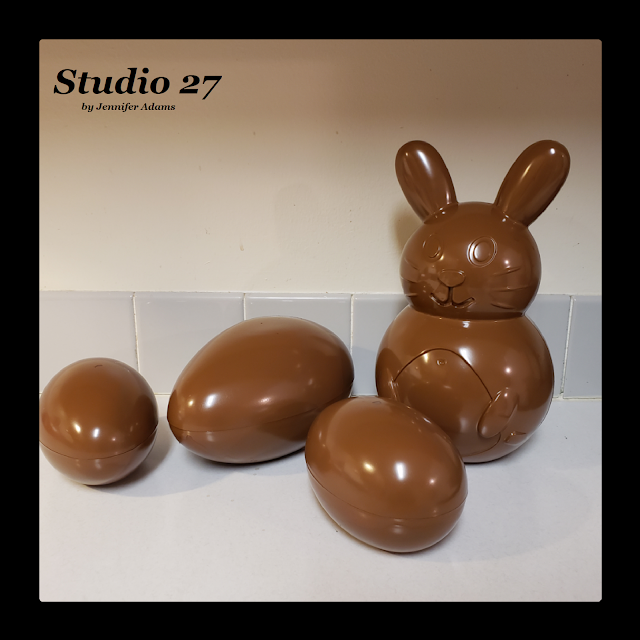
Here are my bunny and eggs (one large, two small) as I found them at Dollar Tree.  They are sturdy, light weight and pretty big.  They are cute enough that you can leave them as is, or decorate them of course 😁

(You can click here to browse Dollar Tree's online selection)


Easter
Painted Brown

And here they are after a couple of coats of spray paint in a glossy brown.  The brand of spray paint isn't so important, but do make sure you buy a can intended to cover multi surfaces, including plastic.  If you want to be especially prudent, go ahead and give the plastic a light sanding before painting.


Easter
Easter
Decorated Chocolates

Once the spray paint had cured, I used puffy paint to add details.  This works best if you use one color at a time, letting each shade fully dry before moving on to the next.

Note:  Because I used my puffy paint over the container openings, these will no longer be able to open and close without ruining the design.  If you wish to use yours for storage or as gift boxes, make sure you plan your design accordingly 😉

And there you have it, a cheap and easy Dollar Tree re-style, just in time for the holiday!

**********

I hope you enjoyed this Easter decor post, thanks for stopping by!

-Jennifer

© Studio 27 by Jennifer Adams 2021

**********

This post was added to the following link parties:

Wonderful Wednesday (Oh My Heartsie Girl)
Wonderful Wednesday (Penny's Passion)

**********

This post was featured at the following link party:

BFF Open House


Saturday, March 13, 2021

DIY Faux Milk

Kitchen Decor

A couple of weeks ago when I shared my baking prop post, I mentioned that I wanted to make a fake measuring glass full of milk too.  Then when I was looking through my collection of drafts I realized that I had already prepared a post with this faux glass of milk for a milk and cookie display.  So it's not a measuring glass exactly, but I can still share with you how it's done!  
Check it out:

********


Disclosure - This post may contain affiliate links.  If a purchase is made through an affiliate link then (at no additional cost to you) I will receive a commission.  You can read more about affiliate links here.


Kitchen Decor
Supplies

For this project I used a .25 thrift store glass and a Dollar Tree paper straw and emergency candle.  Sometimes called prayer candles, these are awesome in size and the glass containers can be decorated or reused.  They aren't labeled as scented but do have a slightly fresh scent to them.

(You can click here if you want to browse Dollar Tree's online selection of goods)


Kitchen Decor

Using a pot of boiling water on the stove top, I placed the candle inside the water and watched until the wax was fully melted.  Never doing this before I wasn't sure if the glass would crack or if the wax would overflow.  Neither happened, in fact, once melted the candle wax only took up half of the space is did when dry.  I think air is somehow added to the density of the wax in order to fill the space of the glass with a smaller amount.  I want to caution you that just because this worked for me in this way does not mean that every candle/glass jar is of the same properties.  Please use care when melting wax or heating glass to avoid burns or broken glass! 😉


Kitchen Decor

I then carefully poured my melted wax into my glass, making sure not to splash around on the sides.  This photo shows the entire amount of candle wax being used for one glass due to the wax melting down to a smaller volume.  You'll want to take that into consideration when deciding how many candles (of this type) to purchase for your projects.


Kitchen Decor

As soon as the wax began to cool, but before forming a skin at the surface, I placed my straw inside at an angle...


Kitchen Decor

...and then let the wax completely dry.  

You can't tell from the photo, but the wax dried with a small depression in center.  In don't know if this is because of the straw or if wax just does that.  Anybody who has candle making experience, let me know!

Want to make some decorative cookies to go along with your faux milk?
Check out this post.

**********

I hope you enjoyed this how-to post, thanks for stopping by!


-Jennifer

© Studio 27 by Jennifer Adams 2021

**********

This post was added to the following link parties:

Wonderful Wednesday (Oh My Heartsie Girl)
Wonderful Wednesday (Penny's Passion)
**********

This post was featured at the following link party:


Saturday, March 6, 2021

Chocolate Bunnies & Eggs


Easter Decor

Remember my post from last week about the Faux Potted Carrots?  In it I shared a picture with an adorable, large chocolate looking bunny.  Today I'm going to show you how you can make your own 'chocolate' bunnies and eggs for your Easter decor.  Check it out:

********


Disclosure - This post may contain affiliate links.  If a purchase is made through an affiliate link then (at no additional cost to you) I will receive a commission.  You can read more about affiliate links here.


Easter Decor

Here are the supplies that I started with.
The package of white plastic eggs were a thrift store find while the glittery eggs came from Dollar Tree.  The bunnies on sticks and tiny eraser bunnies are also Dollar Tree finds while the large bunny, spray paint and acrylic paints are all from Walmart.  That large bunny is only $3 and I found the spray paint in the clearance section for $2 something, go check it out!

(You can click here to see Dollar Tree's selection of online Easter decor)


Easter Decor

A bit of paint and now everything is chocolaty fun!
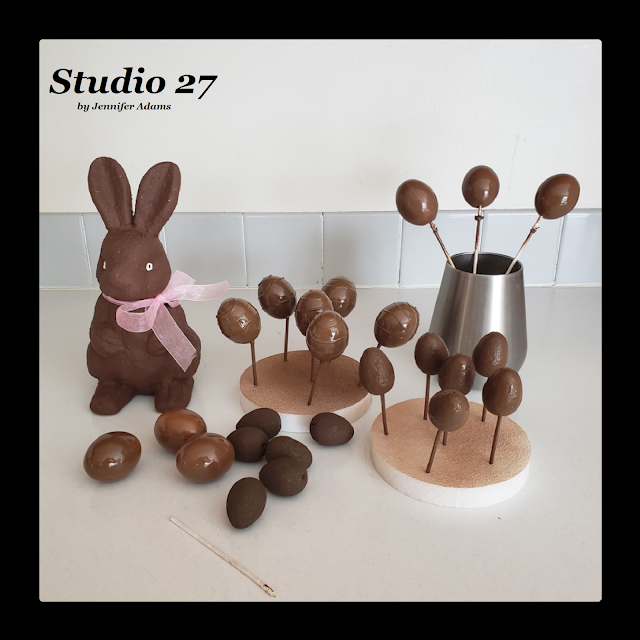
The large bunny and small foam eggs were painted with acrylic while the plastic eggs got the spray paint.

  But what about those purple foam bunnies on sticks?  They died 😕  Turns out you aren't suppose to use spray paint on styrofoam as the enamel causes it to disintegrate...who knew?  Probably lots of people, but until this experience I was not one of them.  Thankfully I figured it out before ruining the big bunny!


Easter Decor

Let's take a closer look at those plastic eggs.

I used a bit of puffy paint to add texture to half of them, then sprayed the layer of brown paint once the puffy paint was dry.  This gave them a more dimensional look and added variety to the display.  Since you are going to be covering up the puffy paint you don't have to worry about what color you use.  Go ahead and grab a bottle that you have extra of, or the cheapest one from the store.  Sometimes you can even find it at Dollar Tree.


Easter Decor

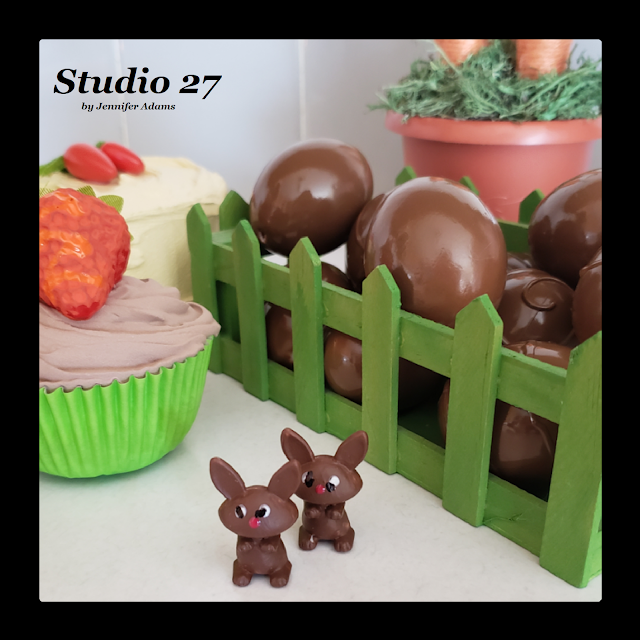
The bunny erasers I painted in brown acrylic and then added the eyes and noses with puffy paint.  Once that was dry I went back and use a sharpie to add pupils (not pictured), so they look way less like zombies now 😉

And here is how everything looks when pulled together:

Easter Decor
Easter Decor
Easter Decor

Want more info from these photos:

The faux carrot plants are here.

 Here is a really old post (back when this blog had a different name) 
showing off the yellow, faux carrot cake.

Like the cake slice?  Here is a post with a similar faux cake.  Just add a bit of joint compound for the icing!

I haven't done a faux cupcake tutorial yet, but here is a video from Dawn Newell of The Pink Tree showing you step by step how to create your own.  This is the exact video that I learned from and if you look in the background you will notice where I got my inspiration for the chocolate bunnies ❤❤❤

(Dawn also has a Facebook page in case you would like to follow her that way)

**********


I hope you enjoyed this Easter decor post, thanks for stopping by!


-Jennifer


**********

This post was featured at the following link parties: