Showing posts with label Clean & Organize. Show all posts

Saturday, July 18, 2020

How To Customize Your Plastic Drawer Storage


Upgrade Plastic Drawers

I love storage and organization and I also love making things pretty.  Here's a story about how I used both of those interests to upgrade my plastic drawers with a custom rose design:

********

Disclosure - This post may contain affiliate links.  If a purchase is made through an affiliate link then (at no additional cost to you) I will receive a commission.  You can read more about affiliate links here.


Upgrade Plastic Storage
Before

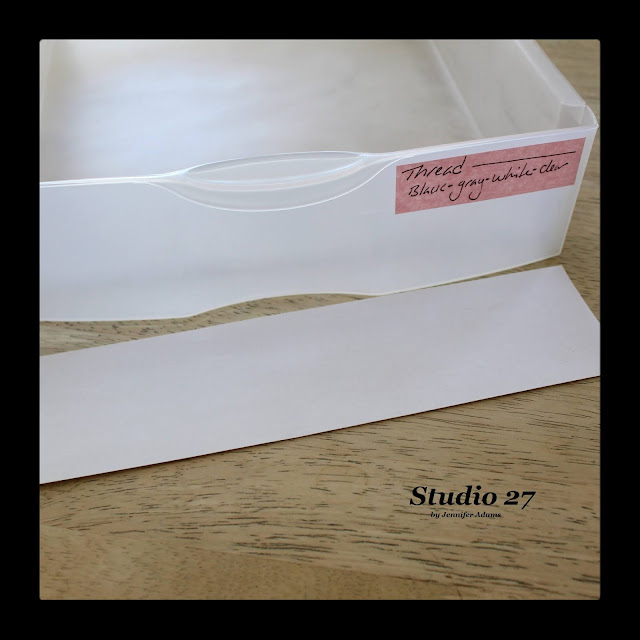
Here are my drawers before I dressed them up.  Not too bad, but not pretty either.  I added felt to each drawer to help keep things in place, but because I didn't glue them down they were getting all rumply.  To help keep track of what's in each drawer I also made a sticky note label for the outside.  Now I know I could take this a lot further with pretty vinyl or even by printing something up, but I simply move things around too often.  I need to be able to switch out my labels without feeling like I've wasted a lot of time and supplies!

You can click here to find these drawers at Walmart.
(I don't know why these are priced so high on the website, you can find them wayyyy cheaper in the store 😊)


Upgrade Plastic Drawers
Inside

This particular set of drawers is for my sewing supplies and I used plastic trays from Dollar Tree to help keep things organized.

You can click here to browse Dollar Tree's online collection of plastic containers.


Upgrade Plastic Drawers
Scrapbooking Paper

I found my scrapbook paper online at Hobby Lobby (and on sale) for .25 a sheet.  
I went ahead and ordered 100 sheets since I use this paper so much, and it was only $25 before tax and shipping.


Upgrade Plastic Drawers
Step 1

After removing everything from my drawers I measured the fronts and used a sheet of printer paper to make a template.  

Tip:  Don't take your template for granted, go ahead and stick it in your drawer to double check the dimensions before you start cutting your good paper.


Upgrade Plastic Drawers
Step 2

Once I was sure of my template size, I used it to measure and cut my rose paper in the way that would leave as few scraps as possible.  It was super easy to get these precise, straight cuts with this Cricut cutting board.  You can even purchase a scoring blade for the same trimmer and use it to get nice, even folds in your paper projects 😍


Upgrade Plastic Drawers
Step 3

Top:  I used a bit of hot glue to anchor my felt in place.  I can't tell you how nice it is to have had it stop sliding around!

Bottom:  With my felt in place, I stood the drawers on end and attached the strips of rose paper with just a bit of clear tape at the edges.  I tried hot glue and white glue as well, but didn't like the way it showed through the drawer fronts.  Another bonus with tape is that if you want to change the look of your drawers it's easy to remove.


Upgrade Plastic Drawers

Better already!  I love that the clutter inside is now hidden and that the rose paper is sort of subdued by the plastic.  I also appreciate the way that my pink labels now pop against the background. 
You can't go wrong with roses 😎


Upgrade Plastic Drawers

And that's how easy it is to upgrade your plastic storage drawers!
Have you completed any similar projects yourself?  I wold love to hear from you-

Contact me at Studio27byJenniferAdams@gmail.com or leave a comment below.

**********

I hope you liked this how-to post, thanks for stopping by!
-Jennifer

Saturday, January 11, 2020

How I Styled and Organized My Cricut Maker Storage Cart


I was lucky to score a rose colored Cricut Maker during the black Friday sales this year and have been having sooooo much fun designing and cutting.  The only problem for me was that without a designated storage area, I was keeping the machine in the box.  It was safe and everything, but a pain to get out and set up!  I finally figured that if I had some sort of cart (on wheels) for the machine, tools and accessories, it would be so much more convenient.  Read on to see the cart that I chose as well as how I organized the drawers and made it pretty:

********

Disclosure - This post may contain affiliate links.  If a purchase is made through an affiliate link then (at no additional cost to you) I will receive a commision.  You can read more about affiliate links here.


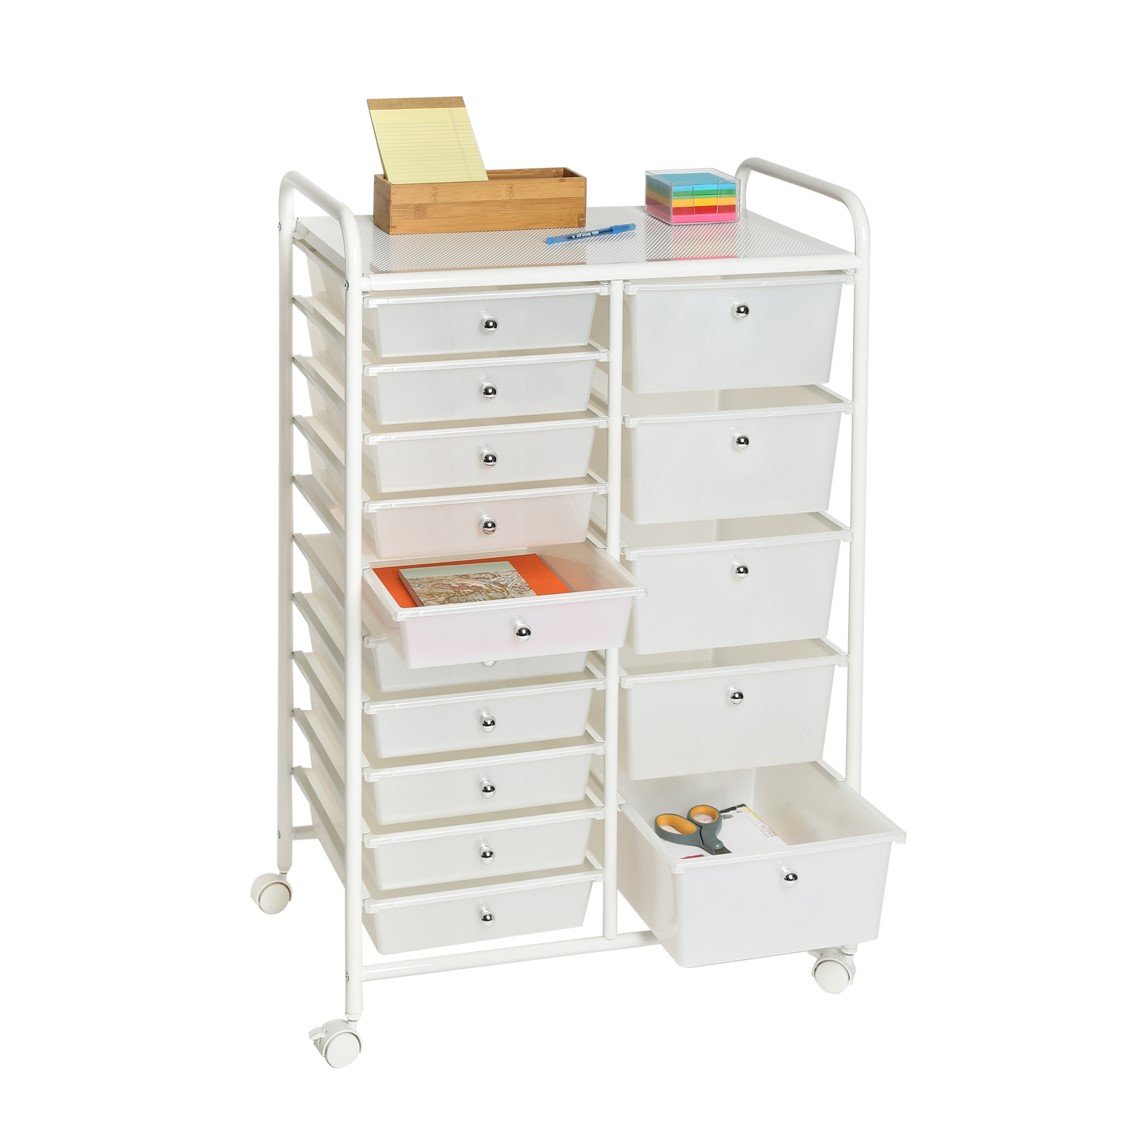
Here is the stock photo of the cart which I ordered online from WalMart.  It's currently available in white or black, with silver looking (plastic) drawer pulls.  I was expecting the drawers to be solid white in color, but they are actually more transparent.  This was no big deal for me since I planned on lining the drawers with felt and wanted a bit of the color to show through anyway, but I thought I should mention it 😉

The cart is very sturdy, has lots of storage space and rolls easily even on carpeted floors.

You can order your own cart by clicking here


Cricut Cart Storage Space
Plenty of Surface

The most important requirement of the cart was that I had plenty of space to hold the machine.  And it does!  I tend to keep the (very heavy) maker positioned more toward the back where the frame of the cart allows more support, but it can go in the middle as well.


Organizational Labels for my Cricut Cart
Labeled Drawers

OK, so here's my thing about the labels - I thought about doing them in vinyl because hey, I got a Cricut!  But I like to change things around and wanted more flexibility.  I decided on using post-its because they are already sticky, easy to remove and available in pretty pink.  I did go ahead and use the Cricut pen and had the machine draw out the font 😎

I organized my drawers this way:

Left Side (shallow drawers) - 
Cords
 Machine Tools (quick swap blades and such)
Cutting Tools (scissors, craft knives, blades)
Application (brayer, scrapers, painter's tape)
Weeding Tools
Weeding Help (baby powder, lint roller)
Pens
Removable Scraps
Permanent Scraps
Iron On Scraps

Right Side (deep drawers)-
Infusable Ink
Transfer Tape
Removable Vinyl
Permanent Vinyl
Iron On Vinyl


Drawer Organization for my Cricut Cart
Felt & Baskets

I mentioned earlier that I like the color of felt as a drawer liners, but I also like the way it keeps things from sliding around.  I decided to go with baby pink and golden cashmere, and alternated the colors for each drawer.  The baskets are from Dollar Tree and come in three different sizes.

You can click here to browse the Dollar Tree collection of storage and organization pieces.


How I Embellished My Cricut Storage Cart
Drawer Embellishments

Remember those silver colored drawer pulls?  Because the drawers move easily without a pull, and I'm not a silver person, I decided to add embellishments instead.  A gold medallion combined with a pink seed pearl and a bit of hot glue did the trick 😍


Cricut Cart Mat Storage
Side Mat Storage

So we've got plenty of storage space for our tools and accessories, but what about those big awkward  mats?  I used super glue to attach plastic hooks to the sides of the cart, then hung my cutting mats and acrylic rulers with the help of cable tie loops.


Cricut Cart Mat Storage
Back Mat Storage

For the machine mats I used another cable tie to attach an S hook to the back of the cart's frame.  Currently, I have 7 cutting mats hanging here with no problem.


How I Styled and Organized My Cricut Maker Storage Cart

And that's my pretty and functional Cricut Maker rolling storage cart.

**********

I hope you enjoyed this organizational post, thanks for stopping by!
-Jennifer

© Studio 27 by Jennifer Adams 2020

**********

This post was added to the following weekly link parties:

Silver Penny Sundays
Inspire me Tuesday
Tuesdays With a Twist
Tuesdays at our Home
All About Home
Wonderful Wednesday
Your Whims Wednesday

Saturday, April 27, 2019

How I organize my Blog Book Binder + FREE PRINTABLES!


How to Organize Your Blog Book Binder


Today I'm sharing how I organize my personal blog book binder.  I always enjoy seeing how fellow bloggers and creativepreneuers organize their business materials, plus it's a great excuse to give away some FREE printables!  I also made up some blog binder organization printable packs that can be purchased from my Etsy shop, so I'll provide links for those as well.

But first, I want to take a minute to show you how to use your FREE printables:


How to Organize Your Blog Book Binder
Cover

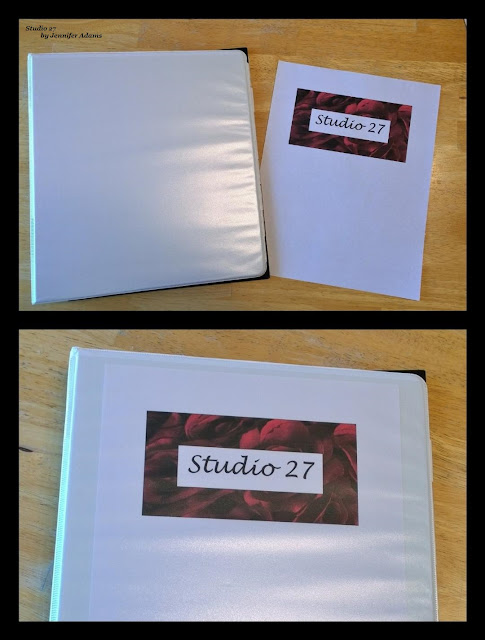
For the cover of your binder, simply place your title printable into a word document and print.  Once the sheet is printed, slide it into the front of a clear cover binder and you are ready to go.  I chose to position my title at the top of the sheet, but it's up to you.


How to Organize Your Blog Book Binder
The Spine

For the spine of your book, print another copy of the title and trim down to fit the dimensions of your particular binder.



Free 'Blog Book'/ Blank Title & Spine Printables

Maybe you want to call your book a 'blog book' or maybe you don't,
so I made a blank version just in case.

You can print the blank version as it is and hand write your title. But if you prefer a type font, just copy the image into a word document and insert a text box on top of the image.  Now you will be able to type whatever title you want and position it within the blank space.  Before you print, adjust the settings of your text box so that the background and outline are transparent 😉


How to Organize Your Blog Book Binder
Tab Printables

For the rest of the free printables (I used mine to label my tabbed dividers) I found it easiest to place three per page in a word document.  It's always good to conserve paper, right? 😊

Each of the printables pictured here will be available within this post as I discuss that particular section, so keep reading!


How to Organize Your Blog Book Binder
 My Blog Book

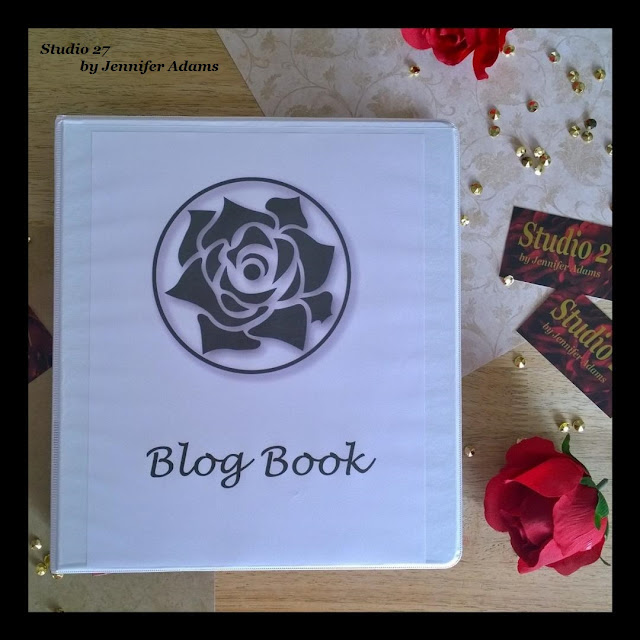
As you saw earlier, a simple white binder with my signature red roses is how keep it all organized.


This binder includes a supply pouch, 5-Subject notebook, tabbed dividers, a folder and a ruler (for measuring dimensions of products that I list for sale).  Basically, my notebook is for frequent every day scribbling and the tabs serve more like a file cabinet for things I need, but don't access quite as often.

Note:  For simplicity, I'm referring to this binder as a 'blog' book within this post. In real life, however, my binder is more of a blog and business binder.

Since my blog itself is monetized (I utilize Google Ad Space and work with various affiliates) and I sell products on Ebay and Etsy, I need a way to keep track of everything.  For this reason I have sections of my binder devoted to my shops, supplies and accounting, but your binder may or may not need to cover these areas.


How to Organize Your Blog Book Binder
Binder Pouch

As soon as you open my binder, I have a pouch containing some pens, binder & paper clips, a calculator and sticky notes.  Sticky notes and scraps of paper are my life.  If I wasn't able to constantly scratch down all of my ideas then I think my head would explode 😆


How to Organize Your Blog Book Binder
  The Blog

In this section I keep track of my basic blogging information such as; usernames, passwords, my email account info, my blog mission and goals, topics, branding information, content creation and posting schedule.


Free 'The Blog' Printable


How to Organize Your Blog Book Binder
Notebook Paper & Sticky Notes

When I first put my binder together, it was full of pages and notes cobbled together like this.  It worked ok, but I wanted something prettier and more organized.  I decided to create organizational printables that not only looked good, but were designed to fit my personal business needs.

Now the 'blog' section of my binder is more organized like this:

How to Organize Your Blog Book Binder

Note that even with the organizational printables, I'm still using those sticky notes!😄 I like the way I can make them into additional tabs to help me find what I need quickly.  I also want to point out those binder clips.  When I have a big section like this posting schedule calendar, I find that the clips help me avoid ruffling through a hundred pages.

My organizational printables have been so helpful to me that I wanted to share them with others.  Because everybody's blog and business are different, I kept each section as a separate purchase.  This way bloggers can pick and choose what is needed without having to buy the entire book.  I also kept the prices low at $2.49 per pack.  This way if someone does need the entire set they can have it for less than $20 😉

You can click here to purchase the My Blog Information printable pack.
You can click here to purchase the Content Creation printable pack (includes posting schedule).


How to Organize Your Blog Book Binder
  Affiliates & Campaigns

Here is where I keep my account details for my affiliates as well as company contact information


Free 'Affiliates & Campaigns' Printable


How to Organize Your Blog Book Binder
The Stores

My 'The Stores' tab is where I keep everything organized for the different platforms that I sell on.  Here you will find account information, the types of products that I currently sell and where, pricing strategies and ideas for new products.

Because I use different shops for different types of products, I went ahead and separated my blog binder with a unique tab for each shop.  I didn't think it was necessary to photograph each tab, but you get the idea 😊


Free Printables for 'The Stores'

Do you sell on a platform that you want a specific tab for?
Just use the blank printable from earlier in this post 😉


How to Organize Your Blog Book Binder
Monetization Printable Pack

Because I have separate tabs for my affiliate work and my stores, I ended up splitting this printable pack across the sections.  Affiliate and campaign worksheets are in that section while I placed my product goals/ plans/ ideas worksheets in the store tabs.

You can click here to purchase the Monitization printable pack.


How to Organize Your Blog Book Binder
 Marketing

My 'marketing' tab is where I organize my services used (like Vistaprint for business cards) as well as keep track of goals and resources.


Free 'Marketing' Printable


How to Organize Your Blog Book Binder
 Marketing Printable Pack

When making this worksheet pack, I made sure to include space to keep track of link parties that I participate in.  Link parties are a great (free) way to get your blog name out there, make relationships with other bloggers and to find links to awesome posts for your own reading 😎  I highly recommend that any blogger wanting to expand their audience should participate in link parties related to their blog subject matter.

You can click here to purchase the Marketing Printable Pack.


How to Organize Your Blog Book Binder
Social Media & Networking

After creating these printables I added them to my binder as sub-sections of my marketing tab, but you could certainly make them their own tabs if you wanted.  The social media pack contains space to track social media platforms used and their corresponding log-in information as well as worksheets to record content ideas and hashtags.  The networking pack helps you compile a list of bloggers that you follow and (want to reach out to) in the form of address pages.

You can click here to purchase the Social Media printable pack.
You can click here to purchase the Networking printable pack.


How to Organize Your Blog Book Binder
Accounting

My accounting section contains my sales and income records (of course) but I also have tabs for resources and supplies.  The resource tab is where I keep information on suppliers for the goods that I create.  My Supply list tab is where I track the cost of every supply so that I can get a better idea of how to charge for my finished products.


Free 'Accounting', 'Income', 'Expenditures', 'Resources'
and 'Supply Lists' Printables


How to Organize Your Blog Book Binder
Legal

My legal section is where I keep printed copies of my blog policies and media kit.


Free 'Legal' Printable


How to Organize Your Blog Book Binder
Accounting & Legal Printable Packs

The accounting pack that I created contains worksheets for tracking income, expenditures and supplies.  The Legal pack is really just a cover page and I didn't feel right charging for it separately 😉  For this reason I added it into the accounting section.

Note:  Even bloggers who do not sell products or utilize add space may benefit from accounting worksheets to keep track of web hosting and other blog related expenses.

You can click here to purchase the Accounting and Legal printable packs.


Free 'Calendar' Printable

I don't actually keep a calendar within my binder but in case you do, here is another free printable 😀


How to Organize Your Blog Book Binder
Blog Book Cover

Want a 'Blog Book' cover that matches the printable packs?
You can click here to purchase the black rose spine and cover printable pages.


How to Organize Your Blog Book Binder

And there you have it, all the ins and outs of how I organize my blog binder, a whole slew of free printables and several links to affordable organizational printables!  Whew!

I hope you enjoyed this blogging/ organizational post, thanks for stopping by!
-Jennifer

© Studio 27 by Jennifer Adams 2019

**********

This post was added to the Best of the Weekend link party.