Recently I shared my faux cake storage/ display cabinet. In the post I mentioned that I found the cabinet while thrifting and it came with open shelving. I took the photos for that post before closing up the shelves, but definitely wanted to ensure that my faux cakes could remain as dust free as possible. Read on to see how I used Dollar Tree photo frames and hot glue to create a DIY 'door' that encloses the space:
**********
Disclosure - This post may contain affiliate links. If a purchase is made through an affiliate link then (at no additional cost to you) I will receive a commission. You can read more about affiliate links here
**********
(You can click here if you want to see the faux cake post)
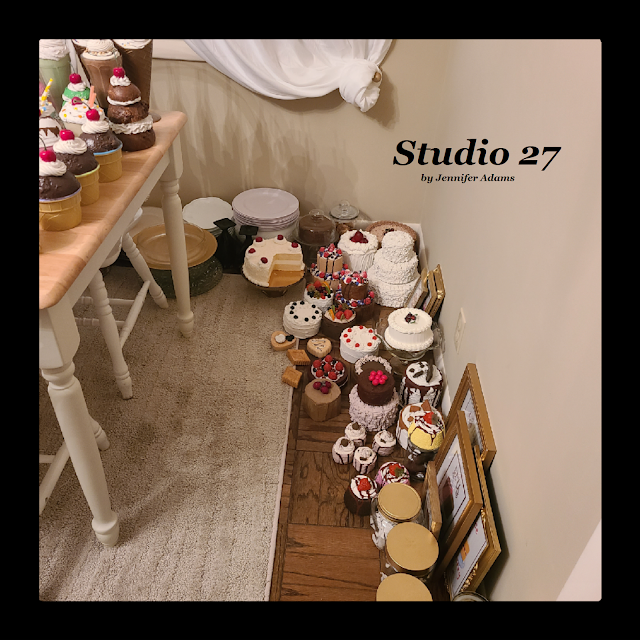
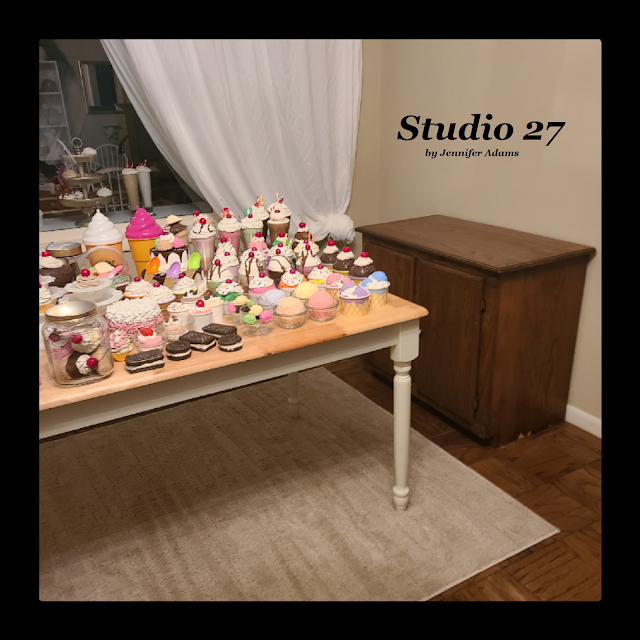
But first, let me show you how things looked when we first moved in - all my faux ice creams were on the dining table and my faux cakes were on the floor in the corner. It was killing me!
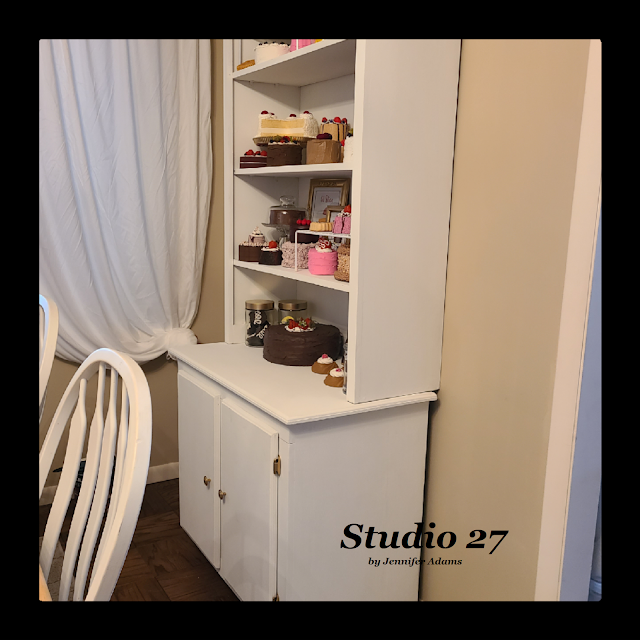
I did what I do though, and thrifted until I found cabinets that would house both displays. This cabinet was only $35 and came in a dark wood stain.
(you can click here to read more about my thrifted furniture finds or here to see my ice cream cabinet)
After painting the cabinet white and loading it up with my goodies, I was ready to close it up.
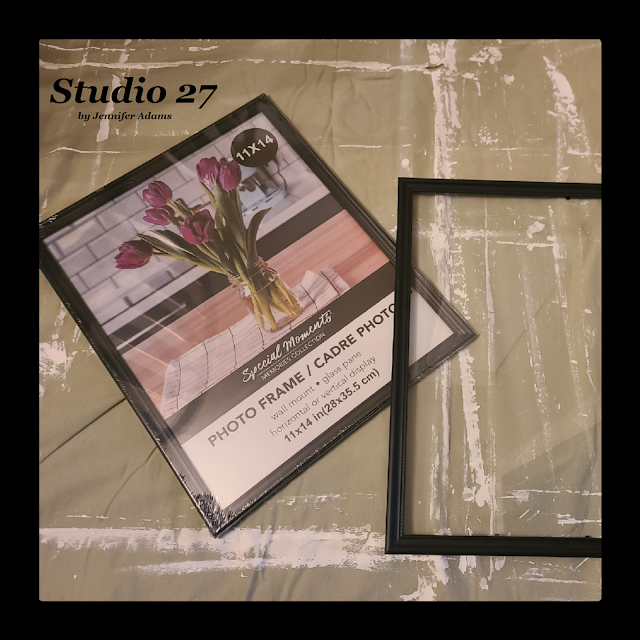
I decided to do so by purchasing 11x14 Dollar Tree frames, removing the backing, painting them, securing the glass to the frame with glue and then gluing the frames to the shelf. Here are some pics:
Using scrap wood from the garage, my Husband attached a couple of slats for me that I also finished in white. The slats allow more surface area so that the photo frames could be attached.
After buying the frames I removed the backing and the glass so that I could repaint them to match the cabinet. I used 9, 11x14 frames, but that is strictly related to the dimensions of the shelf. A larger piece may require more frames while a smaller less. Also, using a different size photo frame will change things too.
Since I bought my frames before the Dollar Tree price increase went into effect, the project cost me around $10 with tax. But even now it would only be around 13!
After the paint was dry I put the glass back in and secured it with glue. I used hot glue here, but you could absolutely go with something stronger if you prefer. I then used more hot glue to attach the frames to the shelf. This time the use of hot glue was intentional - it's strong enough to safely hold the frames in place but flexible enough that I can pull the frames back down if I want to. This came in handy as I've already added more faux cakes to the display. It was easy to carefully take down the frames and then glue them right back up again.
Sound crazy? That my friends is how much I hate dust 😄
But let's also be cautious - just because I got away with using hot glue, doesn't mean it will work for everyone. If your house gets really hot the glue could loosen. Or if you have small children/ curious pets then this might not be the safest option. It would be much better to go with a more permanent glue or actual doors if you think the frames could come loose and hurt someone.
Note that my frames don't go completely to the bottom. I decided that I'm ok with this and left it as is, but you could certainly get creative with smaller frames.
And there you have it, a clean and dust free display!
Want to see the completed dining room? I've got a link for that too 😍
I have a similar cabinet in my bakery that I left open. The closet in which I keep it doesn't have any venting and I keep the door closed, so dust isn't a problem 😎
**********
I hope you enjoyed this how-to post, thanks for stopping by!
-Jennifer
© Studio 27 by Jennifer Adams 2022
**********
This post was added to the following link parties:
Wonderful Wednesday (Oh My Heartsie Girl)
Wonderful Wednesday (Penny's Passion)


This is so creative!! It turned out great. Thanks for sharing on Crafty Creators!
ReplyDeleteThank you Niki!
Delete