Thursday, August 27, 2015

Frozen Party: Birthday Cakes!


I'm back today with a bakery update from Baby Girl's Frozen themed birthday party.  
Come in and have some kitchen fun!


My Instructions

Now let me tell you, never before have I been so nervous to make a birthday cake!  What was different this time you ask?  My instructions, that's what.  Not only did Baby Girl request a five layer cake (gulp!)  but she also drew up this 'schedule' for how she wanted it to look!

Now I knew I could probably manage the five layers as long as I made them with small cake pans, and the snowflakes would be easy since we had already found a ton in our treasure hunting haul.  The sprinkles were also non-threatening, but writing Frozen out in icing?  Nope, I do not currently possess those skills!  Baby Girl didn't mind though, especially since we found a few other cute things to add to the cake.

(You can click here to see the treasure hunting haul post)


Mixes

Since I was going to be baking several layers, I purchased a couple of mixes.  The cake was Duncan Hines French Vanilla and the icing was Pilsbury Fluffy frost in marshmallow flavor.


Cake Decor

Top:  Candy sprinkles and a sparkly #6 from Wal-Mart.  The beads and plastic snowflake are from our treasure hunting haul.

Bottom:  The star/ numeral candle pack and the Frozen figurines were all found at Dollar Tree.

(You can click here to read the Dollar Tree decor post)


Pans & Glassware

I used several pans for this cake, ranging from standard size round to miniature.

The glassware pictured is a round plate, tiered cupcake stand and a miniature cake dome.


Icing

The icing had to be blue, of course!


Layers

***Ok bear with me, my photos are slightly out of order in this collage (shudder!)***
Read the text below to learn what size cake pan I used and in what order.

Top Left:  One standard round layer topped with icing.

Top Right:  I added a second standard round layer with a bit more icing.  Remember, not only is icing between your layers pretty, but it acts a a 'glue' to hold everything in place.

Middle Right: Here is where I added one snowflake shaped layer.  I took the photo without the icing to help show the snowflake detailing.  Once iced it can look kind of like a blob but don't worry, the detailing that is added later will fix everything right up!  

Middle Left:  One 3" layer.

Bottom Left:  One 2' layer.

Bottom Right:  Complete with icing.


Beading

Remember those plastic beads I found for $1?  After sanitizing them in the dishwasher I used them to highlight the different layers of the cake.

This was a really simple process, I started at the bottom with the darkest shade of blue and worked my way up.  I also made sure to gently push the beads into the icing so that they wouldn't fall off.

You can see how the beading helps to visually define the different layers, especially the snowflake.


Snowflake Time!

These snowflakes also received a through scrubbing to make them food safe.  Once clean I attached a large one at the back by sticking one of the snowflake's 'arms' directly into the cake.  A couple of toothpicks helped to keep it from falling backward. 

I wanted a smaller snowflake for the front so I snapped off most of the longer arms.  I left one long arm remaining and used it to anchor the snowflake into the front of the cake.
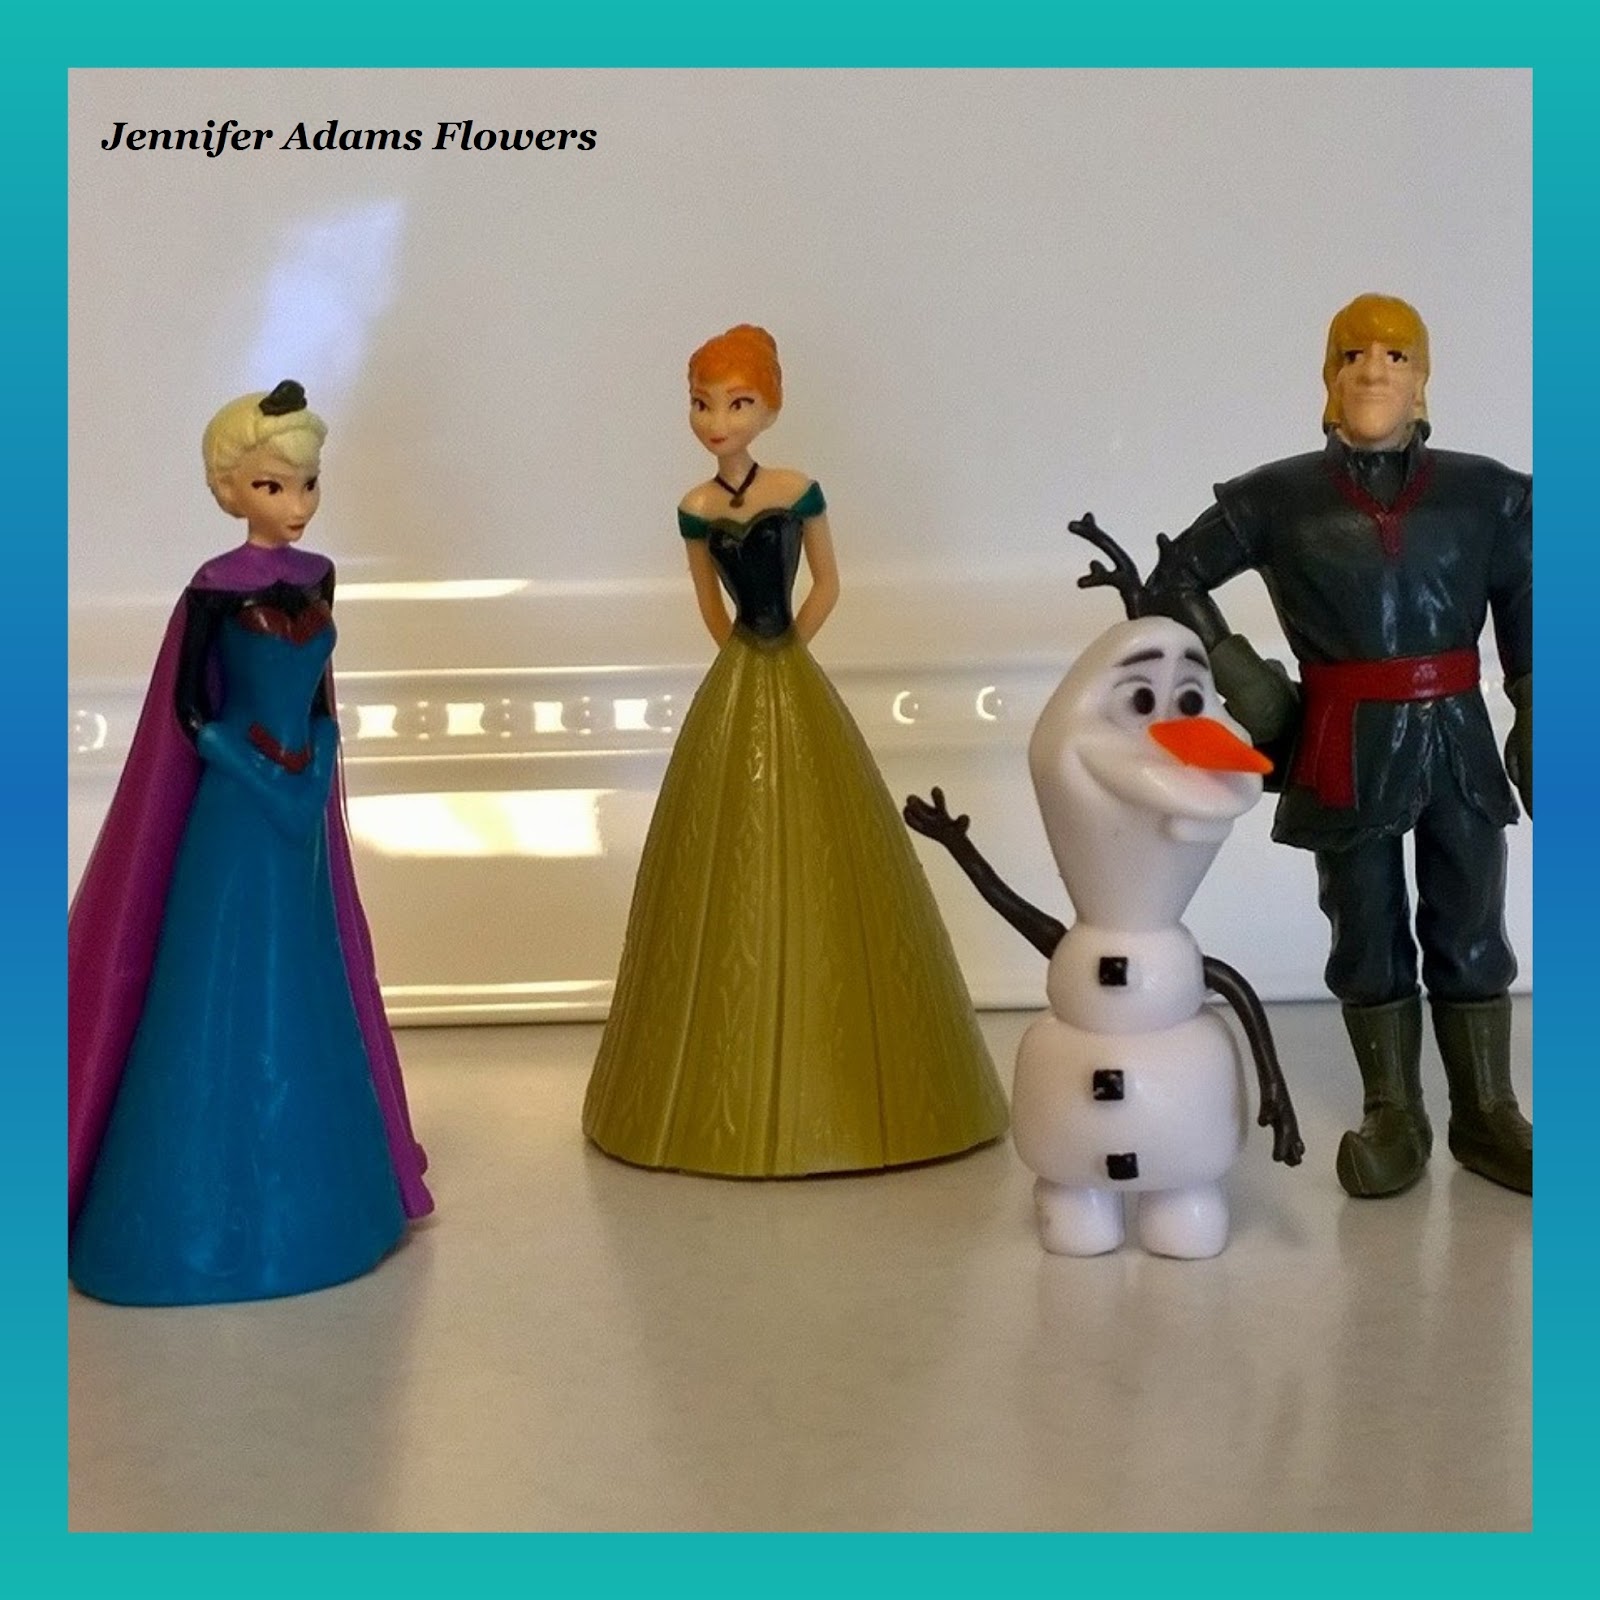


Frozen Friends

After the snowflakes it was time to add our Frozen figurines!

Olaf was really easy, I just stuck his little feet into the top of the cake.

Elsa was also easy, her cape fit right over a couple of toothpicks that I stuck into the cake.

Kristoff was a bit harder, I ended up taping a toothpick to the back of his legs.

Anna was the most challenging (go figure, it's her personality!).  She has a solid angled base so taping any toothpicks would have looked funny.  I ended up just positioning her on the glass plate very close to the cake.


The Completed Cake

A few blue sprinkle candies and a sparkly number 6 finished off the cake.  

I breathed a great big sigh of relief and then popped it into the freezer!  Once the icing was good and frozen, I covered it with plastic wrap and kept it in the freezer until party time.


Mini Cake

I always make the kids an individual cake as well.  This one was layered to match the larger cake.  Personally, I would rather have had a blue #6, but this is what Baby Girl really wanted ;)

The candle pack came with a red star also, but I saved it to add to the cake I will be making for Baby Girl's actual birthday.

***********

And now.....it's cupcake time!


Icing & Mix

The cupcakes were made with a Betty Crocker lemon mix and vanilla Funfetti icing.

Tip:  I didn't need the included sprinkles for this party, but I always choose icing with free sprinkles if possible.  I add them to my stash and use them for topping smoothies, sundaes, Baby Girl's school lunch yogurt and sometimes, even other cakes!  :D


Blizzard Mix

Here are the sprinkles that I bought for these cupcakes, I love the little snowflakes!  This blizzard mix was a Wal-Mart find.

Since I had blue sprinkle candies left over from the big cake, I used some of them as well.  You will see that in the finished cupcake photo below.


Tins & Liners

A standard set of muffin tins and my white silicone liners were all I needed to create these cupcakes.

Sad News:  I lost one of my white silicone liners!  Of all the parties they have attended the past few years, one of them didn't make it back home  :( 

I've got my eye out for more though! ;)


Cupcakes!

Here you can see the mix of cupcakes that I ended up with.  I was glad to have so many of the larger sprinkles left over, I think the combination of sprinkles looks much better!

Those were our party treats, I hope you enjoyed the post.  Thanks for stopping by!

-Jennifer

© Jennifer Adams Flowers 2015

Tuesday, August 25, 2015

Frozen Party: Decor Pictures!


Has it been over a week already since we held our Frozen birthday party?!  Yikes!

Check out these photos of all the party decor:


Napkin Cut-Outs

I started out my decorating by cutting the blue flower design from my leftover napkins.  I didn't realize it when I made the invitations, but cutting through the folded layers also created this lovely pink floral design! 

 (You can click here to see the invitations that I am talking about, or you can click here to see the treasure hunting haul that these napkins came from)

I used the napkin cut-outs everywhere...


Taped to cups to act as a decorative container for the flatware...


...and layered on the table tops with the plastic snowflakes and faux ice cubes.


Olaf

Isn't this little Olaf figurine adorable?  It came with one of Baby Girl's Frozen Toddler Dolls.  I was busy working away when she brought it in because she thought we should include it in the party decor.  She even made the scarf herself!  I love her creativity and design interest!


I taped the printables up above the dessert and food counters.


Printable Close-Ups

(I made sure to take all of these down carefully - they will be great recycled into scrapbook pages)


More Details

On the left you can see a candle that I dressed up by taping on one of the napkin cut-outs.

On the right you can see more of the wall decor and the party napkins.  

Tip:  I always purchase two different types of napkins and layer them on the counter this way.  It's an easy way to add a decorative touch.


Easy Balloon Decor

Remember the shiny garland and ceiling streamers from the treasure hunting haul?  I decided to combine them with the balloons.  It was super easy to tie the balloons to the garland.

A Little Secret:  I was just trying to find ways to incorporate all the decor items that we ended up with when I hung the garland this way....but it ended up being probably my favorite style of balloon arrangement yet!  Not only is it easier to tie the balloons to the garland (as opposed to a skinny piece of curling ribbon), but it looks great with fewer balloons.  I also like the fact that the garland can be stored and re-used.


Balloon Close-Up


Birthday Chair

One of the lengths of garland was falling apart so I cut it apart.  I tied one section to the chair pictured here (with a bit of extra table cloth), and the rest I stashed in the backyard.  The chunky pieces made perfect 'snowballs' for the kids to toss around when they went outside.

Tip:  The plastic table coverings that you can find in the party section are large enough to cut in half and still fit most tables.  I usually buy two; one to cut in half and cover my kitchen/ dining tables and the other to cut in half to cover my coffee table and then I decorate with the rest.


Dining Room


Dessert Counter


Vanilla Cake With Marshmallow Frosting


Lemon Cupcakes With Vanilla Frosting

***Bakery update coming soon!***

I hope you enjoyed the post, thanks for stopping by!

-Jennifer

© Jennifer Adams Flowers 2015

Friday, August 21, 2015

Trash to Treasure: Fixing up a Neglected Mirror


A couple of weeks ago the kiddos and I ran into a garage sale where everything was free.  Yep, free!  (It happens sometimes when people don't want to bring anything back into the house.)

We ended up finding quite a few treasures, including the mirror pictured at the top of this post.  However, that is not at all how the mirror looked when we brought it home.  

The mirror was in good shape structurally - no cracks of chips - but it was a mess!  It also featured an antique looking paint technique that I didn't really love so much.

What to do?  Spray paint it, that's what!  I love finding neglected treasures that I can fix up and breathe new life into.  

Read on to see how easy this mirror was to fix up:


A dirty, dusty, grungy old mirror.

This is how the mirror looked when we found it.
Underneath the mess you can see that the paint is sort of bronzy-red with gold on top.  


Step 1:  Clean!

I used a whole lot of Windex and the mirror cleaned up nicely.


Step 2:  Cover up the mirror.

A bit of paper and some painters tape protected the mirror from the spray paint.


Step 3:  Paint!

I used gold spray paint for this project (shocking, I know) but you could get out a brush and hand paint it as well.


Step 4:  Remove the paper

And there you have it; a brand new looking mirror ready to spruce up your home.

This mirror is now crisp, clean and shiny - just the way I like it!
What are some of the treasures you have fixed up for your home?  You know I love to see your pictures, send me an email!

I hope you enjoyed the post, thanks for stopping by!

-Jennifer

© Jennifer Adams Flowers 2015

Thursday, August 20, 2015

A Sunset Wedding (17 Pc Package) 2015

One thing that I love about summer are the beautiful colors that can be found in the sky, especially at sunset.  Check out this package that was inspired by a beautiful summer evening:


A combination of full roses in white, peach and orange.
Summery blue morning glory blossoms have been delicately tucked in among the roses.

(Notice the variation in the shades of peach, orange and blue, just like the evening sky!)


Bridal Bouquet


Maid of Honor & Bride's Maids


'Toss' Bouquet


Best Man & Groom's Boutonnieres


Mother's & Father's Boutonnieres


Groomsmen


17 Piece Package

This 17 piece package will be arriving in my eBay store soon!

Want to see what is currently available?  Check out my eBay store here

Thanks for stopping by!
-Jennifer

© Jennifer Adams Flowers 2015

Thursday, August 13, 2015

Frozen Party Decor: Dollar Tree Finds

After finding so many party decorations from our treasure hunting adventures, there wasn't a whole lot that we still needed.  But for those few items that were lacking, Baby Girl and I turned to Dollar Tree to finish our shopping.  Take a look at what we found:

(You can click here to read about our treasure hunting haul)
(You can click here to see the party invitations created from party napkins)


Napkins $2

If you remember from my previous posts, I had napkins from my treasure hunting haul but they were unsealed.

I was planning on purchasing navy blue but was surprised to see that Dollar Tree had Frozen napkins as well!  I ended up combining the print with the nay blue.


Necessities $5

Cups, plates and table covers all in plain colors.  I'm planning on decorating my table tops so these plain items will be perfect.  They will add color without making things look too busy or cluttered.


Streamers $0

These streamers are left over from our rainbow graduation party that we had in May, so I didn't have to purchase them.  They can be found at Dollar Tree though; $1 for a package of two.

Now I'm not entirely sure I'll even be using these, but since streamers were a part of our treasure hunting haul I thought I would get them out just in case.  There was so much stuff that came with our haul...we'll just have to see!

(You can click here to read about the rainbow party)


Balloons $2

I'm keeping it simple with a package each of navy and white.


Frozen Characters! $4

This was one of my best Dollar Finds ever!  Baby Girl requested to have the characters from Frozen on her cake and then we happened upon these.  Perfect for the cake and she gets to play with them too ;)

I hope you enjoyed this post, thanks for stopping by!

-Jennifer

© Jennifer Adams Flowers 2015