Take a look at my new photo album that I made after uploading digital files to Shutterfly. This particular album holds all of my photos from birth until I got married (20 years) and that happens to by my kindergarten picture on the cover 😊 This album also represents my first foray into the world of digital scrapbooking. I use the word 'foray' as I was quite intimidated by the process and it took me awhile to gather my courage, check it out:
**********
Disclosure - This post contains affiliate links. If a purchase is made through an affiliate link then (at no additional cost to you) I will receive a commission. Affiliate links are noted below.
**********
I have always loved photography; taking photos, printing them, creating albums, using photos as framed decor......you name it and I'm in to it! But the actual process of scrapbooking has become cumbersome to me.
Truth be told, I've never really enjoyed scrapbooking as a hobby. Oh I like my photos and I love my albums, but the actual sitting down and cutting/ arranging/ cleaning up the mess...not so much. For me, scrapbooking was a chore that I would resign myself to get over with just to have a nice albums. But then, there was another problem - scrapbooked albums are big, bulky and heavy! And after years of hobby photography, I had managed to collect more than 25 giant albums that took up two full bookcases.
Needles to say, over the past year or so my album collection has been starting to give me anxiety. I mean, if I already have 25 + albums and my kids are only 9 & 5....where in the heck am I going to put the other hundred or so that you know I'm going to end up with? Also, scrapbooked albums are kind of delicate. Not only do they eventually fall apart (cue more anxiety here 😟) but because I was afraid of this I kept them stored away in a back closet. What's the point of having albums if nobody looks at them?
So I had come to the conclusion that scrapbooking the old way wasn't really working for me anymore, but still had a few concerns. What would I do with the old albums? Wouldn't transferring them into digital files take for-ev-er on a standard scanner? And if I did manage to scan every single page of every album, would it be a total pain to recreate them into digital albums? And what about the expense? And most importantly, what about non-photo items like my kid's artwork and school papers? How would I continue to store these mementos?
So there I was (for quite awhile) stuck between knowing that traditional scrapbooking was no longer my thing but also not knowing how in the world I was going to figure out the digital alternative. And then I read this post by Abby from Just a Girl and Her Blog.
In the post, Abby describes how she uses a document scanner to quickly and easily transfer all of her kid's artwork into digital files, and then has them printed out into photo books. Genius! Not only does this solve the problem of what to do with non-photo items, but according to the post, document scanners are super fast to use.
In the post, Abby describes how she uses a document scanner to quickly and easily transfer all of her kid's artwork into digital files, and then has them printed out into photo books. Genius! Not only does this solve the problem of what to do with non-photo items, but according to the post, document scanners are super fast to use.
This document scanner business sounded really good to me and after telling Husby all about it, he encouraged me to order one right away (as he does with anything that makes me happy, but I digress...💓)

Portable Document Scanner
I ended up choosing this Brother brand portable document scanner and I absolutely love it. It is easy to use, fast and the quality of the scanned images is amazing! I was able to take all of my fully completed scrapbook pages, run them quickly through the scanner and then transfer them right into a digital photo album.
(You can click this Amazon (affiliate) link to purchase the document scanner pictured here)
As I mentioned, after scanning my old scrapbook pages, I transferred the files to a photo website and made a personalized photo book. I have used WalMart's photo site for years and been very pleased with their prices, shipping speed and the quality of their prints. But when it came to making a photo book I didn't like the limited selection of sizes. I popped on over to Shutterfly instead and was happy to find that they offered a new 8X11 size for photo books. This was important to me as I wanted to have the option to print my photo books with the pages in the exact same size and layout as my handmade scrapbooks. It didn't take long for me to figure out how to use the Shutterfly site and after no time my 1st digital album was ready to print!
Now let's talk about pricing for a minute. Depending on how many pages you add and the personalization options you choose, Shutterfly albums can get quite pricey. However, they offer great sales (as much as 50% off) pretty frequently. I recommend uploading your photos and creating your books, then waiting for the next sale to place your order. When you do it this way and compare the price to the cost of albums, paper, photos, stickers and other embellishments, the prices are quite similar to traditional scrapbook albums.
Another benefit that I discovered is the ability to work on my photo books anywhere! As long as I have uploaded my images to the Shutterfly site, they are ready and waiting for anytime that I have internet access.
I also want to point out that Shutterfly keeps your photos forever, no matter how often you purchase. WalMart will keep your photos too, but only so long as you purchase at least once per year. If not, your photos will be purged from the site! I'm not affiliated with Shutterfly or WalMart, just sharing some of the things I have learned along the way 😉


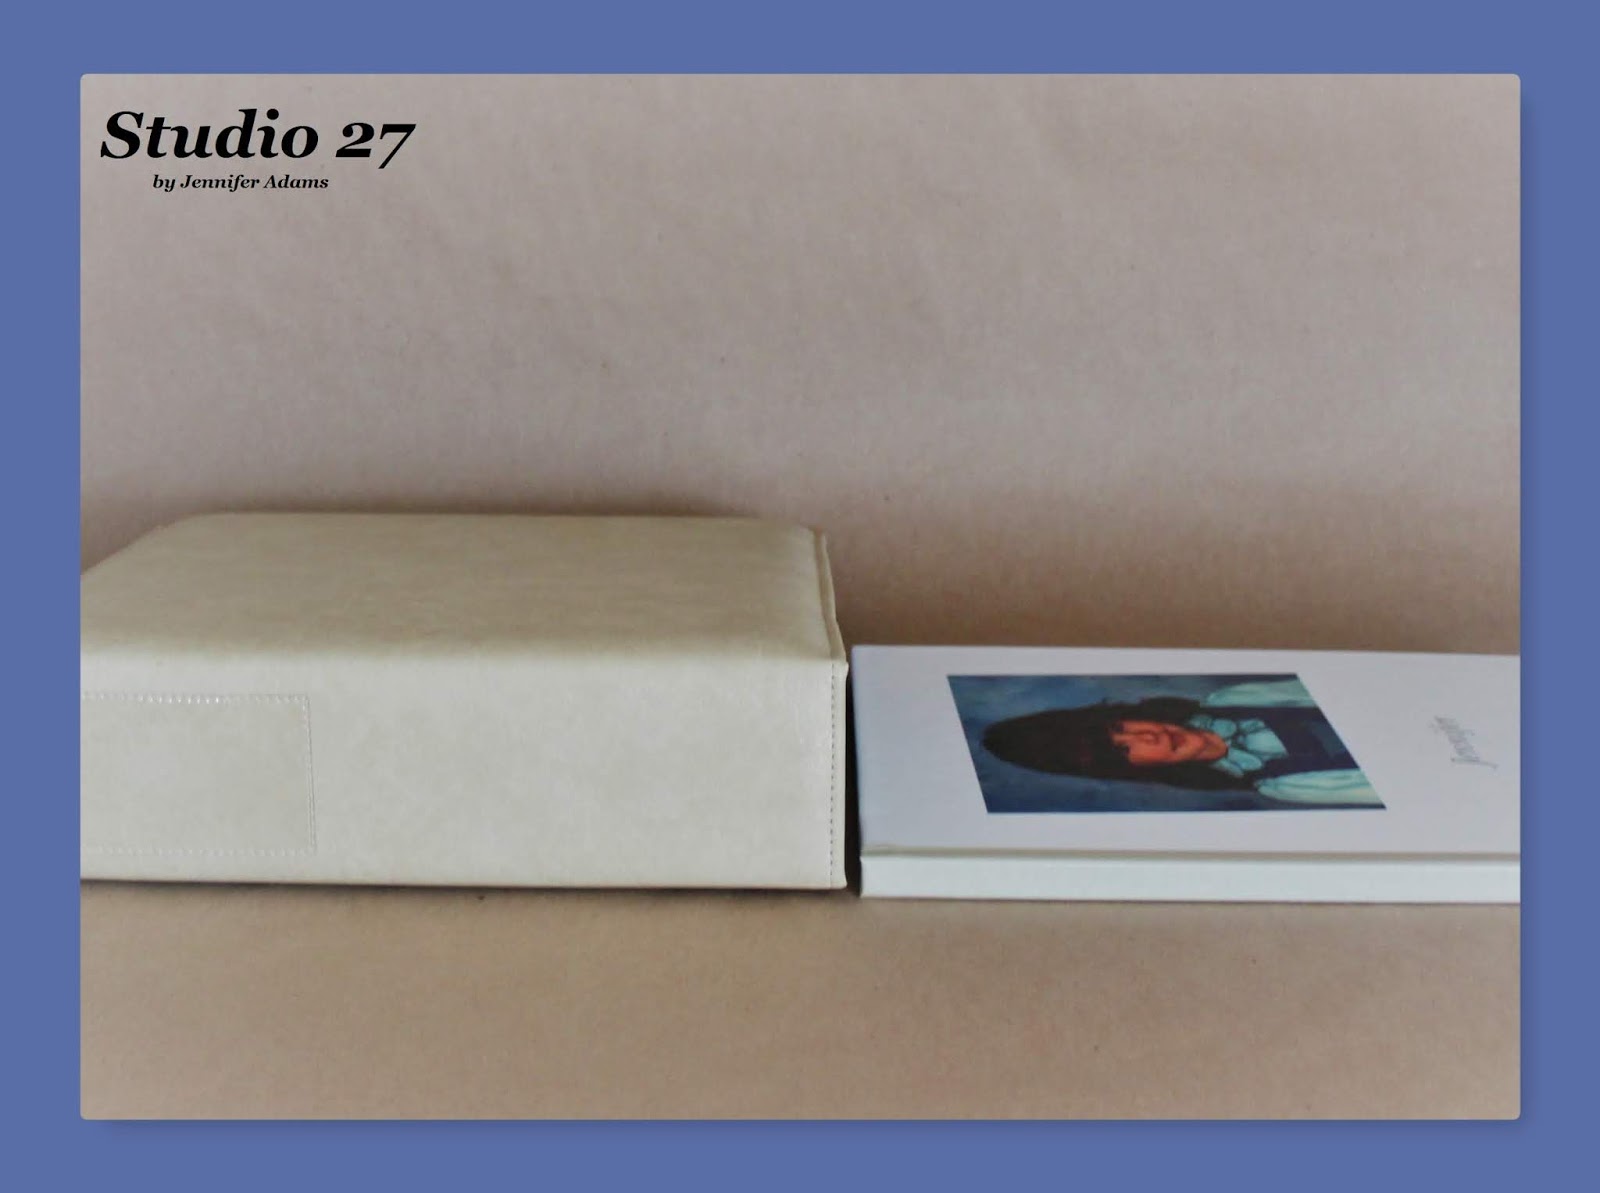
Size Comparison
About a week or so after placing my order, my new Shutterfly album had arrived. Can we just take a minute to appreciate the size comparison? I still have all of the photos and mementos that were in the original book, yet now a fraction of the space is needed for storage. In addition to the neat and tidy size, the book is also sturdy, well made and features quality printing.
One last benefit to document scanning that I wanted to mention - by scanning your old albums you are also creating a digital backup of all your photos. I now have physical albums, digital files (that Shutterfly promises to save forever) as well as the digital scans saved in folders on my pc. I'll move these to an external hardrive for safer storage and to avoid bogging down my pc with saved files. Can you guys tell that I'm loving this digital scrapbooking thing or what? 😁
**********
I'll be back next week with a step-by-step tutorial showing how easy it is to use the document scanner mentioned here. But for now, I hope you enjoyed this scrapbooking post and thanks for stopping by!
-Jennifer
© Studio 27 by Jennifer Adams 2019
**********
This post was added to the Finding Silver Pennies weekly link party.
**********
This post was added to the Finding Silver Pennies weekly link party.