Tuesday, June 27, 2017

Easy to Create Photo Backdrop - 4th of July


With each change of season and (new holiday), I really enjoy taking photos of my kids.  Not only does this give me adorable reminders of their growth, but I also like to use their themed photos as part of my seasonal decor. 

Since it's almost time to celebrate Independence Day, I thought I'd share how to create this easy backdrop that I used for last year's photos.
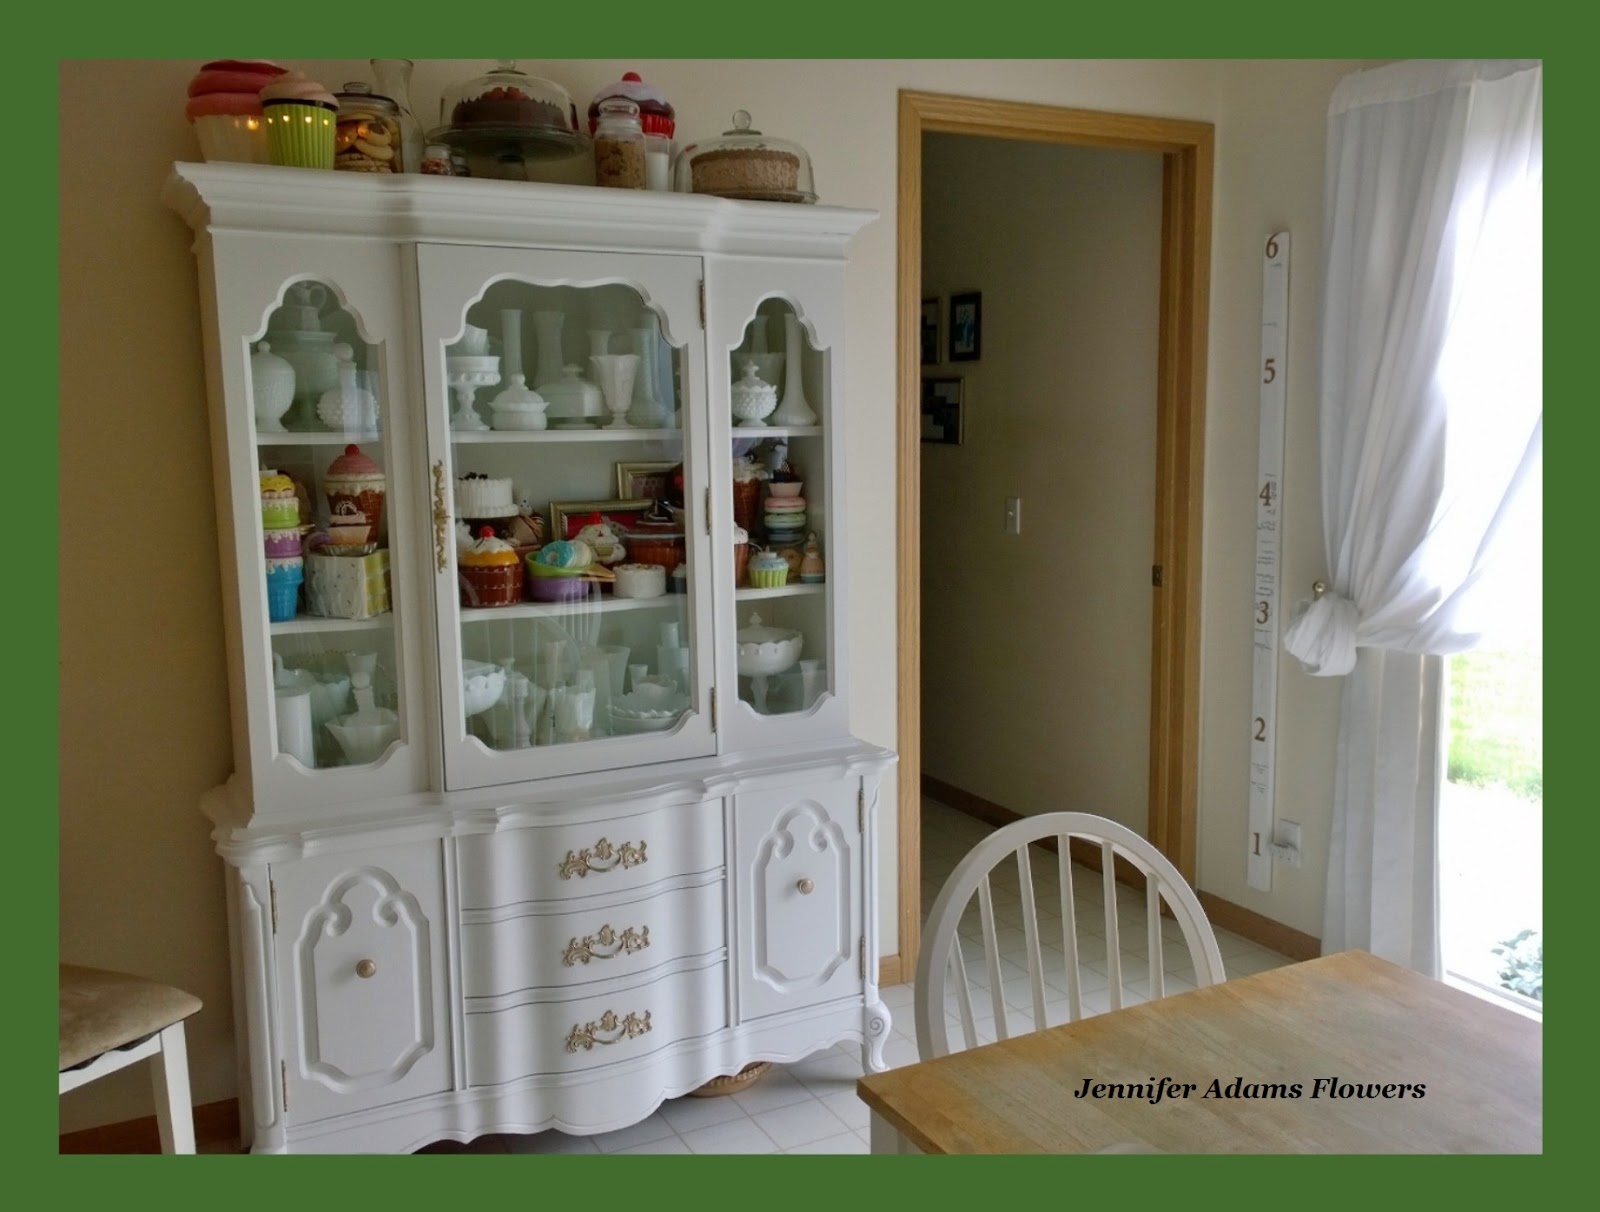


Where I Started

I take photos all over the house, yard and neighborhood, but this time I settled in the dining room.   Here is a before shot so you can see what I started with.  I chose this room for the tall book cases and large table.


Step 1

After removing the chairs I pushed the table up against the shelves.

*My summer decor has changed a bit since this photo was taken,
you can click here to see the updates 😊


Step 2

Next I pulled a white sheet to serve as a plain background and attached it to the top of the shelves.

Note:  I don't recommend leaving anything heavy on top of your shelves that could fall off and hurt someone.  I made sure to remove everything from the top of the shelf before my kids actually climbed up here for their photos 😉


Step 3

I pulled these big blue garlands out of storage and layered them on top of the white background.

*Remember these garlands from our Frozen themed birthday party?
You can click here to read all about that day.


Step 4

Then I added in a bit of red crepe paper.

*Yep, I still have crepe paper left over from our rainbow themed Kindergarten graduation party 😁
You can click here to read about that party.


Step 5

Lastly, I positioned a crate on top of the dining table.  This extra height gave more dimension to the photo than having both of my kids sit side by side.

And there it is, an easy to create photo backdrop all made with items from around the house😊

I hope you enjoyed this how-to post, thanks for stopping by!
-Jennifer

© Jennifer Adams Flowers 2017

Thursday, June 22, 2017

Easy to 'Make' 4th of July Headpiece


With the 4th of July coming soon, I thought I would share this easy to 'make' festive hair wreath.  I say 'make' because really it's ready to go, right from the store 😉


Starry Garland

I found this red, white & blue garland at Dollar Tree.  It comes already wound in a wreath shape that is the perfect size for a child's head.


Step 1 & Done!

All you have to do is take the end of the garland and wrap it around itself a couple of times to secure the wreath in place.  

Seriously, that's all I did here - remove cardboard, twist end, enjoy mother-of-the year status 😎


The Crowning

It was hot last year (surprise, surprise 😀) and my Baby Girl wanted to wear her hair in a bun.  I left a couple sections of hair out on the sides to wrap over the wreath and pin in place, and that was that.

You don't even have to get this fancy, the wreath could simply be placed on top of the child's loose hair.....but it's going to fall off.....in the dark.....so yeah, maybe pinning is best 😌

Add in glow sticks, a bag of popcorn, a firework display and you are all set for a great holiday!

**********

I hope you enjoyed this how-to post, thanks for stopping by!
-Jennifer

© Jennifer Adams Flowers 2017

Thursday, June 15, 2017

A Little bit of Change


Kitchen Change

I mentioned in my last post that I moved a few things around this summer.  Mostly this involved a bit of summer decor rearranging and upgrading but I also ended up moving my bakers rack.  

I loved having my bakers rack in the kitchen, but it was starting to feel crowded.  The kids are bigger now and I didn't like how the entry to the laundry room (where garage door is) was being narrowed - it's crazy how much bigger people are when they are wearing back packs! 😆  Plus, I was feeling like my fake cookie and cake obsession was taking over the kitchen.  

Now I'm all about collecting, but I can't stand clutter.  It was time to condense everything into one tidy place.  With a little coaxing and nudging, all of the cakes and cookies fit into the existing china cabinet.  It looked great and left me with the unused bakers rack that I didn't have another spot for inside the house.......but I thought, "why not the porch?"

You can click here to read my summer decor post,
or here to read about the bakers rack.


On the Porch

I figured this would be sort of an experiment.  I snagged a large rock from our landscaping and put it on the bottom shelf thinking that the wind might be a problem, but it turns out that only the small fern on the very top ever gets blown around.  I also thought that rain might cause some issued, but even through heavy, windy downpours the shelf stays dry.  So far, the biggest issue has been wiping the occasional spider web, not too bad!

The kids really like having the drawer available as that is where we decided to store their bug boxes and bug nets.  Now when we sit on the porch in the evenings, everything they need for catching fireflies is right there on hand 😎

Since this is still in the experiment stage, I haven't done much other than set out a few random plants that I didn't want in the house anymore. 


Top:  I found this artificial fern at Good Will some time ago.  I liked it (because I like anything fake and ferns make me think of dinosaurs, which I love - totally common 😁), but it doesn't really fit in with my indoor style.

Middle:  These pots of faux grass were treasure hunting finds from last year.  Since the containers are a bit too modern for me, they also went outside.  

Bottom:  I love me some ivy, but this basket wasn't doing it for me as an indoor container. I think it's ok for the porch, though.  (You can click here to read about my basket issues 😂)


**********

That's it for now.  I hope everyone is having a great start to their summer, thanks for stopping by!
-Jennifer


© Jennifer Adams Flowers 2017

Saturday, June 3, 2017

Summer Decor 2017

Welcome to June!
Here is a look at summer in our house this year:


Succulents

These are the succulents that I purchased last year and used to be in tiny, cube shaped white containers.  Something about the pots kept bugging me until I finally realized that they were too modern for my taste.  I ended up pulling them out and combining them all into one glass jar.  Much better!

The potted faux grass that you can see in the background was a treasure hunting purchase from last year.  It's in another spot now as I've moved a few things around - post coming soon!

You can click here if you want to see the succulents in their former containers.


Peaches!

I found these artificial peaches a few months ago at Good Will (I think they were around $2).  I already have a set of larger peaches, but none this exact size and color...so yeah...totally needed them 😉

You can click here to see the other peaches.


Lemon 'Tree'

Remember that artificial boxwood that I found at Good Will?  I couldn't decide if if was better suited for spring, summer or everyday decor so I just left it sitting on the counter (forever).  Finally, as I was getting out the summer decor, I ended up piling a bunch of faux lemons next to the boxwood.  After a couple of passed through the kitchen I thought, "I'm gonna stick those lemons in that bush!"  And the rest was history 😀

You can click here to read more about the thrifting haul where I found this boxwood.


Lush Green Grass

I found these crates of thick artificial grass while treasure hunting recently.  I paid $2.50 for the set and love how realistic they look.  All of the beauty, none of the allergies 😉


Lemonade

What's summer without a couple of glasses of ice cold lemonade?  And who am I without my obsession with all things artificial?  That's right, I've added fake lemonades to my collection - totally normal 😍

I received these as gifts with a few other faux food items as birthday and Christmas gifts this past year.  I'll post with photos of my other food items soon, but in the meantime - yay lemonade!!!

**********

I hope you enjoyed this summer decor update, thanks for stopping by!
-Jennifer

© Jennifer Adams Flowers 2017