Friday, December 15, 2023

Trash To Treasure: Faux Bread Loves From Old Spray Foam

 Fake Food

This is one of my most favorite projects ever - not only did I gain a few more faux food items for my collection, but it was completely unplanned!  Read on to see how this project came about:

Note - this is my last post for 2023.  I'll be taking my holiday break for the next couple of weeks, but you can expect a new post January 5th!

**********


Disclosure - This post may contain affiliate links.  If a purchase is made through an affiliate link then (at no additional cost to you) I will receive a commission.  You can read more about affiliate links here


**********


Fake Food

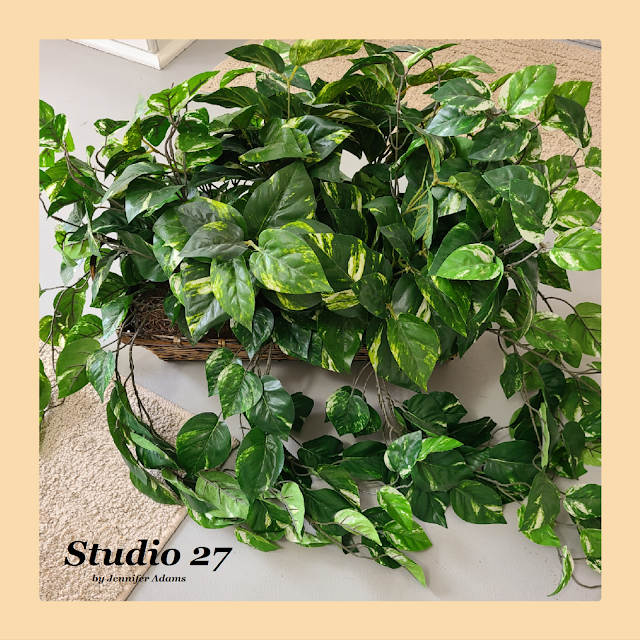
You might remember from this post where I made some faux fruit trees, that I recycled the greenery from baskets purchased at the thrift store.


Fake Food
Fake Food

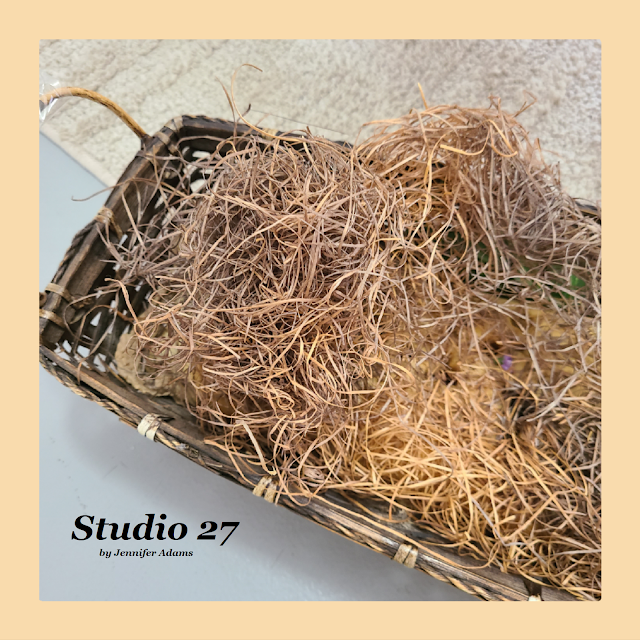
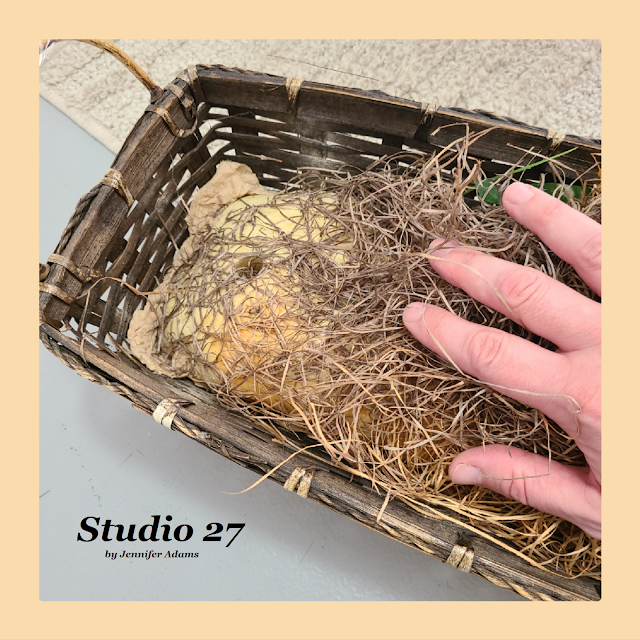
Once removing all of the greens from my baskets, I could see that they were filled with this spray foam.  I couldn't help but think that the foam looked like large loaves of bread and decided to see what I could do.


Fake Food

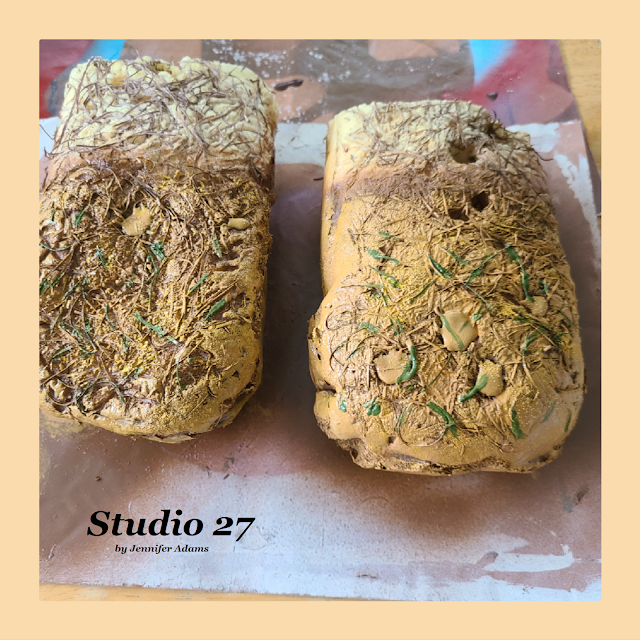
Here is the foam after I pulled it out and removed as much of the Spanish moss as possible.  I wasn't able to get all of it off because some of  it was stuck into the foam, but I figured I could use paint to make it look like seasoning.

If you want to make similar loaves of foam I think you could do so by applying spray foam into a long basket.  Just line the basket with plastic first so that you can remove it later.  Here is a post where I made spray foam bread in actual loaf pans.


Fake Food

I decided to use one full length and one that I cut in half.  It cut very easily with this foam cutting knife.


Fake Food

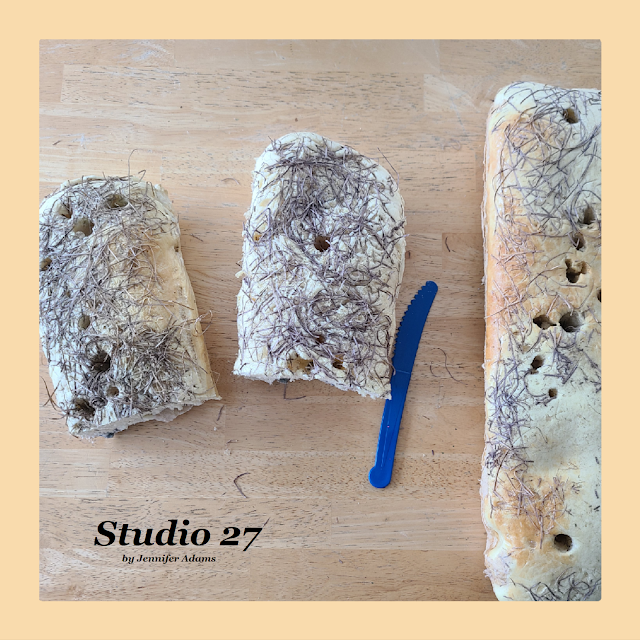
There were a lot of holes from where the greenery had been poked in.  
I filled those using hot glue and let dry.


Fake Food

Then I used a combination of acrylic paints applied with a sponge to completely cover the loaves.  I first applied the darker color (cinnamon) and then went over again with the golden sunset, dabbing it here and there so that the cinnamon still showed through.


Fake Food

After that I dabbed on another shade - coffee latte - to add just a bit more dimension.


Fake Food

Using English Ivy Green and a small brush I highlighted the 'seasoning'.  Most of the time I painted the Spanish moss, but sometimes I just made little markings to look like bits of greens.


Fake Food

Here is how the two half-loaves looked.  Because I planned to wrap them in paper I didn't bother to paint all of the way to the end.  You can see the original coloring compared to the painted ends.


Fake Food
Fake Food
Fake Food

For the larger loaf I followed the exact same steps but using different colors - Light Mocha combined with Khaki first and then a little Cinnamon.  The seasoning color was also English Ivy Green.


Fake Food

Here is how the two color combinations compare.  Not drastically different but enough to add variety.


Fake Food

Fake Food

Using craft paper and hot glue I wrapped them up as though they are ready for sale.  The smaller ones I wrapped at one end while the larger loaf I wrapped on the bottom.


Fake Food

And there you have it - faux loaves of bread from recycled materials!

The cheese wedges and crackers were found at garage sales, but you can find similar on Amazon.  Just search "fake cheese wheel" or "fake crackers" and you will find a lot of fun options.

**********

I hope you enjoyed this how-to decor post, thanks for stopping by!
-Jennifer


Winter Tiered Tray Decor

**********

Cricut Cutting Crafting


Friday, December 8, 2023

Baking Pan Makeovers: Christmas Tree & Bundt

Fake Bake Crafting

Fake Bake Crafting

I've got another couple of holiday themed baking pan makeovers to share with you, this time Christmas!  Check it out:

**********


Disclosure - This post may contain affiliate links.  If a purchase is made through an affiliate link then (at no additional cost to you) I will receive a commission.  You can read more about affiliate links here


**********
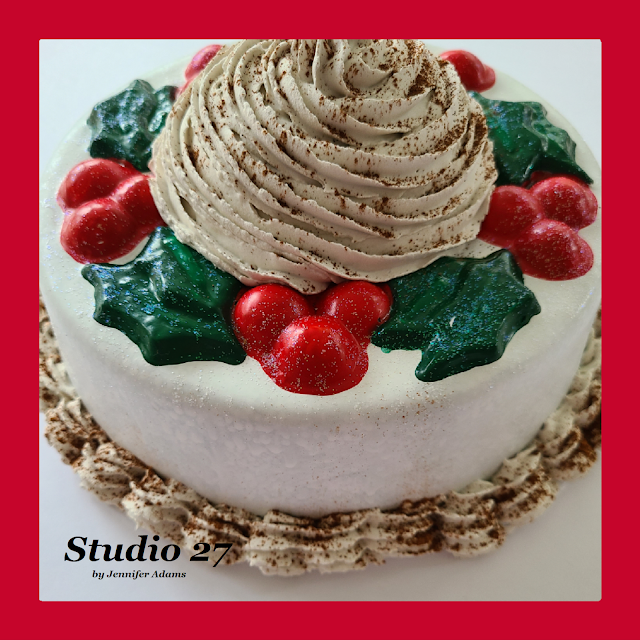
Fake Bake Crafting

Here is the tree pan, thrifted for $1.99


Fake Bake Crafting

I brushed on acrylic.


Fake Bake Crafting

And then followed up with puffy paint for the colorful lights.

(You might remember seeing this pan hanging in my breakfast room from this post)

Now on to the Bundt:


Fake Bake Crafting

Also thrifted for $1.99, the base of my 'Bundt' cake is actually an old Jell-O mold


Fake Bake Crafting

I first gave the mold a coat of white spray paint.


Fake Bake Crafting

Then using a sponge brush and white acrylic, I dabbed on more paint to give a textured look.


Fake Bake Crafting
Fake Bake Crafting

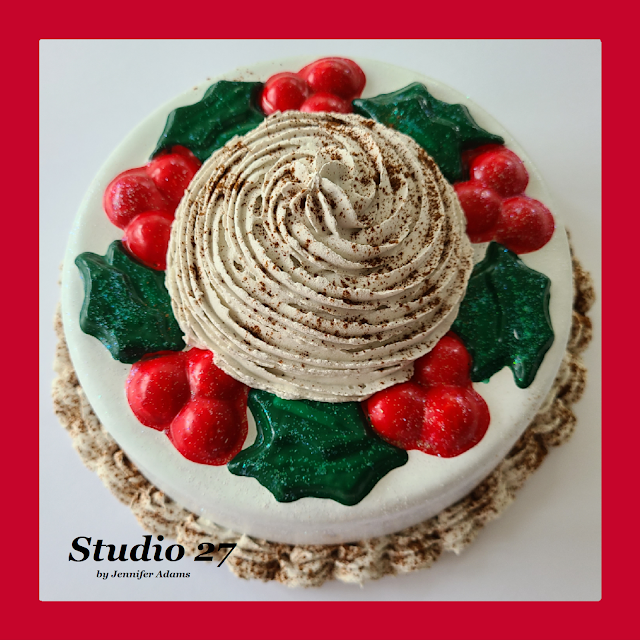
Once the white was dry I painted in the leaves and berries and sprinkled glitter on them while still wet.

  Then using a piece of foam I stuffed it in the center of the cavity to give me a flat surface for the 'icing'.  With light weight spackle in an icing bag, I piped on a mound to cover the middle  and a ring around the base of the cake.  (This post uses a similar mold and will show you exactly how I placed the center foam, as well as created a base for the bottom icing trim)  While the spackle was still damp I gave a nice sprinkle of real cinnamon - not only does it look yummy, but it smells good and won't attract bugs.

And there you have it, a couple more baking pan makeovers!

**********

Like the idea of using cake pans for your fake bakes?  Check out these:


**********

I hope you enjoyed this how-to post, thanks for stopping by!
-Jennifer

© Studio 27 by Jennifer Adams 2023

**********

This post was added to the following link parties:


**********

Do you like the convenience of crafting with instantly available digital downloads?
Check out this week's features from my Etsy shop:

Fake Bake Tiered Tray Decor Printable

**********
Cricut Cutting SVG Bundle Instant Download


**********

This post was featured at:


Friday, December 1, 2023

Gingerbread House Re-color

Christmas Candy Fake Bake Decor

In my recent breakfast room holiday decor post, I showed you this gingerbread house that I thrifted and repainted.  Read on to see the before and after:

**********


Disclosure - This post may contain affiliate links.  If a purchase is made through an affiliate link then (at no additional cost to you) I will receive a commission.  You can read more about affiliate links here


**********

(In case you missed that breakfast room post, you can find it here)


Christmas Candy Fake Bake Decor

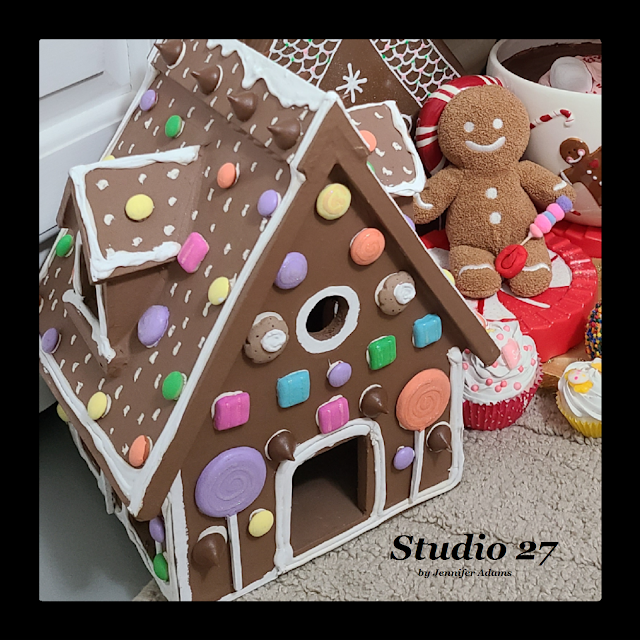
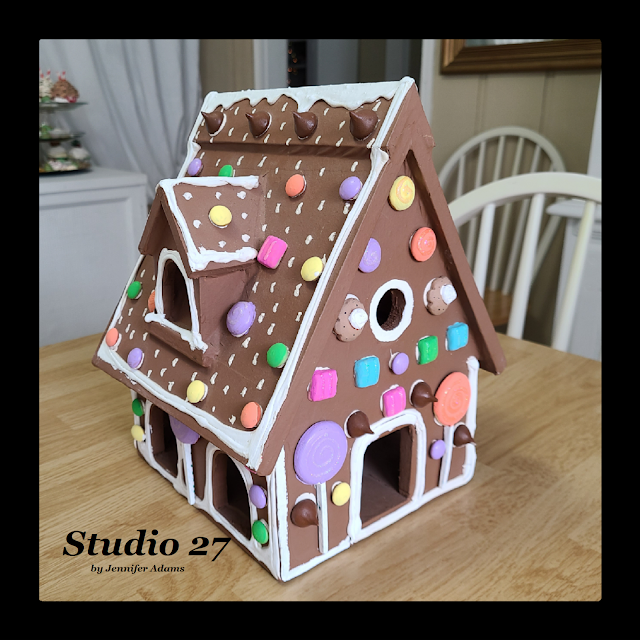
Here is the little house as I found it for $4.99.  I loved that it was a gingerbread home and loved the candies, but not the coloring so much.  I felt like the coloring was a little drab compared to the rest of my Christmas candy decor.  No problem, a little bit of paint and...


Christmas Candy Fake Bake Decor

...everything is better!

Using acrylic paints I recolored all of the candies in brighter shades.  You can't really tell from the photos, but I applied some clear glitter puffy paint as well.  I also repainted all of the icing, making it plain white instead of sprinkled.


Christmas Candy Fake Bake Decor

It fits in with the rest of my decor so much better now!  Whenever I'm thrifting I like to remember that with a little craftiness anything can become perfect 😍

And that's my new (to me) gingerbread house.

**********
I hope you enjoyed this holiday decor post, thanks for stopping by!
-Jennifer


Friday, November 24, 2023

Lighting A Holiday Village

Christmas Village

This year I added a holiday village to my front room and lighted it using a strand of Christmas lights.  Here is how you can do the same:

**********


Disclosure - This post may contain affiliate links.  If a purchase is made through an affiliate link then (at no additional cost to you) I will receive a commission.  You can read more about affiliate links here


**********

Christmas Village

Here is how the village looked without lights - ok but not festive enough.

I found these buildings at the thrift store for $5 each!  One is a Dickens and the rest are from K-Mart, all stamped with dates from the 90s.  They each had their own cord and light bulb, but I removed them for a couple of reasons; one- I don't like having a ton of cords to mess with and two- I don't like using older electrical equipment.  I have several vintage milk glass lamps that I replaced the electrical cords on, but I decided to go the simple route with the village and used Christmas lights.


Christmas Village
Christmas Village

Using tulle, I cut it into strips and tied it around each light.  It gives a softer and fluffier look, as well as  helps to hide the green of the wires.  You could use lights that come with white strands, but I'm dedicated to using what I have on hand so here we are 😄

You might remember me talking about the same lighting method in this dining room post from a couple of weeks ago, where I used it for another village.


Christmas Village

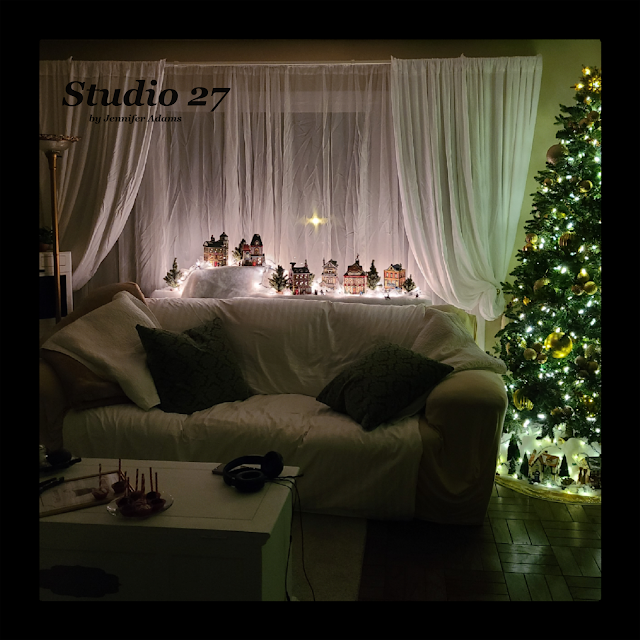
And speaking of that village, I ended up moving it to the front room as well!  Here is how they look, with the new village behind the couch and the old one under the tree.

I wound the light strand in between the houses and made sure to poke some of the lights into their electrical openings.  That way the windows light up as well as the snow cover.  The star in the sky above is a happy accident - it's actually the lamp post in our front yard showing through the window!

Here are close-ups of the new village:

Christmas Village
Christmas Village
Christmas Village
Christmas Village
Christmas Village
Christmas Village

The trees and batting (used for the snow) are from garage sales while the figures are Dollar Tree

And that's my front room village.


**********

I hope you enjoyed this holiday decor post, thanks for stopping by!
-Jennifer


**********

Do you like the convenience of crafting with instantly available digital downloads?
Check out this week's features from my Etsy shop:

Fake Bake Tiered Tray Decor Printable

**********

Winter Holiday Cricut Crafting


**********

This post was featured at:


**********