Thursday, January 29, 2015

Behind the Scenes: Hunting Themed Birthday - Party Baking! (2015)

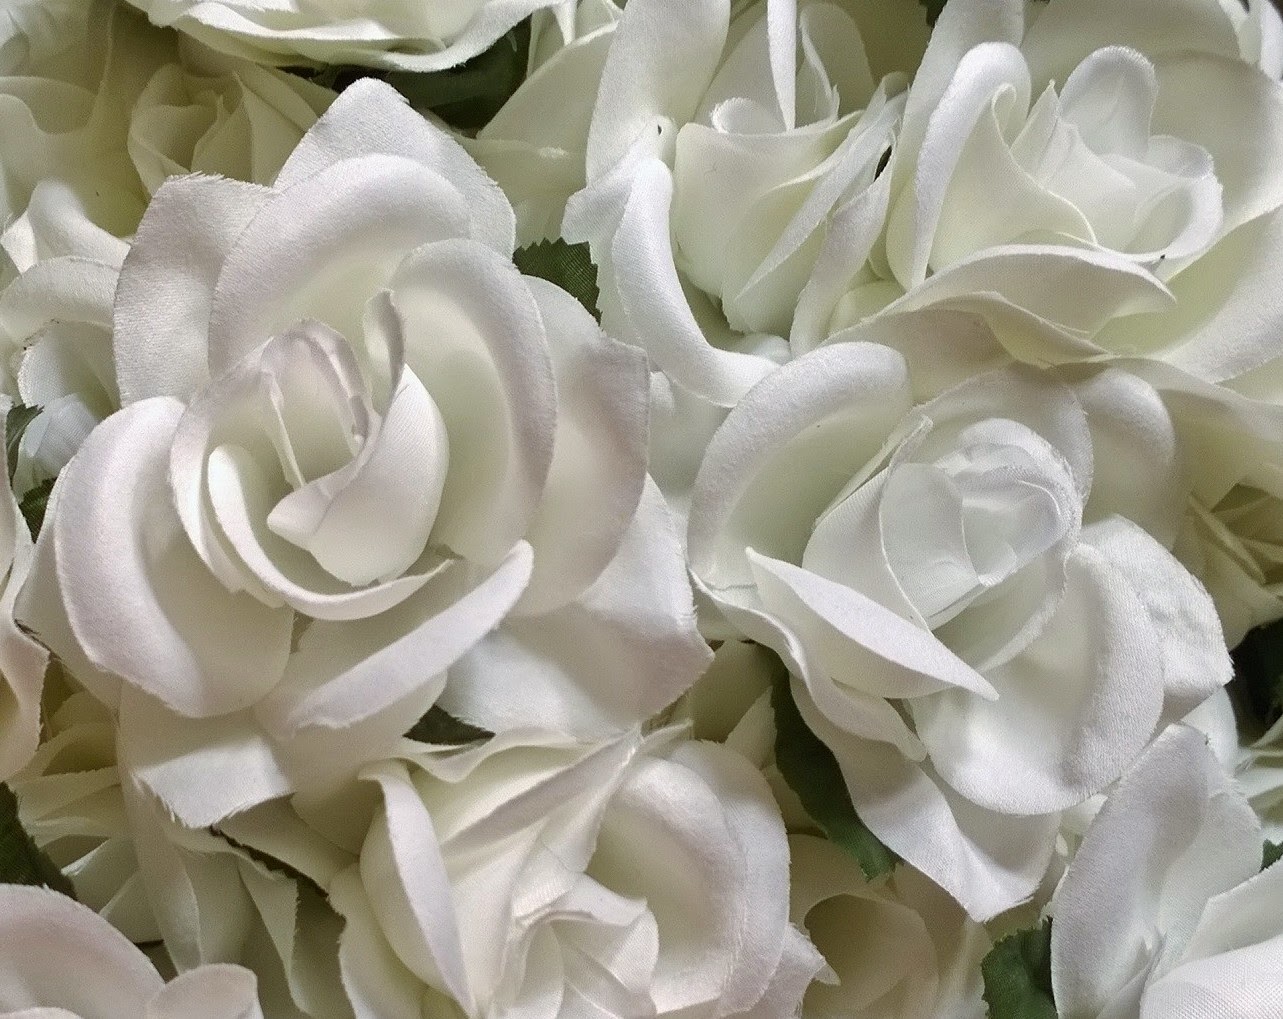
I got to spend a good portion of the day last Thursday in my kitchen baking party treats!

Of course they were deliciously camouflage, check it out:


Supplies

Left:  Chocolate cake mix and chocolate frosting paired with these adorable camouflage inspired sprinkle candies.  With these items I made 24 cupcakes in white liners.

Right:  Vanilla cake mix, 2 tubs of vanilla icing, 1 tub of chocolate icing and 1 package of caramel icing flavor.  I used these ingredients to make 1 large double layer cake and 1 miniature double layer cake for the Little Man himself.


Chocolate Cupcakes

Once the cupcakes were iced, I used sprinkle candies in green, yellow, brown and black to convey the hunting theme.

I baked these first to get them done and out of the way as I knew the cakes would be much more time consuming!


Now on to the cakes.....


Caramel Flavoring

What better way to get the perfect camouflage base color?  Add a tinted flavoring packet.  Not only did the shade of beige turn out perfectly, but the vanilla icing took on a yummy caramel flavoring as well.


Frosted Mini Cake

The first step was to frost both cakes in the beige caramel icing.
The neutral beige tone served as the perfect backdrop for the brown and green detail work.


Adding the Camouflage

 I used dark chocolate icing to create the fist layer of camo detailing.  I chose to start with chocolate because having the darker ("heavier") color on the bottom looks better dimensionally.

For more tips on how I create icing bags and trim my cakes to look their best, click here.


Chocolate Shapes

This was actually pretty easy.  I just outlined a few abstract shapes before filling in with more icing.  Once filled in, I used the tip of the bag to swirl the icing a bit.  I thought that gave the icing a more polished look.


Green Shapes

I repeated the process using vanilla icing that I tinted green with food coloring.  Notice how each green shape is touching or slightly overlapping a chocolate shape.  This gives a bit of organization to an otherwise messy look.


Sprinkles!

I didn't originally plan on using sprinkles, but I felt that the cake looked a bit unfinished.  The sprinkles helped to tie each design element together.


Cake Stand Label

I cut labels out of the ingredient packaging and tied them on to the lid of the cake stand.  I really like the way they finish off the look.


The Finished Cakes

Thank you cold January weather, you came through for me even when both refrigerators were full! 

I forgot Husby had two turkeys thawing out in the extra fridge for his smoker, but his workbench made a great cake storage shelf out in the garage!


Cupcake Tower

This is how the cupcakes were displayed during the party.  I made sure to add a little label here as well, even though they were plain chocolate.  For me, consistency is a big factor of good design :)

I finally have all of my party photos edited so I'll be sharing more next week!
I hope you enjoyed this tasty post, thanks for stopping by!

-Jennifer

© Jennifer Adams Flowers 2015

Tuesday, January 27, 2015

Behind the Scenes: Hunting Themed Birthday - Party Decor (2015)

With the invitations done and camouflage duct tape already put to good use, I needed to bring a hunting theme to the birthday party tables......Hmmmm......ammunition and targets, of course!


Click here to see the party invitations.
Click here to see a plain jar candle receive a little camouflage treatment.


Materials

A few cylinder glass vases that I already had on hand, empty shotgun shells and spent brass casings that I borrowed from my Dad and Brother.

Nothing brings home the idea of hunting quite like ammunition, but I would like to stress a couple of safety points:

  One, I made sure to use empty shells and casings (if inserted into a weapon they could not fire, if compressed or heated they could not explode, etc, etc, etc).  And two, I made sure that the empty shells/ casings were enclosed inside of glass containers.  Used ammunition may contain traces of gun powder or lead, so it's best kept out of the reach of children.


Finished Table Vases

Not your typical table arrangement, huh? :D
I loved the way these turned out!  


Targets

This was simply a package of pre-made paper targets I purchased from the sporting goods section of Wal-Mart ($2).  I thought they would look better without the excess labeling so I cut out the circular pattern and they were ready to go.

I used these as part of the table decor during the party, but plan on working them into scrapbooking pages as well ;)


I'll be back in a few days with step-by-step instructions as to how I iced a camouflage cake.
Thanks for stopping by!

-Jennifer

© Jennifer Adams Flowers 2015

Saturday, January 24, 2015

Behind the Scenes: Hunting Themed Birthday - Party Candle Upcycle (2015)

Recently I shared with you the invitations for Little Man's hunting themed birthday party.  

 (You can find that post by clicking here)

In that post I showed you how I used camouflage duct tape to create the invitations.  Today I'm sharing how I used more of that same tape to dress up a candle.


 Vanilla Cookie Jar Candle

I wanted a white jar candle for the party that was scented like a baked good, this was perfect!

Wal-Mart sells these large jar candles for about $5 year round.  During the holiday season they introduce themed scents such as pine, cinnamon and cookie and then reduce the price to $1 the day after Christmas.  That's when I like to stock up, but you have to be quick as they sell out fast.  I was able to get 2 pine, 2 cinnamon and 4 cookie scents!


 Much Better!

A little hot water and most labels come right off of your glassware.


 Camouflage Duct Tape

I knew this print would make the perfect replacement label

(I used the same roll of tape for the invitations, candle and utensil cups at the party, and still have some left over)


The Finished Product

I loved how the candle turned out; simple but very on-theme.

This cute little candle is still burning as I type up this post.  We had Little Man's party today, and it was such a good time!

But for now:
Everything has been cleaned up and put away.
Husby and the kiddos are fast asleep.
 I am enjoying the quiet and taking the opportunity to work on photos, editing and drafting...

...there is a whole lot more birthday design coming soon... 

I hope you enjoyed this post, thanks for stopping by!

-Jennifer

© Jennifer Adams Flowers 2015

Wednesday, January 21, 2015

Photos From the Workroom

It's a crazy busy week.  

I'm working on creating five separate wedding packages. 
I'm working on photographing and editing those five separate packages.  
I'm getting everything designed and ready to go for Little Man's birthday party this weekend.  
Every one of us has yet another cold....the joys of being a kindergarten family :)  
And I decided that this was the week to start writing my book......

I'm not crazy....am I?  :D :D :D

Anyway I thought I would share with you a few photos from my workroom.  I  haven't watermarked them, they are free for you to use and share however you like.  Enjoy!


 White Roses


 White Dahlias


 Yellow Dahlias


 Two-Toned Daffodils


 Pink Roses


Red Roses


I hope you liked the photos, thanks for stopping by!

-Jennifer

© Jennifer Adams Flowers 2015

Thursday, January 15, 2015

Hunting Themed Birthday Party: Invitations (2015)

The Little Man will be having his first ever birthday party soon!  I'm having a lot of fun designing and planning his celebration, which will be a hunting theme.

Check out what I came up with for the invitations:


Christmas Cards

Remember these?  I found this entire package of Christmas cards for .10 last summer when I was treasure hunting.  I knew they would be perfect to recycle into party invitations.

(You can find that treasure hunting post here)


 Deer

The first thing I did was to cut out the deer silhouette.....and toss the rest of the card into the recycle bin ;)  The brown background for the deer was cute (that you could see when the card was closed)  but I wanted something more masculine for this project.


 Base Paper

Next I found some scrapbook paper that could be cut down to the size I wanted.  I loved the beige of this paper but not the border, so off it went.  I cut the remaining paper into thirds.  It only took three sheets of paper to make the nine invitations needed.


 Camo Detail

I wanted some sort of a background for the deer silhouette and this camo printed duct tape was just the thing!  I added one strip of tape to each length of beige scrapbook paper.

(I found the tape at Dollar Tree for $1)


 Deer Silhouette in Place

After placing the tape, I used hot glue to attach the deer silhouette at an angle.  I use angles a lot when designing, it makes things look a lot more interesting and saves space. Seriously, I love angles!

Scrapbooking Tip:  Placing photos on an angle will often allow you to fit more per page.
Interior Design Tip:  Placing furniture on an angle often creates better traffic flow and gives the feeling of more space in a room.


The Finished Invitation

I searched Pinterest until I found invitation wording that I liked, then combined it with the information I needed to add.  After printing up the wording, I cut it out and glued it onto the invitations.  Here is the wording in case you can't read it from the photo:
 
~~ATTENTION HUNTERS~~
Grab your gear and head this way,
Little Man is having his first Birthday!

Tip:   make sure you use the right glue.  I thought I could grab one of Baby Girl's glue sticks from the kitchen drawer.....as opposed to getting out, plugging in and waiting for my glue gun to heat up...hey, I was tired!.....and the glue isn't sticking to the duct tape all that well.  Live and learn! :D


The Little Man will be waking up from his nap anytime now, so I'm going to leave off here.  But I'll be back soon with more party fun.  Happy designing and thanks for stopping by!


-Jennifer

© Jennifer Adams Flowers 2015


Tuesday, January 13, 2015

From the Archives: Baby Lunch! (2015)

Since I have always been a planner, I made sure that all the baby equipment we acquired for Baby Girl was in a neutral color palate.  That meant other than diapers and boy clothing, we had everything we needed for a second baby.

To throw a baby shower when we didn't need gifts seemed tacky, but I still wanted to celebrate the new baby.  I also wanted to have photos so that his second-born baby book would be as nice as the first-born baby book.  And I wanted the opportunity to do something special with my Baby Girl, something that would help her prepare her little heart and mind for the new arrival ;)

So we decided to host what we called the 'Welcome Baby Lunch'.  Baby Girl and I worked together looking at Pinterest ideas, planning a menu and decorating.  It was a lot of fun!  Our theme was snowflakes, with baby items added in here and there.

We kept the party very small by limiting the guest list to the two Grandma's, one Great-Grandma, my Sister and one Sister-in-Law.  We also noted on the invitation that no gifts were needed, we just wanted to celebrate!

Note:  I took these photos before I started blogging, so the intent was to capture the emotions/ memories of the day as opposed to the 'how-to'.  You can see the difference as to what I usually post, but I think you should still be able to get a good feel for the overall design.  Enjoy!


Dining Table

I used a white table cloth and layered on white holiday lights.  To make the lights softer looking, I tied on many strips of tulle fabric (thank you Pinterest!)

The next step was to add cylinder vases that were filled about an inch high with faux snow.  On top of the snow I placed a single baby bottle.

Then I added in a few glass jars filled with creamy white crushed velvet poinsettias.  I wanted some sort of floral decoration, but I didn't want the table to look 'flowery'.  I also wanted something that could be recycled into my yearly winter decor.  The poinsettias worked perfectly.

I wanted candle light as well and used vanilla scented votive candles in my vintage juice glasses.  These pretty glasses were a gift from my Husby, who found them while mushroom hunting of all places! ....Something about a farm, a house being torn down and a man with a tractor burying trash.  Husby saw the glassware and asked if he could have them, then brought them home to me.  Yay!

Want to see how I made 'snow balls' with faux snow?  Check out my Winter Decor post here.  There you will also see how I currently use some of the left over white poinsettias.

*This was not a dark candle-lit party, I just had the lights off for the scrapbook photos :) 


Another view of the dining table.


Table Scatter

I used miniature plastic snowflakes as confetti throughout the party.  I found these in the holiday section of Wal-Mart before Christmas.  I think they were around $1.

(I saved all of the snowflakes to use as embellishments for the coordinating scrap book pages.  Hello glue gun!)

I also added in a few pacifiers for the cuteness.  I didn't have to buy these either, they were all left over (still brand new) from Baby Girl.  She would never take a pacifier, so I had a bunch in storage.  Guess what?  The Little Man would never use one either.  At least I used them for something ;)

You can't see from these pictures, but in addition to the table scatter there was a miniature white snowflake ornament at each place setting.  I found the ornaments at Wal-Mart, and each guest got to take theirs home.  I also made sure to have enough left over so that Baby Girl and I each have one as well.  Now when we decorate our Christmas tree, we remember the party that we hosted together :)


Dessert Table

Since we were eating in the dining room, I used the kitchen table as a dessert station. 

A white table cloth served as a snowy backdrop for the yummy treats.  I used blue snowflakes as confetti to break up the sea of white and layered the napkins.  I always layer out my napkins this way, even if they are all the same color.  It looks so much prettier and is also a great space filler.  Full displays are always much more appealing!


Hershey's Chocolate

I saw this cute idea on Pinterest.  Color in specific letters to end up with chocolate bars that spell out 'he' or 'she'.

I used two different colored Sharpies for the lettering and nestled the chocolate bars into a milk glass pedestal bowl.  An aqua colored napkin helped to provide contrast so the tiny snowflake ornaments could pop.


Snowflake Cake

I cannot remember what kind of cake this is!

I do remember that It is a double layer with the bottom layer being round and the top is snowflake shaped.  I also remember that when I iced the cake it didn't look so much like a snowflake anymore :D

I used miniature white marshmallows to help define the snowflake a little bit better and added some white pearly sprinkles too.  To achieve the snowflake shape on top, I used a cookie cutter as a stencil for the sprinkles.

I had absolutely no intentions of using marshmallows for this cake, but it ended up turning out really cute.  That's the way it is in design, creativity and flexibility are keys to success!

....It's ok to have a bit of a freak out though, I was rummaging through every cupboard trying to figure out how to fix that cake! :D :D :D


Cupcakes!

These cupcakes were baked with Devil's Food mix and iced with chocolate frosting.  On top I sprinkled chopped up Andes mints.....They were super yummy, a total pregnant ladies dream! 

I baked the cupcakes in white silicone wrappers and displayed them on my three tiered glass cupcake stand.  I also sprinkled a bit of white snowflake confetti here and there on the glass for added visual interest.


It was such a fun party, and I could go on forever,  but right now I need to get pack to planning a First birthday party for a certain Little Man - birthday posts coming soon! In the meantime, if you would also like to read about my shower for Baby Girl, you can click  here.

Happy designing and thanks for stopping by!

-Jennifer

© Jennifer Adams Flowers 2014

Saturday, January 10, 2015

Winter Decor (2015)

Here's how I feel about winter:  December is ok and that's it!  :D :D :D

Christmas makes everything cozy, but after that things are dark, bleak, cold and miserable.  I needed to make the wait for spring a bit more manageable so I started decorating for Winter and Valentine's Day a few years ago. (With the Little Man's winter birth I get to throw in birthday decorating now too!)

Thankfully I had the fantastic idea to start saving Baby Girl's outgrown hats, mittens and gloves to use as adorable decor items.  I'm adding in items that the Little Man has outgrown as well, and have also collected a few 'snowy' decorations.  Now I can't wait to get the winter decor out every year and I actually enjoy the winter season!  Take a look;


Snowflake Boxes

I purchased these cardboard snowflake boxes over 10 years ago from Wal-Mart.  Originally I planned to use them with my Christmas decor, but the silver and white didn't go with anything else that we had.  They were too pretty to part with though, so I kept them as storage boxes for some of our more breakable ornaments.  The poor things spent a decade in hiding!

Now they get to come out every year and are much happier.


Hats & Mittens

I absolutely love this!  I took my large glass jar and filled it with hats and gloves.  How cute is that?!

The white mittens have ribbon attached to the backsides with little safety pins.  Last year I had them hanging from the curtains, but it looked a little too much like laundry.  I thought I would try hanging them from the lid of the jar instead and love the way it turned out.


Winter Baby Jammies

In one of my cake stands is a couple pairs of cute little toddler jammies.
Pink or blue, can you tell who's who?  :D


 "Snow Balls"

I made these snow balls last year during the dreaded 'Polar Vortex' (insert scary music here).  We knew we were going to be stuck inside the house for a few days, so I made sure to have projects to keep Baby Girl and I busy.  She painted a jewelry box and I played in the 'snow' :)

I found the Styrofoam craft spheres at Wal-Mart (I think) but can't remember the cost.  The craft snow is finely shredded plastic that I found for .25 while treasure hunting.  The photo on the packaging showed it being used as part of a Christmas village, but without glue to hold it in place it goes everywhere!

To make the snow balls I rolled the spheres in white school glue until they were fully coated (make a puddle of glue on a paper plate).  Then I rolled the gluey spheres into the fake snow and let them dry.  It was that simple and they look great!

A pair of socks hanging the same way as the mittens and a little hat with ears (Awww!) complete the look.  You can kind of see that the pictures I have on display are family sledding photos.


Trifle Bowls

One filled with a Baby Girl's scarf and the Little Man's hat, another filled with more snow balls.


Glass Jars

On the left my jars are filled with acrylic ice cubes and faux snow.

I found the cubes treasure hunting for .50 but you can find them at many craft stores.  They are often marketed as decorative vase filler for fresh flowers or to use as table scatter for parties and events.  I wanted a jar full of ice that wouldn't melt, so that's how I used them ;)

The faux snow is the same snow that was used to make the faux snow balls.

The Jar on the right is filled with creamy white fabric poinsettias.  Baby Girl and I hosted a Welcome Baby Lunch last year when I was pregnant with Little Man, and these are the Flowers she picked out.  We had a few jars of these as part of the table decor for the party along with candles, lights, tulle and a few baby items.  I saved one of the jars to use every year for winter decor - Yay memories!

I'll be posting soon with photos and more details from that party!


Winter Printable

This is the only winter printable I have so far.  I simply printed the phrase; "LET IT SNOW!" on to a plain sheet of paper before layering it onto a more textured sheet.  A few snowflake stickers and a pretty frame left me with a cute winter themed printable.


In the Kitchen

Top Photo:  On the window sill  I have a couple of snowflake cookie cutters.  I love how this picture turned out, you can see how cold it is!

Bottom Photo:  These candle plate and jar shade accessories were Christmas gifts from my Sister.  The glass has a crackle finish and tiny snowflakes are falling among the pine boughs.  The snowy design is perfect for winter and I used a plate stand to support the candle plate.  I like it standing up so that I can see it from anywhere in the kitchen.  Thank you Sister!


Snowy Cupcake

This little cupcake came in a set of three and were a gift from my Mom a few years ago (Thanks Mom!).  The other two cupcakes are red and green, so they live with the Christmas stuff.  (You can read the post where they are pictured by clicking here)

This winter cupcake is sitting on a cake stand on my bakers cabinet in the kitchen.  (You can read my kitchen decor post by clicking here)

That's the Winter decor I have for now.  Eventually I want to add a few more printables and a whole lot more photos now that Little Man can walk and play outside in the snow.  Once the season is over this year I will be adding both Baby Girl and the Little Man's snow boots (they won't be able to wear them next year).  I also want to somehow incorporate hot chocolate.....I just haven't figured out how yet....:)

Thanks for stopping by!

-Jennifer

© Jennifer Adams Flowers 2015


Wednesday, January 7, 2015

Our New Year's Eve (2014)

Since I'm stuck inside avoiding a nice, balmy temperature of 4 degrees (sarcasm), I'd  thought I would take a moment to update my blog with a New Year's Post :D

We decided to celebrate New Year's Eve by eating a lot of Chinese food in our own dining room.  It was fun, and you know I have a lot of pictures, but first let me show you my New Year's Decor:


A trifle bowl filled with party supplies.

I am one of those people who takes down all of my Christmas decor the day after the holiday.  I put it all up the day after Thanksgiving and love every bit of it every day...until the clock strikes midnight on Christmas Day.  After that moment, the magic is gone and it all becomes clutter to me.  So away it goes! But that's ok, because I need to get out the Winter and New Year's decor anyway :)

Except for the noisemakers, everything pictured here has been collected over the years.  

I keep a separate bag for New Year's decor in the same bin as my Winter decor.  That way I only have to grab one container from the freezing cold garage after Christmas.  I put out both New Year's and Winter at the same time and a week later (when New Year's is already over) I can quickly stash the New Year's decor right back into the same box.  This leaves the Winter decor already in place and I get to relax a bit ;)

*My winter decor post will be coming soon*


A couple of fancy masks.

These were purchased with Baby Girl in mind (Dollar Tree).  I knew she would enjoy playing with them, and I would get some great photo opportunities.


Celebration Table

When it came time to set the table for our celebration dinner, I simply pulled a few New Year's items from our holiday decor.  I used a small fleece winter blanket as our table cloth...yep, that's a blanket!

(If you missed my previous post detailing my glassware and plates, click here)

I left the table like this, simple and empty, so Baby Girl could take over......


......and here are her contributions.

She did a great job, don't you think?

I love that even at such a young age, she already has an eye for design!


 Our Feast

We had:  Sweet & Sour chicken with rice and veggies, egg rolls, pot stickers and crab rangoon.

I spent all day in the kitchen cooking, keep scrolling for my recipes......


......just kidding!  :D :D :D

Thank you Pagoda Express and Campbells for making this a super easy and yummy meal!

I did use a couple of tricks to keep it healthier though; I baked our sides until they were nice and crisp and I boiled our chicken instead of frying it.  

We follow a heart healthy diet around here so that means lots of chicken/ turkey and I rarely fry anything.  Since Husby and I both have good cholesterol levels, we get to have a 'cheat' (AKA unhealthy) meal each week.  This was our cheat for the week of New Year's.   Although I still chose  not to look at the salt content of these items...it was a holiday ;)


Dessert: Ice cream in a tuxedo!

What the what?!?!  Aren't these little chocolate tuxedo cups the cutest things?  My Aunt Linda sent a gift basket to my parents house for Christmas that was full of fun and yummy things.  I got to take these tuxedo cups home with me!


Dressing Your Ice Cream

I added a little bit of cookie ice cream before topping with Cool Whip and chocolate sprinkles.  They were really cute and the kiddos enjoyed eating them.  Thanks Linda!

That's how we enjoyed our holiday, how about you?

-Jennifer

© Jennifer Adams Flowers 2015