Friday, September 30, 2022

New House Makeover: Craft Room

Craft Studio

I've been waiting a very long time to have my own craft studio space, and after moving into our new home I finally got it!  Read on to see how I transformed our back sunroom into my craft room:


**********


Disclosure - This post may contain affiliate links.  If a purchase is made through an affiliate link then (at no additional cost to you) I will receive a commission.  You can read more about affiliate links here

**********

If you have missed any of the other new house room tours, you can check out these links:


Not on to the craft room...😄


Craft Studio
Craft Studio

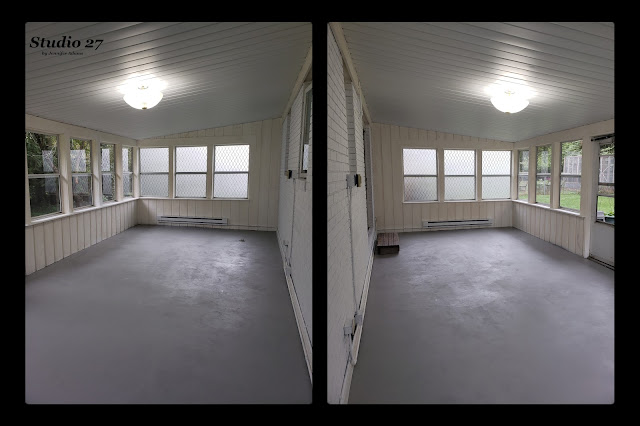
Here is how the porch was when we moved in - a nice big space with lots of windows and dark cedar siding.  I started out by cleaning the floor which my husby then refinished in gray.  It took me two hours - no joke - just to get all of the windows open!  It had been so long since they had last been opened that they were sealed shut with dirt and grime.  After that it was a couple of afternoons cleaning them inside and out.  Finally I repainted (with some help from my babies 😍) and that monster job took three coats as the thirsty cedar kept soaking up the paint.

I went in to this room thinking a few days of a quick clean and repaint, and it ended up taking me close to three weeks!


Craft Studio

And here we are with the floors and walls refinished.  Because the room is fully windowed on three sides, two sides faced the neighbors back yards.  Wanting privacy I used window cling to obscure those two sides.  You can read a step-by-step tutorial of how I did that  here.

**********

After that it was time to fill the room up:

Craft Studio

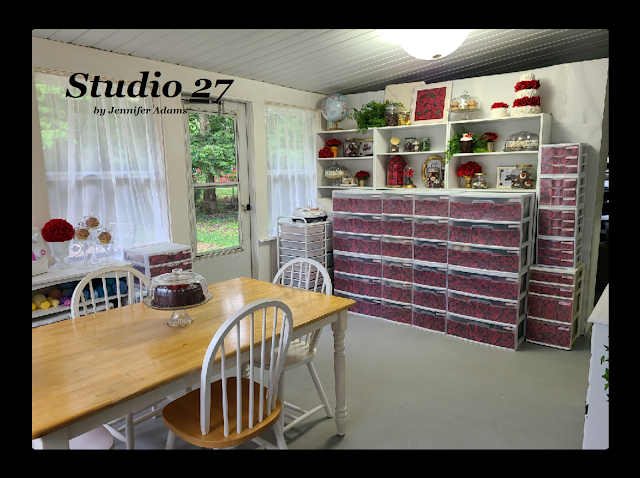
Attached to the family room, here is how the room looks when coming through the sliding door.  Starting at the left I have my Cricut cutting cart (organized like this), painting supplies, general tools, fabrics, yarns and all things sewing.  The dining table in the middle is great for having a large work surface and space for my favorite people to join in.

For the decor I used a lot of white furniture and storage with gold touches, faux cakes/ cupcakes/ chocolates and my favorite red roses.


Craft Studio
Craft Studio

Moving on to the right is my Cricut press cart and a wall of shelving with plastic drawer storage in front.  I placed the drawers in front intentionally so that I could use the shelves on top for pretty things and the bottom shelves are for hidden storage.  All I have to do is pull a drawer completely out and then I have access to the shelves behind.  

The shelving is also creating a wall that splits the room in two.  If you were to go beyond the shelving, I have turned the back part into a walk in closet.

The globe up on top of the shelf is a visual that I use for blog inspiration.  Whenever I get a hit from a new location I stick a push pin into that country, you can see a post about that  here.


Craft Studio
Craft Studio

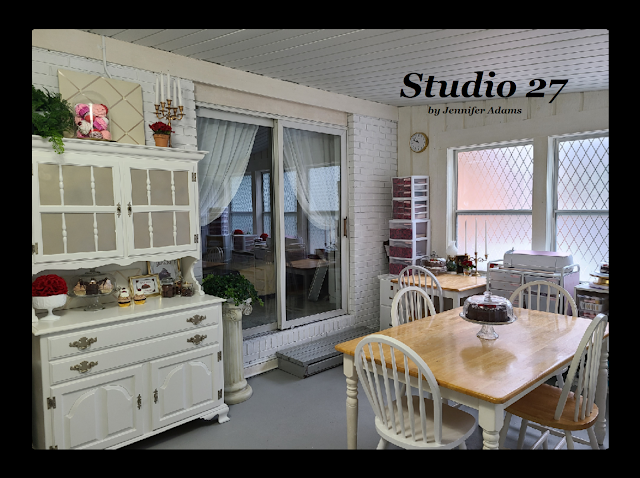
Continuing on to the right is a thrifted cabinet that I refinished to hold all of my beads, glitter, jewelry making and fake bake supplies.  On the other side of the sliding door is a small table that I use for a desk with my filing cabinet and office supplies.  Right now my computer is still in the front room of the house but I'm still toying with having something out here.  I like my big screen for my digital art and it's too big for this desk area.  At the same time I don't always like rolling my Cricut cart all the way across the house into the front room, just because it's heavy to lift up the step.  Maybe a laptop out here just for cutting, but I could still design inside?  I'll figure out something eventually 😊


Craft Studio
Craft Studio

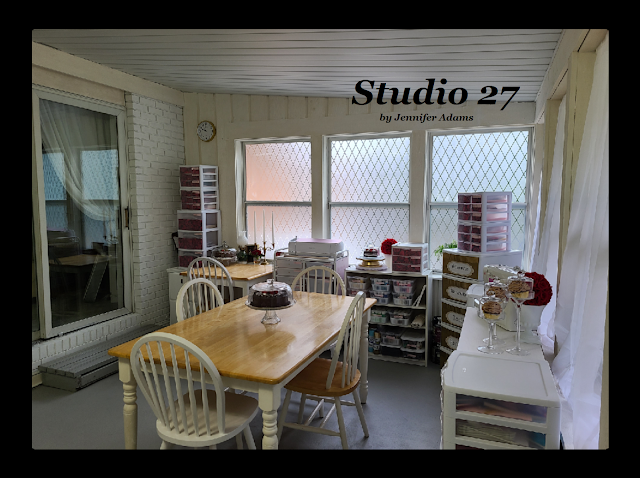
Here are a couple of more shots, just to see how everything is from every angle.  I have a series of posts planned for next month where I will take you inside the storage and organization of all the drawers 😊


Friday, September 23, 2022

DIY Hula Hoop Antler Wreath

 Antler Decor


Wanting a large wreath to hang outside of the front door of our new home, I also wanted it to be light weight, inexpensive and durable!  Here is how I put one together myself using a hula hoop base:


**********


Disclosure - This post may contain affiliate links.  If a purchase is made through an affiliate link then (at no additional cost to you) I will receive a commission.  You can read more about affiliate links here


Antler Decor

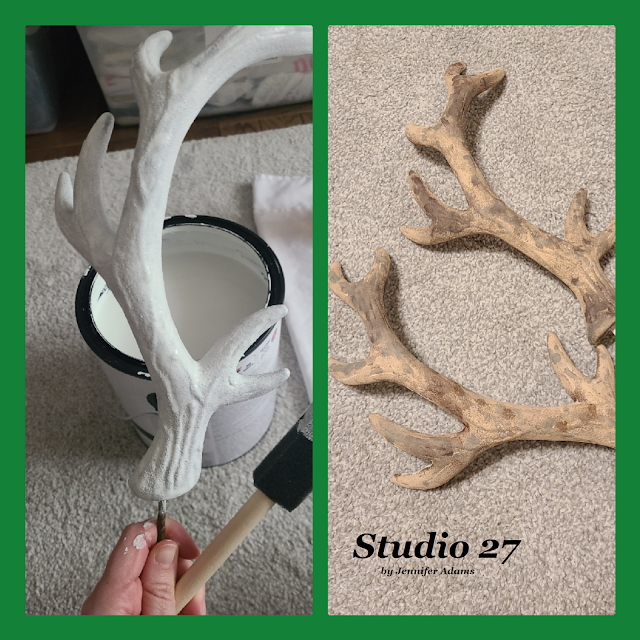
Here are the materials that I began with; a hula hoop that I wrapped with floral tape and foam antler picks that I repainted to look more realistic.


Antler Decor

I found the antler picks in the holiday section of Walmart at Christmastime a few years ago.  I liked them because they were life sized, light weight, and I knew they could be repainted (they were originally brown and gold glitter).  Using acrylic paints I brushed them completely in white first (to cover and seal the glitter) before sponging on shades of browns and grays.  Once complete I used a clear sealant spray to protect them.

*Note - Don't try using spray paint on your foam pieces, the propellant will eat away at the foam and ruin your item!

A search today of Walmart's website lists the picks at around $35, which is nuts!  Here are similar ones at Hobby Lobby at a much better price.


Antler Decor

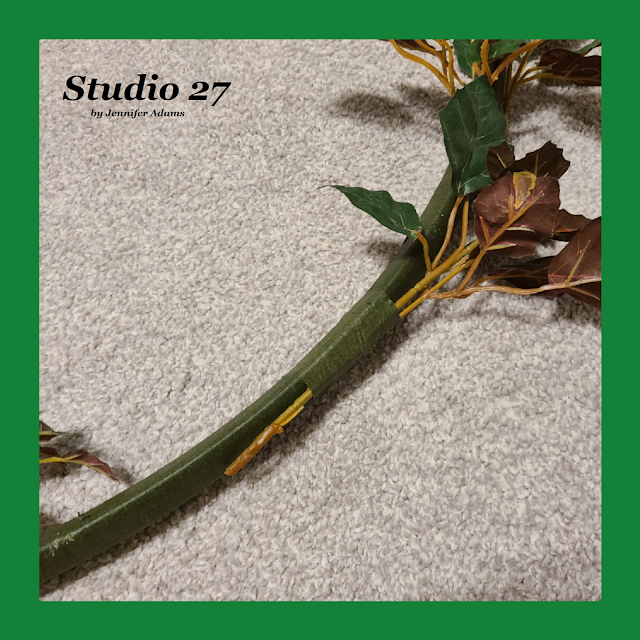
Once my antlers were complete and set to the side, I began working on my wreath using faux greenery from my stash.  I had already covered the hoop in floral tape which made it a pretty color and gave it a sticky surface for my greens to hold onto.  I began attaching the greens in small sections, using more floral tape to wrap them on.


Antler Decor
Antler Decor

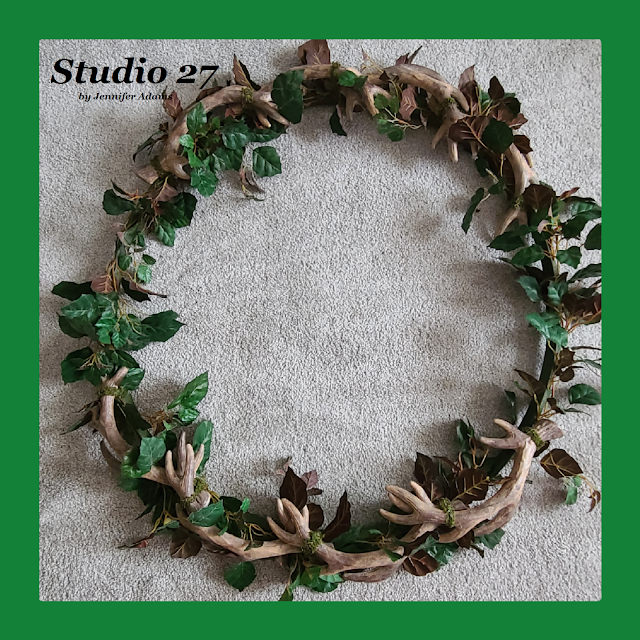
Working in sections I added greenery bit by bit until my wreath was fully covered.


Antler Decor
Antler Decor

After that it was time to add the antlers.  I cut off the pick part of the antlers and attached them one by one to the hoop using zip ties, making sure they were nice and secure.  Each time I added a new antler I would overlap it on top of the previous antler to cover that antler's zip tie.


Antler Decor

In order to make sure everything was nice and attached though, I did have to add more zip ties that ended up being visible.  No problem, a bit of faux moss and some glue covered the plastic right up!

Tip:  Make sure to use faux moss here if your wreath is going to go outside, real moss will deteriorate in the weather.


Antler Decor
Antler Decor
And here is the finished wreath as is hangs by the front door.  We plan to repaint the siding in a shade of gray but for now, this will do.  I love the natural tones of the antlers with the greens and so far, it has held up well in the weather.


And there you have it, an easy to make antler wreath!


Friday, September 16, 2022

Faux Food From Dollar Tree Pet Toys: Part 2 + Snack Food Display

Fake Food Decor

Today's post is a combination how-to and storage/ display post.  I'm going to show you how I repainted Dollar Tree pet toys to look like pretty faux food, as well as show you how I store/ display my fake snack food collection.  Check it out:

**********


Disclosure - This post may contain affiliate links.  If a purchase is made through an affiliate link then (at no additional cost to you) I will receive a commission.  You can read more about affiliate links here


Fake Food Decor

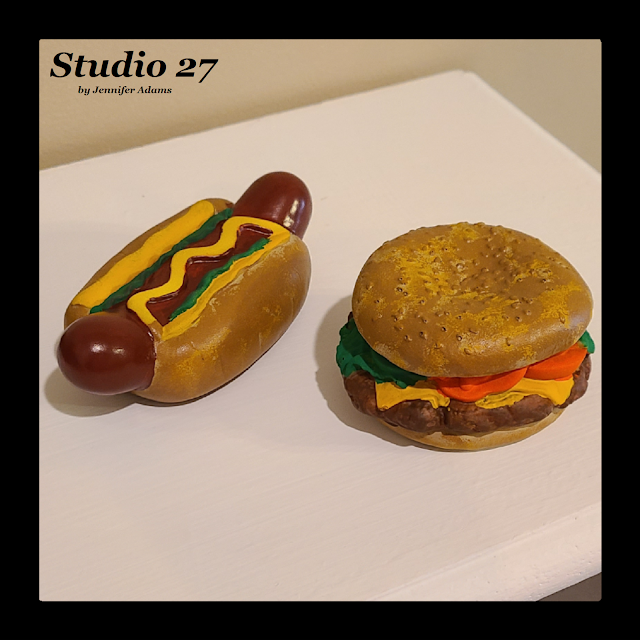
Here are how the pet toys looked as I bought them from Dollar Tree.  The size and shape were great, but the coloring could use help.

Note:  This isn't the first time I've used pet toys in my fake bakes, the link list at the end of this post contains another pet toy/faux food tutorial 😊


Fake Food Decor

Using acrylic paints in Khaki, Kings Gold and Coffee Latte, I used a sponge brush to apply the color by dabbing it on.  I like to start with my lightest shade first (khaki, top right) and then add darker colors as I go (kings gold second and then the coffee latte)

It might seem frustrating at first, but keep playing around with your colors until you like what your have.  You can always add more of a shade if you think you need to, or even start over.


Fake Food Decor

I used the same process for the hot dog buns, and then fixed up the condiments/ meats by using more acrylic paint that I applied with a brush.  

**********

Once dry I added the hot dogs and burgers to my snack food display cabinet, here are some pics of that collection:


Fake Food Decor

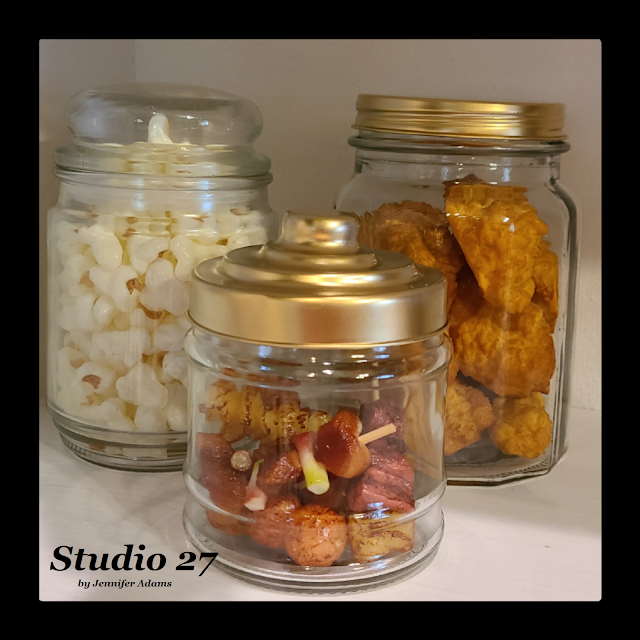
The little finger sandwiches were made using leftover spray foam pieces, you can see how I did that  here.  The hot dogs are also pet toys that I repainted and I found them at the thrift store.


Fake Food Decor

This photo shows all of the Dollar Tree pet toys.


Fake Food Decor

The faux popcorn was a holiday tree garland that I took apart and put into a used candle jar.  The chicken wings here and the kabobs here (note how tiny they are before purchasing).


Fake Food Decor

The sandwiches are play food toys that I hot glued together and the soda I made with thrift store glassware, resin, faux ice cubes and acrylic paint for color.  You can check out this post for step by step directions.


Fake Food Decor
Fake Food Decor

The popcorn containers came in a set with the foil wrapped burgers and sodas that I found on Ebay for around $50.  It's been a few years since I bought these and unfortunately the seller is no longer available.  I looked for similar sets but didn't find anything.  You may have to buy them piece by piece if interested, though it looks like they have gotten quite expensive - I saw single burgers going for $30!

The popcorn ball I found at a thrift store and I think is intended to be a holiday decoration.  I bet you could make your own by gluing some of the faux popcorn to a foam ball.


Fake Food Decor

These tacos also came from the Dollar Tree pet section and I repainted them in the same way.


Fake Food Decor

The hot dog sandwiches in the trifle bowl were an Amazon buy that's no longer available.  I couldn't find a similar style, but a 'fake sandwich' search on Amazon does bring up a lot of other cute options!

**********

And there you have it, easy and inexpensive fake bake décor from dollar store pet toys, as well as my faux snack food collection!

**********


Friday, September 9, 2022

Faux Food Storage & Display: Breakfast

Food Decor


Hello and welcome back for another faux food storage and display post!

Today I'm sharing my breakfast food cabinet, scroll on to see a photo of each shelf individually coupled with close-ups and descriptions:


**********


Disclosure - This post may contain affiliate links.  If a purchase is made through an affiliate link then (at no additional cost to you) I will receive a commission.  You can read more about affiliate links here


**********

In case you missed any of my previous faux food storage and display posts:


Now on to that breakfast display- 


Food Decor

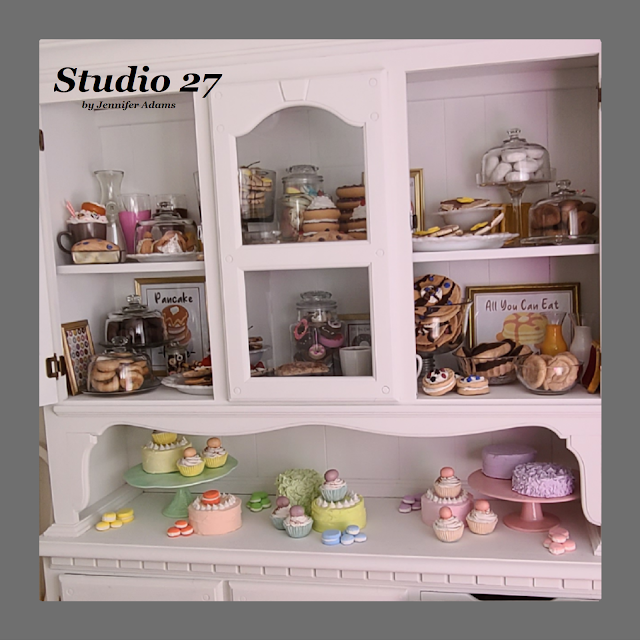
These photos show the cabinet with doors opened.  I found this thrifted piece for only $48 and was thrilled to make a home for all of my faux breakfast goodies in the glass door cabinet section.  The bottom is an open display that I change out seasonally and in these pics you can see some of my spring collection.


**********


Top Shelf:

Food Decor

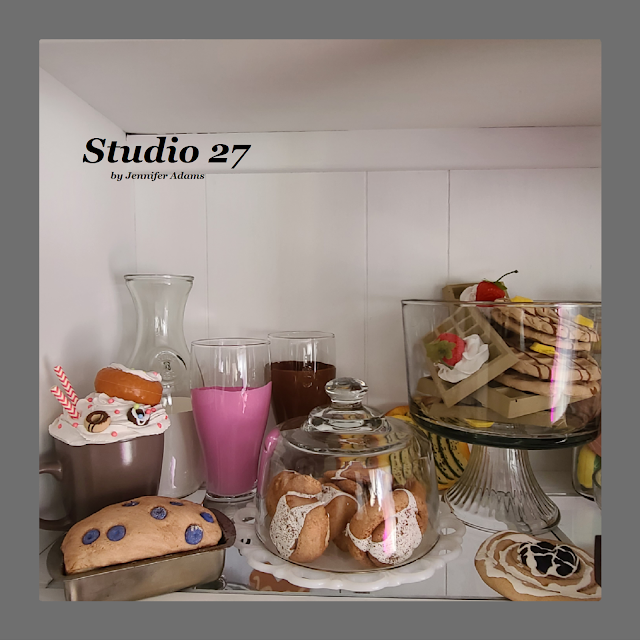
The plain, strawberry and chocolate milks are acrylic paint inside of glass containers.

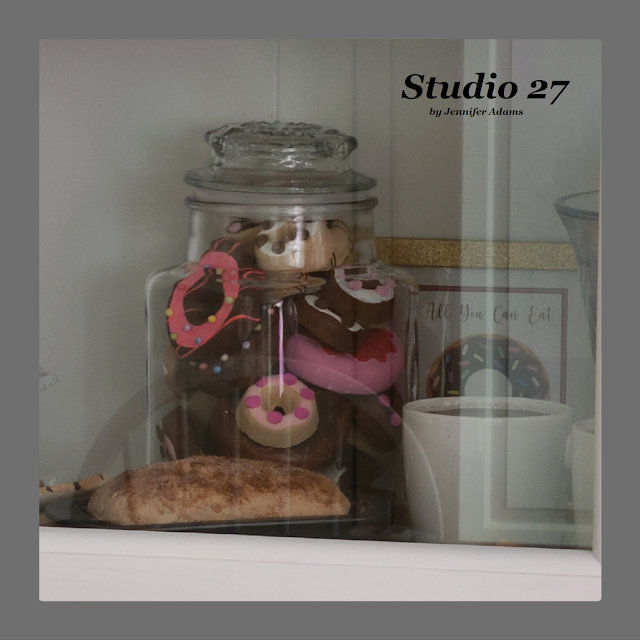
The doughnut drink was made in this way and I used this mold to make the tiny doughnuts on top out of clay.  The larger doughnut is a kids toy that I repurposed.

The blueberry bread is salt dough in a thrift store pan.  I poked the clay berries into the dough while it was still damp and was careful not to bake it as long as normally so as not to harm the clay.  I used some brown acrylic paint that I watered down to give a more baked look to the finished piece. You can find the blueberry mold here.

You can see how I made the cinnamon rolls in this tutorial

The avocado toast slices (way back) were Christmas tree ornaments that I picked up at Hobby Lobby and removed the hangers.  Here is a very similar option.

I used this silicone mold for the rectangular clay waffles.  The round waffles I made using clay inside of an old mini electric waffle cooker that I picked up at the thrift store.  It was an awful process where the clay was nearly impossible to get out of the cooker and every waffle had to be carefully reshaped.  I definitely recommend going with a silicone mold, here is one of similar size.  Both types of waffles I painted in acrylic paint.  The whipped cream is joint compound topped with these faux strawberries.  The pats of butter I made by using a silicone mold kit to copy the shape of toy butter pieces.  Once the mold was created I used clay and acrylic paint.  You can check out this post to read all about how I made my own silicone molds.


Food Decor

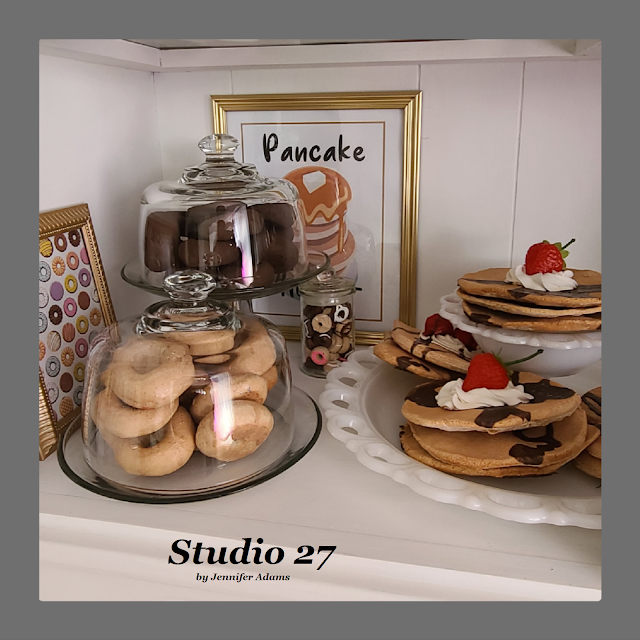
Using that miniature doughnut mold again, I made clay shapes that this time I painted in acrylic to look like Cheerios.  Once dry I put them into a thrift store glass bowl with candle wax to look like milk. Here is a post where I use candle wax in a similar way.

The jar of squishy doughnuts are Amazon purchases.  You can find the large ones here and the small ones  here.

The stacked doughnuts are dog toys from Dollar Tree!  The plain ones are just balanced on top of one another, but here is a post where I detail the whipped cream topped stacks.

The berry bread was made exactly the same as the blueberry bread in the previous picture, and I made the berries using the same mold set (just painted them in different colors).


Food Decor

You can click here to find the doughnut printable (99 cents in my Etsy shop).

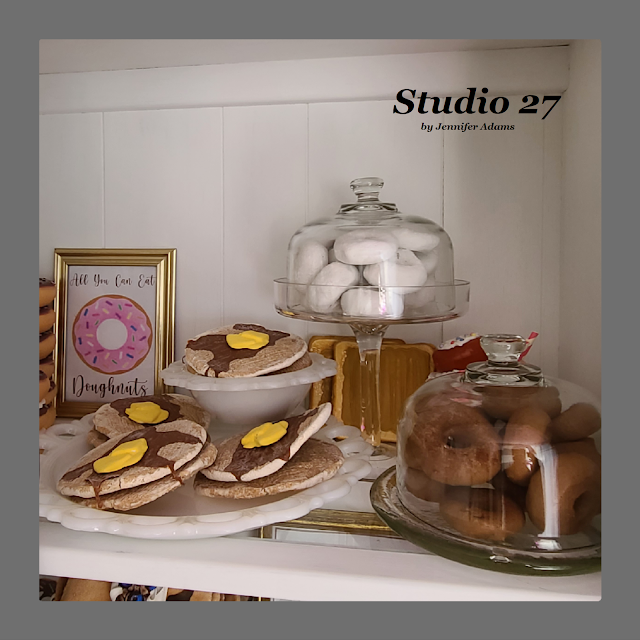
The pancakes are salt dough topped in acrylic paint for syrup and more of those butter pats that I made with my silicone mold.

The peanut butter toast is also from Hobby Lobby.  I found this Amazon link that has a set of peanut butter, jelly and Nutella toast.

I think the sprinkled thing in the back corner is another doughnut mug.  I've changed things around  and added a bunch since I took these photos, so I can't even check the cabinet to see what it was!

The doughnuts are salt dough.  Just make a round ball and gently pinch in at the center until you get a doughnut shape.  I painted them with acrylic once dry and used baby powder (for the powdered sugar) and real cinnamon to top them off.


**********


Bottom Shelf:

Food Decor

The doughnut print is scrapbook paper that I popped into a frame while the pancake house print can be found here.

The salt dough doughnuts were made the same way that I described previously, this time using a gloss paint for the chocolate icing and watered down acrylic for the plain.

The crepes are salt dough drizzled with acrylic paint and topped with spackle and more of those strawberries that I linked earlier.

The jar of miniature doughnuts are more that I made with that silicone mold and painted in acrylic.


Food Decor

The doughnuts in this jar are clay for the large and plaster for the small.  You can find the large silicone mold here and a similar small pan here.  Both sizes I decorated with acrylic paint, puffy paint and an assortment of faux sprinkles.

The salt dough bread here was topped with real cinnamon.

You can find the chocolate doughnut printable here.

The faux coffees I made using resin that I tinted with acrylic paint. Here is a tutorial where I did another resin drink project.


Food Decor

These berry crepes were made again with salt dough and topped in acrylic paint/ spackle.  The berries I made again using clay in this set of silicone molds.

The mini waffle sandwiches were made with clay in another of my homemade silicone molds, this one created by making a cast of a kids toy waffle.  I used lightweight spackle to sandwich the acrylic painted waffles together and added a bit more on the tops.  Those berries are from that same mold set again.

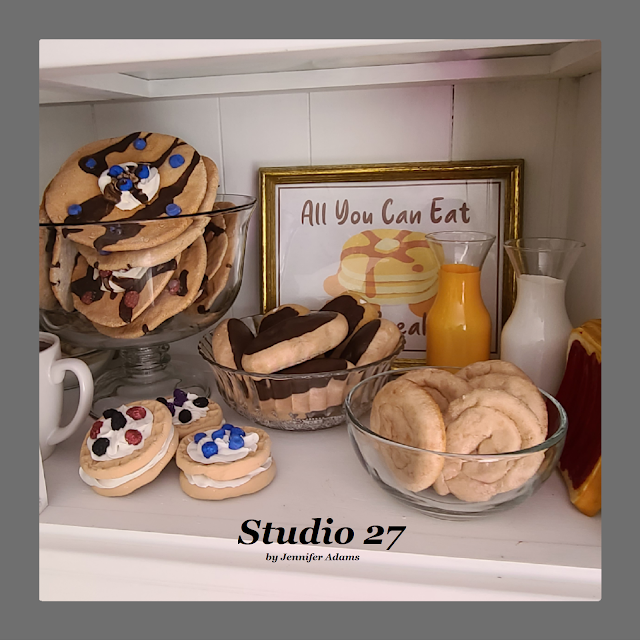
You can find the all you can eat breakfast printable  here in my Etsy shop.

The long john doughnuts are salt dough that I hand shaped and then painted the tops with glossy acrylic.

The honey buns are also salt dough, this time I made a long snake shape and coiled it up.  I used glossy Mod Podge to give the sugary sheen to the finished buns.

The orange juice and milk are more glass containers that I colored with acrylic paint and the jelly toast can be found in that link I posted a bit ago.