Tuesday, March 31, 2015

Baby Onesie Turned Easter Decor


 I love taking photographs, especially of my children.  Not only are pictures wonderful for recording memories (scrapbooking anyone?) but they make great home decor items as well.  I'm always on the lookout for photo inspiration as well as photo props.

Last year I got some adorable Easter photos of the Little Man and Baby Girl using eggs and jelly beans as props.  I like to do a few different 'shoots' for each holiday, and one of last year's shoots featured Little Man in a jelly bean print Onesie. The tiny Onesie was so cute, I just had to figure out a way to turn it into a keepsake!

Normally I would have cut the Onesie into a quilt patch and added it to one of my keepsake quilts, but I don't have a quilt for Spring/ Easter.  Most of the clothing purchased over the years for Easter has consisted of formal dresses for Baby Girl.  (Yes I still have each and every one of them, no way am I cutting them apart!)  Any other 'springy' clothing that I wanted to preserve went into Baby Girl's personal quilt, so I never ended up with enough material to need another holiday quilt.

You can click here to read about my Summer/ 4th of July quilt.
You can click here to read about my Halloween quilt.

So what to do?  I decided to cut out and frame a portion of the Onesie.  It was a super easy project and now I have another cute item for my Easter decor.

Check it out:


"Mommy's Little Jelly Bean" Onesie and 5X7 photo frame.


 After opening up the side seams of the Onesie, I used the 5X7 frame insert as a template for cutting the fabric. 


 I wasn't concerned with getting a perfect cutout in the beginning.  It's easier to first concentrate on removing the image from the garment.


 I flipped it over and cut off the excess fabric.  Then I used a little tape to hold everything in place. 

.....I was going to use glue, but the Little Man was having snack time and I could tell he was only going to give me about 5 minutes of free time.  Tape got the job done..... ;)


A cleaned up piece, ready to be framed.


Framed and ready to go!


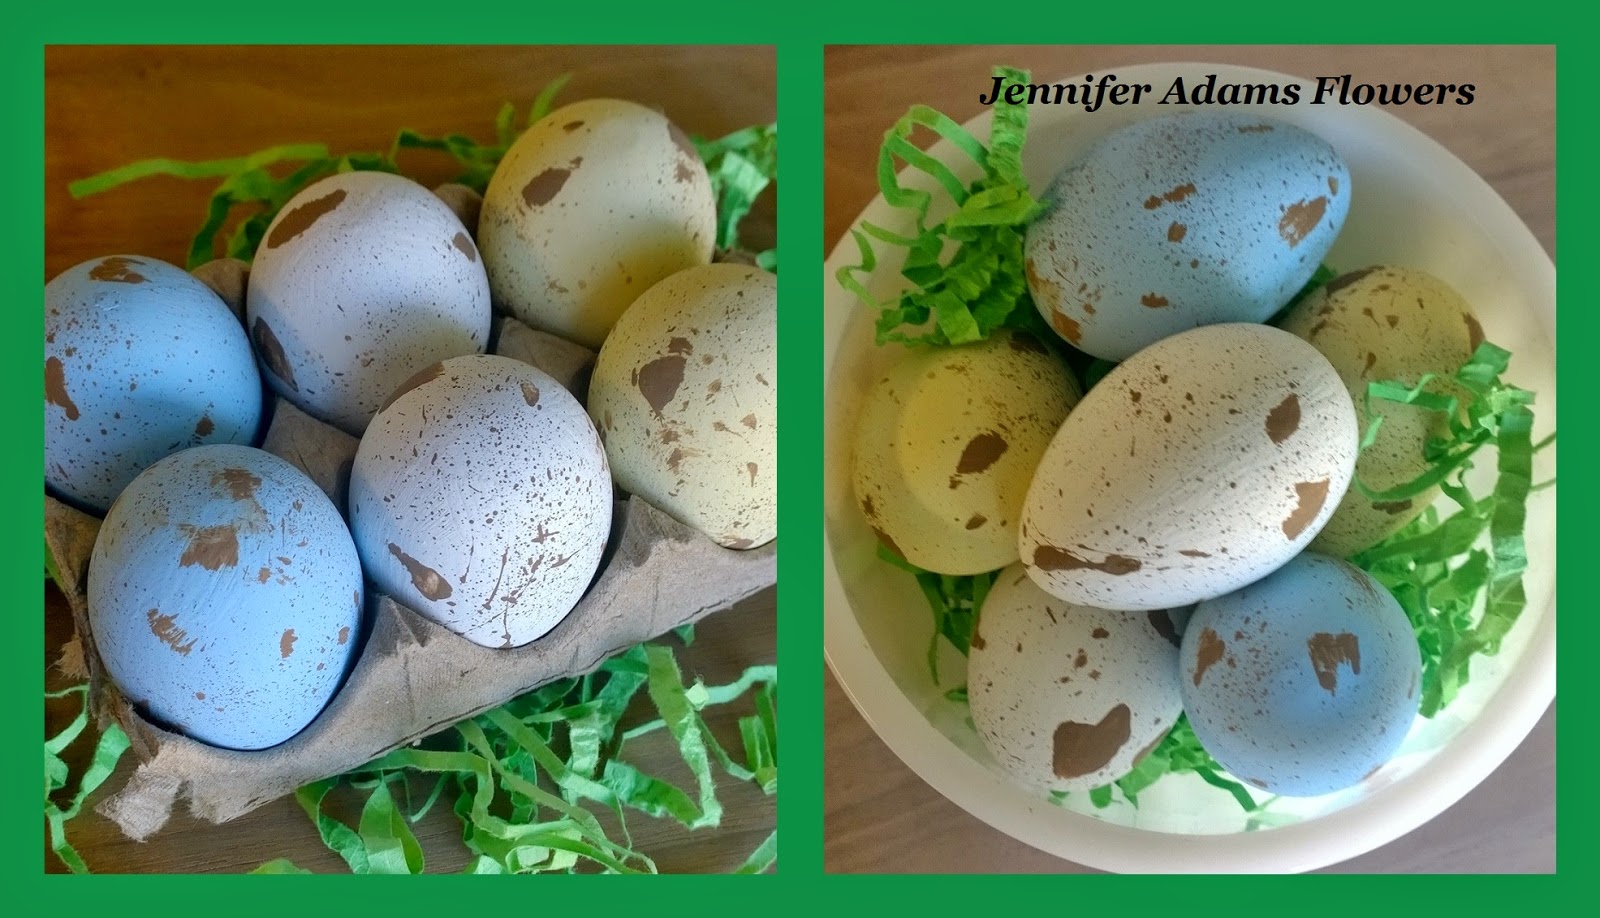
I tucked the frame into my Easter decor.  I thought the jelly bean print went well with these treat inspired eggs.

And there you have it, a fast and easy way to re-use your old baby clothes :)
I hope you enjoyed the post, thanks for stopping by!

-Jennifer

© Jennifer Adams Flowers 2015

Thursday, March 26, 2015

Floral Headbands (Spring 2015)

It's time to welcome spring with a wearable flowers!

I decided to pull a few flowers from my supply closet and make up some headbands check them out:


 Pictured here are five of the flowers I used for this project: hot pink peonies, orange zinnias, yellow cosmos, purple daisies and white zinnias.  

(I also used a simple blue fabric cut-out flower shape that you will see in a bit)


 Headbands

I chose these ready-made stretchy head bands as the base for my floral embellishment.  I wanted something soft and stretchy, these were perfect!


 Making the flowers 'workable'

As with most faux florals, these had hard plastic centers.  The hard bits of plastic make the flowers look bulky and unnatural, so off they went.
 
After removing the plastic centers of the flowers I used my sewing machine to stitch the layers together.  This held the floral layers together while I attached it to the headband.


 Attaching the head bands.

I used my sewing machine to quickly attach the fabric flower to the headband.  This was  a lot faster and stronger than stitching by hand.

After everything was stitched in place, I used glue to attach various beads to the flower centers.  Not only is the beading pretty, but it also covers the machine stitching.

***************

I had a lovely little model help me with take photos of the finished headbands, take a look:


Yellow Cosmos accented with yellow beading on a yellow satin band.
White Zinnia accented with clear beading on a green satin band.


Blue tropical flower accented with navy/black beading on blue satin band.
Orange Zinnia accented with orange beading on an orange satin band.


Purple daisy accented with pearl beading on purple satin band.
Pink Peony accented with pearl beading on pink satin band.

***************

Like what you see?
These headbands are available now in the Jennifer Adams Flowers Etsy shop.

Thanks for stopping by!

-Jennifer

© Jennifer Adams Flowers 2015

Tuesday, March 24, 2015

Painting Easter Eggs (2015)


Ok, so I have this thing with Easter eggs.  I don't know what it is, but I can't resist collecting them.  They are... Just. So. Pretty! 

I have plenty, way more than required for any reasonable egg hunt....but Easter rolls around...or I'm out treasure hunting....and I see a color or design that I don't already have...you see where this is going....:D

(Right now Dollar Tree has plastic eggs that look like baby chicks.....I have resisted)

So needless to say, I already have a ton of plastic eggs (two big bins full) and then I discovered ready-to-decorate foam eggs at Wal-Mart last year.  Ohhhhh snap!

So now I can have Baby Girl paint faux eggs for the same price as dying hard-boiled eggs and then I get to keep them forever???  Love it!  

(I still boil up a dozen real eggs for her too, it's just something you got to do)

Read on to see the eggs we have painted so far this year!


Materials

Foam eggs, brushes and lottttts of paint.  

I like using acrylic paints for these projects.  They are permanent, easy to work with, economically priced and readily available.

The paints on the left are, I mean were, mine and Baby Girl's are on the right.  You can see that her's were a little worse for wear.  She used up what was left and has now worked her way into my stash as well ;)


Toothpick Trick

So in my head I thought I was going to poke a toothpick into the end of each egg.  That way I could hold the toothpick while I painted and then stick it into some Styrofoam to dry without touching any wet paint.  Well, it turns out that the foam eggs are just too hard.  I didn't really want to have holes in them any way.  

I decided to paint one side at a time, but the darn eggs kept rolling over every time I set them down.  I figured out that if I set them down next to a toothpick they would be wedged in place.  See? I did need those toothpicks!  :D

Just be careful when letting go of the egg.  For some reason many of the eggs seemed to have a heavier side and I never knew which way they were going to roll!  After a few messy smudges (and a handful of curse words) I figured out how to hang on until the very last minute.  That way if I needed to I could move the toothpick.


My Eggs

You may have seen photos of these already from my Etsy shop post.

If not, you can view that post by clicking  here.


Baby Girl's Easter Eggs

(These are the same eggs as pictured at the top of this post)

  I love the colors that Baby Girl chose.  She also globed on lots of paint, so they ended up with a fun texture.  So pretty and so faux, and I get to keep them!  I made sure to take a Sharpie and add her name and the year at the bottom of each one also.

Those are our Easter eggs so far.  I'll be back with an Easter decor post soon.
Thanks for stopping by!

-Jennifer

© Jennifer Adams Flowers 2015

Thursday, March 19, 2015

Pretty in Pink Roses (17 Pc Package) 2015

I enjoyed making up these beautiful pink rose bouquets, check them out:


Pretty Pink Roses


Bridal Bouquet


Bridesmaid's Bouquets


Bridesmaid's Bouquets


Boutonnieres & Pin-On Corsages


'Toss' Bouquet


The 17 Piece Package

This 17 piece package can be found in my eBay.

Want to see what else is currently available?  Check out my eBay store here

Thanks for stopping by!
-Jennifer

© Jennifer Adams Flowers 2015


Tuesday, March 17, 2015

Spring Decor 2015

Much of my spring decor was featured in this post last year.
Today I am sharing a few items that you haven't seen yet:


Grape Hyacinth

I found this faux potted hyacinth a few years ago for $1 while treasure hunting.  What I love about it is the fact that not only is the plant a fake, but the water is too.  It's so realistic that Baby Girl had to touch it just to make sure!

You can find acrylic water kits at pretty much any craft store.  I have never used one myself, but the finished product feels like plastic.  I like the material because it looks like water, holds everything in place and weighs down the vase.


Evening Shot

I love how everything looks at night too.  The candle light is so pretty :)


Potted Silks

I have had these two potted plants for some time now, but they didn't make my spring decor post last year.  They were upset with me at being left out, so I made sure to get a picture this time :D

Tucked together next to one of my glass cake domes, they make a pretty spring statement.  The pink geranium I found treasure hunting for .50 and the bluebells I found on clearance for .75

The plastic pots are painted with textured paint, so they look like pottery.  I also like the painted on 'moss'.


Close-Up

I really appreciate how realistic these look!


Daffodil Vase

On my dining table I have a few fabric daffodil bunches in a cylinder vase.  I used a bit of Easter grass to fill in the bottom.  Currently, this milk glass bowl is empty, but I'll probably be filling it with eggs soon.


You can see a pair of Baby Girl's old rain boots on the window sill in the background.  They are the same as I pictured in last year's Easter  decor post, but this time I added a couple of faux forsythia blooms as well.

I am feeling excited because I have a pair of green rain boots for somebody this year!  Little Man has been walking for some time now and I can't wait to play in the warm spring rains together.  I'm also really pleased that next year I will have two pairs of boots for my spring window ;)

Speaking of the Little Man, I hear a baby voice singing from the crib so I need to go now.  Thanks for stopping by!

-Jennifer

© Jennifer Adams Flowers 2015

Saturday, March 14, 2015

Jennifer Adams Flowers: Now on Etsy!


I've been busy the past couple of days, painting Easter eggs and launching my Etsy shop.
These pretty little hand painted Easter eggs are available now, check it out!


 Polka-Dots


 Metallic Swirl


 Floral Print


Speckled & Splattered

You can visit the Jennifer Adams Etsy shop by clicking here
You can also find the Etsy link in the sidebar of this blog.

Enjoy your weekend, and thanks for stopping by!

-Jennifer

© Jennifer Adams Flowers 2015

Thursday, March 12, 2015

Spring Footprint Art (2015)

It's March 12th!
It's Spring! (As far as I'm concerned)  :D

I put all of my Valentine decor away and got out all of my Spring the first weekend of March.  There are still a few piles of melting snow outside, but that's ok.  Inside I have daffodils!

Right now I'm working on photos of a few spring decor items that didn't make it to the blog last year.  I'm also brainstorming some really cute Easter Egg designs.  But for now, I'll share with you my Spring print art.

I made these last year after seeing similar designs on Pinterest, check it out:


Baby Girl is Pretty in Pink

After sketching out the designs I wanted, I used green paint to create the foliage.  A bit of pink paint on Baby Girl's feet and there you have it; Spring blooms!

Side Note:  I took this photo before going back to erase the extra pencil markings.  I thought it would be helpful to see that the markings provide a general plan for the art piece, but the paint doesn't have to be exact.  Just go with the flow and clean up the excess later :)


Lavender for the Little Man

I followed the same technique for Little Man's prints.

Side Note:  It is rare that the prints look perfect on their own and often I go back in with a brush to fill in any empty spots.  This time I left the prints as is.  The half missing toes on the left remind me how my only 3 month old baby would not sit still for this project.  He thought he could stick those little feet into all the paint at once :)

(You can also see from this picture that the pencil marks erase quite nicely.)

I have both of these prints framed and displayed with the rest of my Spring decor.  I love walking through the house and seeing all of the pretty flowers.

I hope you enjoyed the post, thanks for stopping by!
If you have a minute, let me know how you are getting ready for warm weather and sunshine.


-Jennifer

© Jennifer Adams Flowers 2015

Tuesday, March 10, 2015

Winter Photography (2015)


March came in like a lion this year, with lots and lots of snow.  In honor of this last winter storm, I'm sharing some of my Aunt's personal winter photographs.

Did you hear me Mother Nature?  I said last...:D :D :D

My Aunt has a real talent for capturing nature's beauty, check it out:


 Frosty Berries


 Winter Pine


 Snowy Pine


 Icy View


 Birds in the Field


 Rural View


 Cardinal


 Preserved


 Frost


 Beyond the Fence


Early Morning

This one is my favorite.  If you look to the lower left, you can see the sun coming up.  I also like the way you can almost feel the stillness and cold of the morning.

Great work Auntie!

I hope you enjoyed these beautiful photos as much as I did, thanks for stopping by!

-Jennifer

© Jennifer Adams Flowers 2015