I have always loved miniature villages at Christmas time and this year I thought, why not have a tiny Halloween scene as well? Read on to see how I transformed a ceramic Christmas house into a spooky Halloween cottage:
**********
Disclosure - This post contains affiliate links. If a purchase is made through an affiliate link then (at no additional cost to you) I will receive a commision. Affiliate links are noted below.
Disclosure - This post contains affiliate links. If a purchase is made through an affiliate link then (at no additional cost to you) I will receive a commision. Affiliate links are noted below.
Supplies
Paints, brushes, palette trays and ice tea with lemon 😉
I know I've mentioned this before, but I always stock up on paint brushes at Dollar Tree. At only $1 for an entire package, these are great for projects where you don't want to mess up your good artist's brushes. Even better, they have an entire selection of canvas now too!
You can click this Dollar Tree (affiliate) link to browse their stock of art supplies.
My acrylic paints I like to pick up at Walmart as they are usually priced at only .50 per bottle.
Tiny Ceramic House
I found the house at a yard sale for .50 and thought it would lend itself beautifully to becoming a Halloween cottage instead. There are a few evergreen bushes and some piles of 'snow' on the roof, but no problem - a little paint in strategic places can camouflage almost anything 😁
Custom Colors
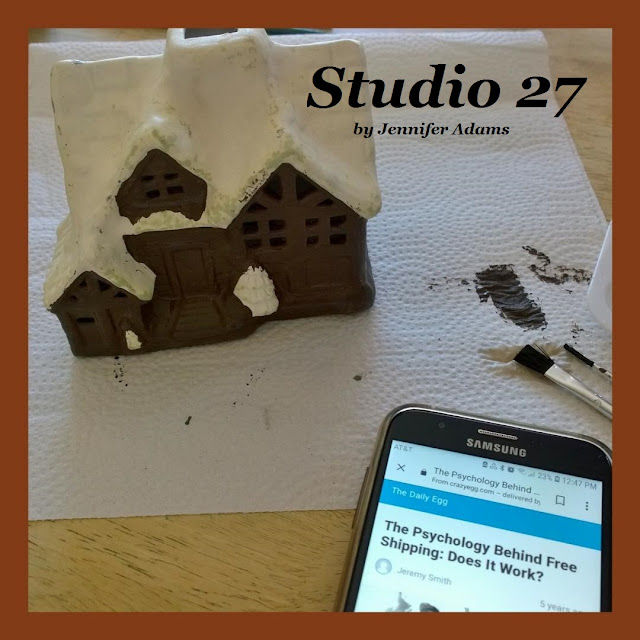
Wanting my house to be dark and shadowy, I mixed together Chocolate Sprinkle & Pewter Gray to paint the structure.
Study Time
What do you do while you wait for paint to dry? I'm always trying to learn more about running my business so today's article was- The Psychology Behind Free Shipping: Does it Work?
😁😁😁
Now moving on.....
Roof & Door
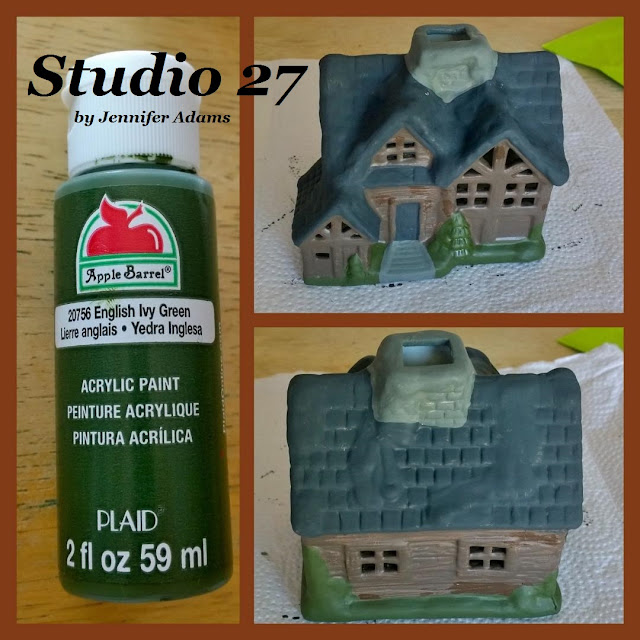
This time I combined Jet Black with the Pewter Gray to cover the roof and door. Don't worry about those mounds of snow just yet, go ahead and cover them as regular roof tiles.
Stonework & Greenery
I used more of the Pewter Gray for the chimney and front stairs, then chose English Ivy Green for the yard and landscaping. I say 'yard' because that's how I painted the house to be, but it was intended to be snow. Speaking of that snow, when looking at the back of the house in the bottom photo you can really see those drifts on the roof.
I have a solution.....
Green it up!
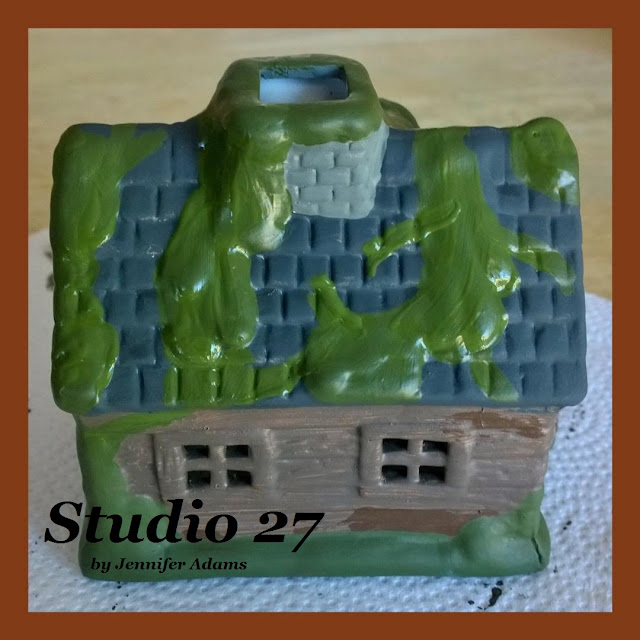
Using more of the English Ivy Green, I first painted the snowdrifts. then I went back and added bits of green here and there to look like vines. My goal was for the cottage to look as though it was nestled in the woods somewhere.
Fall Foliage
Harvest Orange, Jack-O-Lantern and Sunny Day were the shades of orange and yellow that I chose to use for the seasonal foliage.
Layers of Leaves
Starting from the top photo and working down, you can see that I first applied the Harvest Orange before layering on Jack-O-Lantern and then the Sunny Day. By using a dry brush and sort of stamping the paint in place, I was able to create a less defined look to the leaves.
Pumpkin
A circle of Jack-O-Lantern near the front door serves as the homeowner's pumpkin.
A circle of Jack-O-Lantern near the front door serves as the homeowner's pumpkin.
Details
Lastly, using a Sharpie, I added detail to the fully dried paint. A face for the Jack-O-Lantern, a doorknob, lines for the masonry and vining were the finishing touches.
Add a Candle
While you can certainly use an actual tealight, I prefer the battery candles whenever my kids are around. These can be found at Dollar Tree as well 😎
Get Glowing
And there you have it, here is my little woodland cottage at night, all glowy and ready for trick-or-treaters 😉
**********
I hope you enjoyed this how-to post, thanks for stopping by!
Inspire Me Tuesday
Tuesday's With a Twist
And there you have it, here is my little woodland cottage at night, all glowy and ready for trick-or-treaters 😉
**********
I hope you enjoyed this how-to post, thanks for stopping by!
-Jennifer
© Studio 27 by Jennifer Adams 2019
**********
This post was added to the following weekly link parties:
Silver Penny Sundays
**********
This post was added to the following weekly link parties:
Silver Penny Sundays
Tuesday's With a Twist
Wonderful Wednesday (Oh My Heartsie Girl)
Wonderful Wednesday (Penny's Passion)
Your Whims Wednesday
Creative Inspirations
Friday Favorites
Wonderful Wednesday (Penny's Passion)
Your Whims Wednesday
Creative Inspirations
Friday Favorites


No comments:
Post a Comment