Wanting to make some faux fruit trees for my garden shed, I added artificial apples to a fake Ficus. I then made a couple more trees using carboard tubing and greenery, check it out:
**********
Disclosure - This post may contain affiliate links. If a purchase is made through an affiliate link then (at no additional cost to you) I will receive a commission. You can read more about affiliate links here
**********
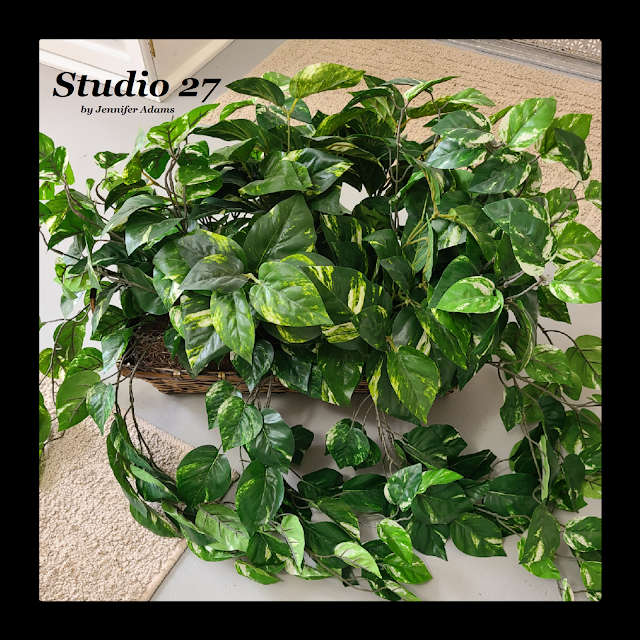
This project started when I found these fake plants at the thrift store. There were two of the round pots and two or three of the long, rectangular baskets. I want to say they were around eight dollars each, but I can't remember!
I wanted trees in the round pots, but didn't like the greens that they came with. I went ahead and bought the rounds anyway because the cost of buying empty baskets and filling them with my own spray foam would have been more than just buying these and re-working them. I loved the greens in the rectangular baskets, so I knew I could use those instead.
*And the foam in the rectangular baskets looked just like loaves of bread! I cleaned and painted them to add to my fake bakes - tutorial post to come!
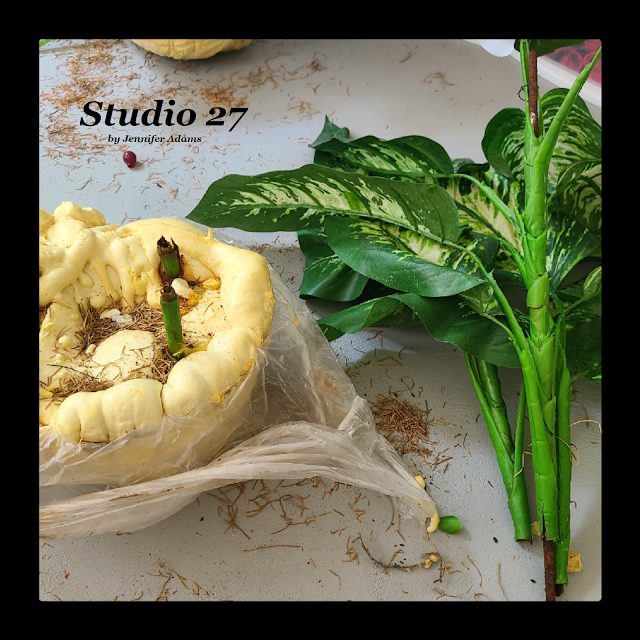
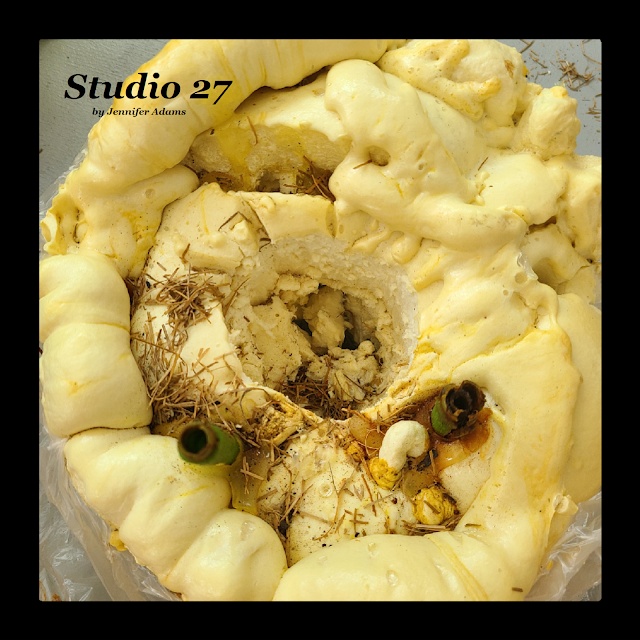
After removing the moss I pulled the foam rounds from the pots and then pulled/ cut out the stalks of greenery. It can take work because the stems are set into the foam securely so by taking them out of the baskets first you prevent damage to the wicker.
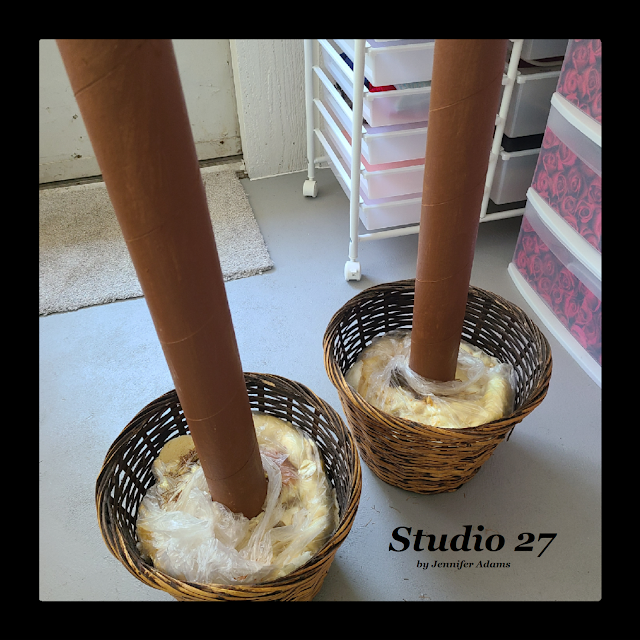
Using a strong cardboard tube (it was in a rug I had delivered) I marked where I wanted to insert it and hollowed out a circle.
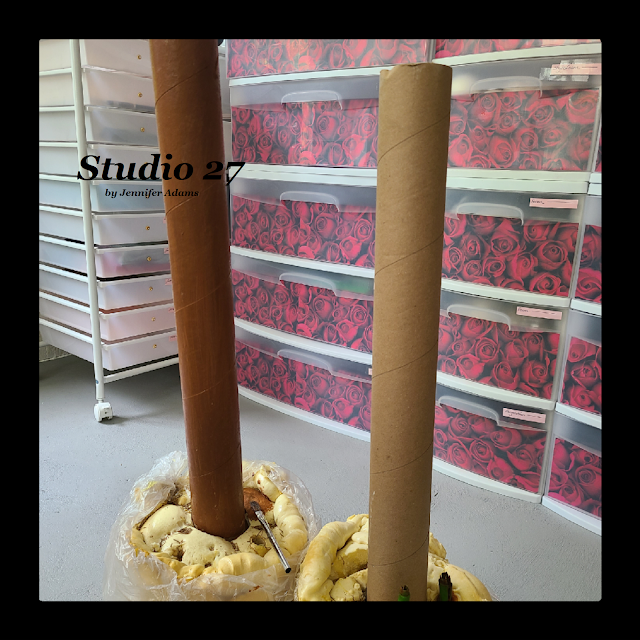
Note: The tube is going to be the tree trunk and needs to support the weight of the greenery and fruit without tipping over. Make sure the tube is inserted as deeply as possible, glued well in place and that your pot will be heavy enough. These foam inserts already had some sort of wight in the bottom so I didn't need to worry about it, but you could always use rocks if you needed to.
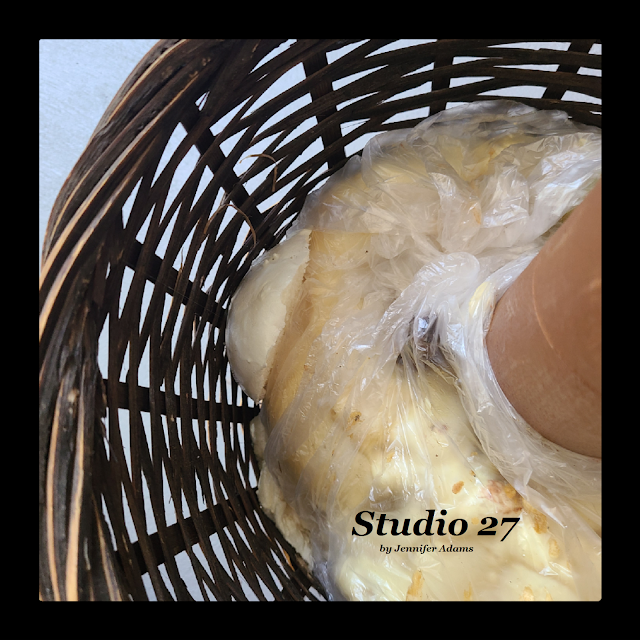
I painted my tubes brown, glued them in place and then put the foam rounds back into the baskets. They came with the plastic bag already there so I put it back. It helped to stuff the foam in tightly and keep it from shifting within the basket.
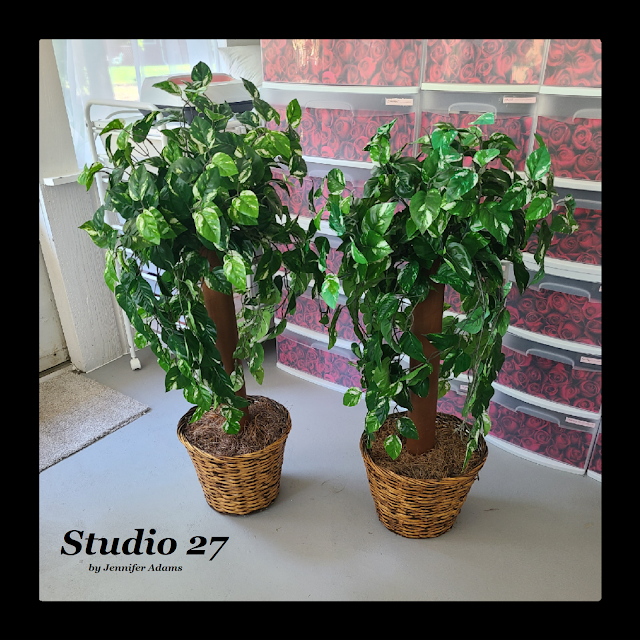
After that I replaced the moss. Mine is just tucked in, but you could glue it into place if you wanted.
Also, I wanted to point out that my tubes are different heights. This was intentional because I wanted variation, but it's totally up to you.
Here are the piles of greenery that I pulled from the rectangular baskets. They hadn't been cut apart from their bushes and still had thick stems.
The thick stems meant I could group three together and just pop them right into the open end of the tubes. Another option would be to glue some foam into the tops and then insert the stems into the foam. As it was I did add bits of foam here and there to tighten things up, and of course glued everything in place.
*As I mentioned in the intro, there is one more tree that you will see later on - a faux Ficus. I liked how the branches and greens looked as they were, so I left it as it was and just added the fruit.
I already had a supply of fake apples, oranges, lemons and limes in my craft storage that were collected from various thrifting trips.
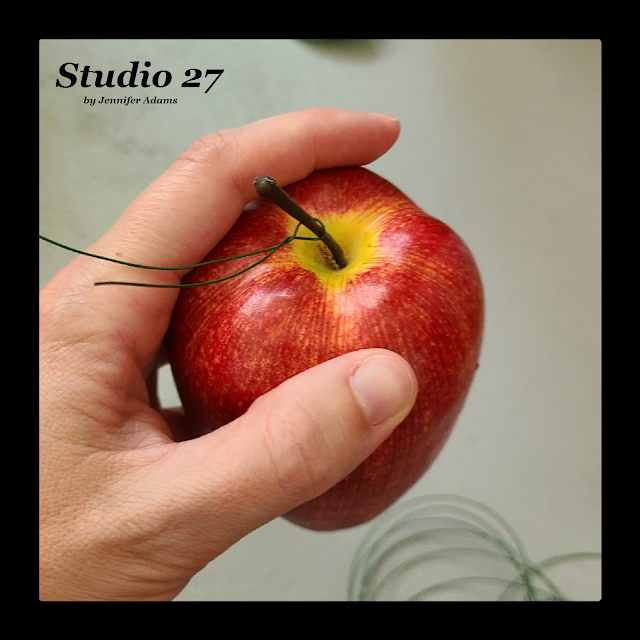
Using floral wire, I wrapped it around the fruit stems until it was tight and glued it in place. I then used the two pieces sticking out to wire the fruits on to the trees.
Like this:
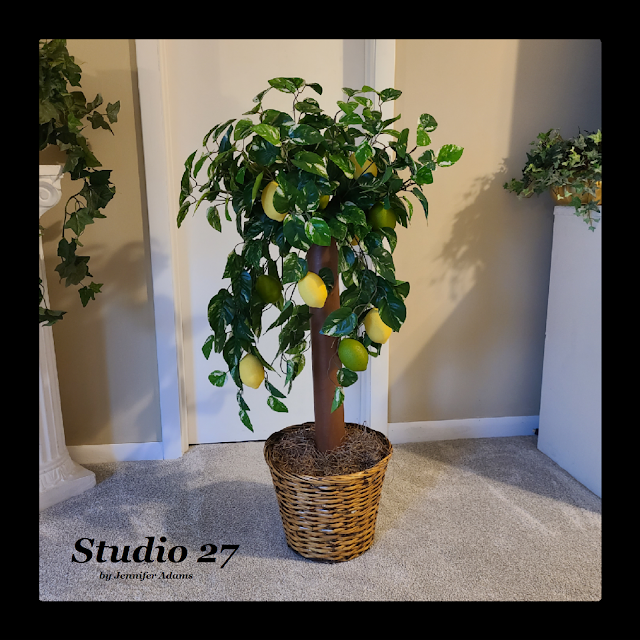
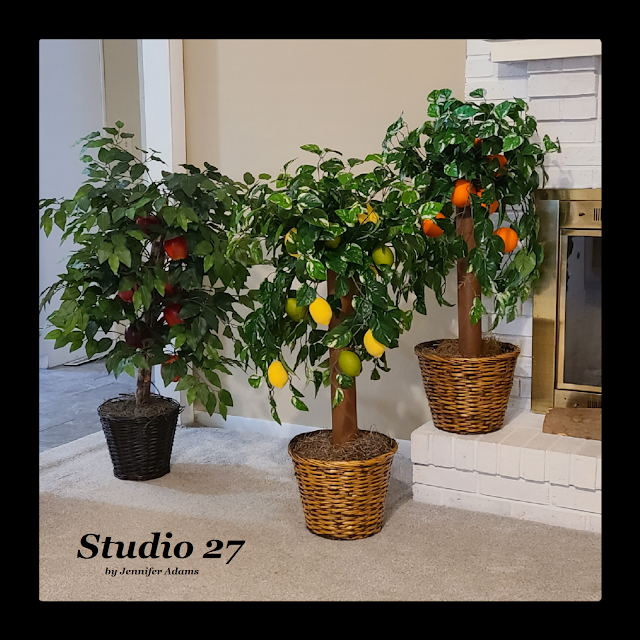
Lemon/Lime
I decided to combine my lemons and limes because I wanted to keep my display down to three trees total. My garden shed is a bit small and I needed all of the trees to fit - I'll give a tour of the shed in the future!
Orange
Apple
And there you have it, faux fruit trees ready to decorate your patio, sunroom or garden shed.
**********
I hope you enjoyed this how-to post, thanks for stopping by!
-Jennifer
© Studio 27 by Jennifer Adams 2023
**********
This post was added to the following link parties:
**********
Do you like the convenience of crafting with instantly available digital downloads?
Check out this week's features from my Etsy shop:
**********










I would have never guessed that these are faux! :) So creative! Thanks for sharing this post at the Will Blog for Comments #12 linkup. Come join us again next week, too.
ReplyDeleteThanks for hosting!
DeleteThis is SO clever, what a great idea. Thank you for sharing with us at Handmade Monday :-)
ReplyDeleteThanks so much!
Delete